Showing posts with label Copic. Show all posts

Monday, April 20, 2026

Pink and Main April Release - Cozy Shelf


A warm welcome to my blog where I'm sharing a new card for Pink & Main today as we continue to promote their new release which went live on the 17th and which you should definitely check out because it is just so lovely with it's books/reading and bows theme.

My card today uses their new Cozy Shelf stamp set and the coordinating die.


Initially I was going to stamp the bookshelf image but I changed my mind and I simply die cut white cardstock with the bookshelf die.  I backed the outer frame and shelves with foam tape and I used a little Lost Shadow Distress Oxide Ink on the three pieces that form the back of the unit.  

I chose some Lawn Fawn patterned paper for wallpaper and trimmed it to A2 and glued it to my card base, I framed the background using an old MFT frame die from my stash and applied that with foam tape and then I adhered the bookshelf and glued the three ink blended pieces directly through each opening.


I stamped all of the images from Cozy Shelf with black Memento Ink and coloured with combinations of the following Copic markers:-

Girl's Skin - E04, E11, E00
Blush - R22, R21, R20, R00
Hair - E44, E50, E40
Teal - BG49, BG15, G00, BG000
Pink - R22, R21, R20, R00
Beige - E31, E40
White - C3, C1, C0
Leaves - YG41, G20
Cat - C5, C3, C1, C0

Each image was die cut and glued directly on the shelves and the girl and cat images applied with foam tape.

Last but not least a sentiment was chosen from Cozy Shelf, stamped on a sentiment strip and applied also popped up on foam tape.  No embellishments required on this project and so with that it was done!

Thanks for spending some time with me today, it is appreciated!


Saturday, January 29, 2022

Hello Bluebird Stamps - Bloom and Grow

My latest card for Hello Bluebird Stamps was a pleasure to pull together.


Items used in this project:-

- In The Meadow Background Stamp
- Oval Nesting Dies
- Gallery Frame #4 Die
- Bloom and Grow stamp set and coordinating dies


Lilac background was stamped and heat embossed in white then die cut using the Oval Nesting die.   A background was ink blended and then the lilac panel layered over it with foam tape.   The white frame was applied directly with glue.


Images from Bloom & Grow were stamped, coloured with Copic markers and then die cut using the coordinating dies.   Each element was arranged and applied with foam tape and for a finishing touch I used gel pens to draw in some tufts of grass and white dots for daisies.

I appreciate you stopping by today, see you again soon.


Thursday, January 27, 2022

My Favorite Things - Color Challenge #182

Hello friends!   Do you feel like playing along with the newest My Favorite Things Color Challenge?  This is CC182.


My simple inspiration card was made by masking a cardstock panel and ink blending with MFT's Summer Splash ink then removing the mask.  I dotted in some interest and stamped the sentiment to a sentiment strip created using Skinny Strips Die-namics.


The images from the Being With You stamp set were stamped and coloured with Copic markers then die cut using the coordinating die-namics.   Here are my Copic colours:-


Pinks - RV23, R22, R20, R21, R00, R000
Greens - YG06, YG03, YG01
Greys - W2,  W1, W0, W00


Images were applied with dimensional foam tape and the same for the sentiment strip.


Thank you for coming by today and good luck with your entry to the challenge.   Don't forget to visit the MFT You Tube Channel for endless inspiration and tutorials!


Sunday, January 23, 2022

Hello Bluebird Stamps - Bouquet Buddies

Hello friends, I just wanted to briefly share a short blogpost that includes more images of this, my latest card for Hello Bluebird Stamps.


Hello Bluebird Stamps products used in this project:-

- Bouquet Buddies Stamp set and coordinating dies
- Thankful For You Word Die
- Woven Background Stamp


Background was stamped in pale pink ink for a barely there appearance.   The bouquet was stamped with Premium Dye Inks by The Stamp Market.   The puppy was stamped and coloured with Copic markers:-

W2, W1, W00, E42, E51, R00, R20

Sentiment was die cut several times and pieces were glued together and then to the scene.   All other elements applied with dimensional foam tape.   A few Nuvo drops completed the scene.


I appreciate you stopping by today, see you again soon!


Saturday, January 15, 2022

Hello Bluebird Stamps - Meadow Bunnies

Just popping in to let you know that you can find me over on the Hello Bluebird Stamps blog today with this card featuring the delightful Meadow Bunnies stamp set.   Full details for how it was made including Copic colours used can be found in the post.


Thanks for stopping by!


Wednesday, January 12, 2022

My Favorite Things - WSC576

Welcome to a new Wednesday Sketch Challenge at My Favorite Things.   This is WSC576 and here is my inspiration card and the sketch you are working with this week.


To create my card I first used the Rolling Clouds Stencil and I ink blended the background panel.   I then used the new Beehive and Hanging Branch Die-namics and I coloured the die cuts they created with Copic markers. 

Next, I stamped the bees from Honey Bees and these were also Copic coloured and die cut using the coordinating Die-namics.   Here are my colours used:-

Beehives - E33, E38, Y17, Y15, Y13, Y02, E79, E77
Branch - E79, E77, E74, E71, YG07, YG06, YG03
Bees - E33, E38, Y17, Y15, Y13, Y02, BG49, G00, BG11, R20

Points were highlighted with a white gel pen.


I trimmed up parts of the hives to work with the sketch, glued the dark insides of the hive directly and the main body of the hives were applied with foam tape.

The sentiment was stamped and heat embossed on the trunk and this was also applied with foam tape.

Last but not least the bees were arranged and applied.   For the finishing touch I applied a few clear sequins and I glittered the bee's wings.


Such an easy sketch to work with this week, I really hope that you have the time to enter the challenge. Thanks for stopping by my blog today and don't forget what a great resource the MFT You Tube Channel is for how-to videos and endless inspiration.


Tuesday, January 11, 2022

My Favorite Things - Release Day!!

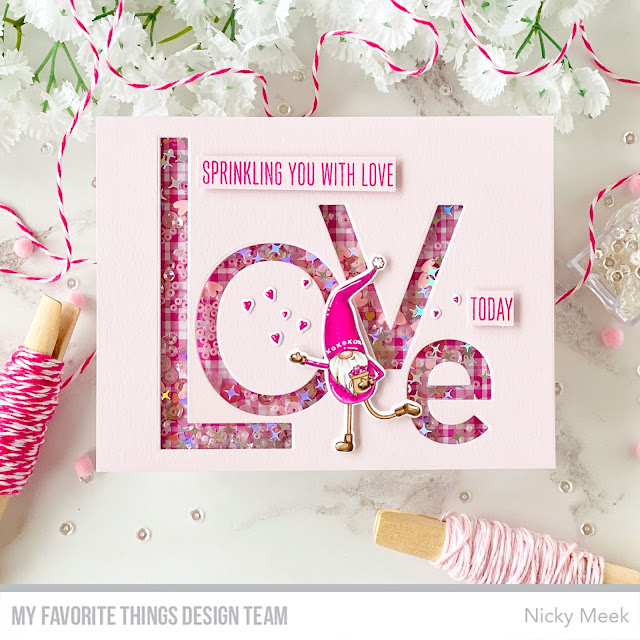
The countdown is over and My Favorite Thing's January release is now available for purchase.   Perhaps you are planning on buying some of the items used in my card today?  I've made a shaker card using the Giant Love Die-namics together with the Love You Gnome Matter What stamp set which has coordinating die-namics of course!

Also used in this project is patterned paper from the Sweet Plaid 6 x 6 Paper Pad and Princess Pink cardstock.


The Giant Love die was used to create the background from Princess Pink cardstock and this was backed with acetate to form a shaker window, on the reverse I applied foam tape around the edges, sprinkled in my shaker contents then sealed the back using the Sweet Plaid paper and the whole shaker unit was glued to the card base.

I stamped the images I was using from Love You Gnome Matter What and coloured with Copic markers.

Gnome - V06, RV17, RV04
Nose - E04, E11, E21
Beard - W3, W1
Legs, Boots, Gloves - E44, E43, E42

I embellished with a white gel pen then die cut and applied with foam tape.   The sentiments were stamped with Poppin' Pink ink and applied with foam tape and with that, this fun little shaker card was complete.


Happy shopping and thanks for stopping by today, as always you can find more ideas and inspiration on the My Favorite Things You Tube Channel!


Monday, January 10, 2022

My Favorite Things January Release - Countdown Day 1

Hello and welcome to Countdown Day 1 for MFT's January release going live at 10am EST TOMORROW!!!

I've got a slimline card for you today that features the new I'm So In Love With You, Still stamp set which comes with coordinating die-namics.   Also used in this card the new Love Ya stamp.   My background was created using Slimline Drafts & Hills Stencil and Slimline Cloud Edges Stencil.   My frame was created from Chantilly Cream cardstock using the Slimline Double Stitched Rectangle Die-namics.


I created my background using the stencils and softly ink blending  the ground and sky.   I framed out the background with the frame I created using Chantilly Cream cardstock applied with foam tape then popped this panel in my Misti where I stamped the Love Ya sentiment using Wild Cherry ink by MFT.   I then moved my panel 1/8 inch within the Misti and did a second generation stamping without re-inking in order to create the shade effect you see.  I stamped the tufts of grass from the stamp set.

I stamped the two images from I'm So In Love With You, Still stamp set and coloured them with Copic markers:-

Fur - E44, E43, E42, E0000
Cheeks - R00, R20, R21
Straw Hat - E51, W3, W2, W1
Reds - R59, R39, R29, R27
Shading - W2, W1

The images were die cut and applied with foam tape with the little heart stamped between them.


Pop on over the MFT Blog today to see more inspiration and new products and don't forget to leave a comment for a chance to win a gift voucher!   Thanks for stopping by today and as always you can find more ideas and inspiration on the My Favorite Things You Tube Channel!


Saturday, January 8, 2022

My Favorite Things January Release - Countdown Day 3

Welcome to Countdown Day 3 to the January 11th new release from My Favorite Things!   My card today features the new Tiddly Inks illustrated stamp set called Sweet Honey Bee which has coordinating die-namics.   Also used in this project - Micro Cloud Edges Stencil and Grassy Edges Stencil


To create this card I first did some super soft stencil ink blending using the two stencils mentioned above.  I then stamped the sentiment to the grass area.

I stamped the adorable little girl in her bee costume and the other images and used Copic markers to colour them:-

Girl Skin - E04, E11, E21, E00, R00, R20, R21
Hair - E51, E43, E44
Costume - B000, W5, W4, W3, W2, E51, YR20, E000
Flowers -  RV06, RV04

Images were die cut, backed with foam tape, arranged and adhered.  A few clear sequins were the finishing touch!


Take a moment to visit the MFT Blog today for more inspiration.   Be sure to leave a comment to be entered to win a gift voucher!   Thanks for stopping by today and as always you can find more ideas and inspiration on the My Favorite Things You Tube Channel!


Friday, January 7, 2022

My Favorite Things January Release - Countdown Day 4


Hello and welcome to My Favorite Thing's January release Countdown Day 4 preview!


My card today features the new and very fun Castle Drawbridge Die-namics together with the new Knight In Shining Armor stamp set which of course has coordinating die-namics and this project also uses the essential-to-own Mini Cloud Edges Stencil.


For my design I first used the stencil to create the sky background which I then adhered to my card base.

I then die cut white cardstock using the Castle Drawbridge die-namics and I used Copic markers to colour the stonework.  I used pewter coloured cardstock to create the chains and other metalwork and adhered these into position.   The castle was backed with foam tape and applied to the background I'd created earlier and I placed a piece of kraft cardstock behind the door which you'll see lower down this post.


I stamped the images from the stamp set and coloured them with Copic markers and then die cut, backed them with foam tape.   I made a little tab for the knight behind the drawbridge door so that he stands up when the drawbridge is lowered.  Here are my Copic colours:-

Castle - E44, E43, E42, 40
Knights - E04, E11, E21, E00, T1, T2, T3, T4, Y17, Y38, V06, V05, RV63
Dragon -YG0000, YG00, YG03, YG13

Finally, the sentiment was stamped and applied with more foam tape.


Please visit the MFT Blog today for more inspiration and don't forget to leave a comment for a chance to win a gift voucher.   Thanks for stopping by today and as always you can find more ideas and inspiration on the My Favorite Things You Tube Channel!


Thursday, January 6, 2022

My Favorite Things January Release - Countdown Day 5

Hello and welcome to Countdown Day 5 to My Favorite Thing's January 11th release!
My card today is previewing the brand new and adorable Stacey Yacula illustrated You Are My Happy Place stamp set and in the background you can see the new Never-Ending Love Background Stamp.


A panel of Princess Pink cardstock was stamped and heat embossed in white with the new background stamp.   The panel was trimmed down and adhered to a kraft cardstock panel which in turn was adhered to a white panel which was all mounted on my card base.


I used the A2 Rectangles Frames die-namics to create a white frame which was backed with foam tape and applied.

 I chose the adorable sloth image from the stamp set, stamping it and colouring with Copic markers:-

E44, E43, E42, E40 and E0000, Cheeks R00, R20, R21

Images were die cut using the coordinating die-namics and applied to the scene with foam tape and as you can see I added more of the leave branches, tucking them here and there to balance the scene.

Finally I stamped the sentiment and heat embossed in white and a few sequins accent the finished card.


Visit the MFT Blog today to see more inspiration and be sure to leave a comment for a chance to win a gift voucher.   

Thanks for stopping by today and as always you can find more ideas and inspiration on the My Favorite Things You Tube Channel!


Sunday, November 28, 2021

Christmas Sled - Rachelle Anne Miller

A new card today for Rachelle Anne Miller Digital Stamps featuring one of my favourite images called Christmas Sled.


To kick this one off I first used a pale grey ink and I stamped a pretty tree image from my stash by Lesia Zgharda and available from Simon Says Stamp.  I stamped the subtle background and then used Speckled Egg Distress Oxide Ink to softly ink blend the panel creating a subtle focal point.

This panel was die cut using a deckle edge die set by Honey Bee Stamps.  The panel was backed with white craft foam and applied to an A2 card base.


I printed off the digital stamp using Copic friendly cardstock and my home printer.  I coloured the images using Copic markers, here is my colour palette:-

Skin -  E11, E21, E000
Reds - R39, R29, R24, R22, W4, W3
Greys - W7, W5, W4, W2, W1
Minty Greens - BG0000, G000, G00, W2
Bunny - T2, T1, T0

I then carefully fussy cut each component carefully and this allowed me to rearrange the elements slightly.  They were backed with foam tape and applied to the scene. 

Next, I used white acrylic paint and a stylus to dot in snow including over the characters so that it looked authentic.


Finally, I die cut the word 'noel' 5 times from white cardstock using a Hello Bluebird die.  I adhered each die cut to the next forming a nice dimensional stack which I then glued to the scene.  Underneath it I adding the season's greetings smaller sentiment using red ink to pick up the red from the characters.

A few sparkling clear sequins completed the card.

Happy crafting!


Sunday, November 21, 2021

Christmas Sled - Rachelle Anne Miller Creative Studios

 I have a new Christmas card to share with you all today.  I've used the 'Christmas Sled' digital stamp by Rachelle Anne Miller Creative Studios - please read on for all the how-to details.


For this card I first created a slimline panel 8.5 x 3.5 inches after printing the digital image on the cardstock.   I offset the cut so that I could fit in the oversized sentiment.   I then used Copic markers in E0000, E000 and E00 together with W0, W1 and W2 to create the snow-blown background..


I used the following Copic markers to colour the featured image.  Y26, YR23, YR24, YR27 and E37 together with W3, W4, W5 and W7.   Skin tones are E000, E21, E11 and E04.  Cheeks are R00, R20 and R21 and I highlighted a few points with a white gel pen.

I framed out the scene using Hello Bluebird Stamp's 'Gallery Frame #5 die, apply this die cut with foam tape behind for some nice dimension.  I also used Hello Bluebird's 'Oh What Fun' word die for the oversized sentiment.  I die cut the sentiment three times from white cardstock and once with glittering gold cardstock.  I adhered each layer together finishing with the gold on top which I ever so slightly offset to the right for a little bit of a shadow effect.  The sentiments were then glued to the scene.


Finally I used a stylus and Dr. Ph Martin's Bleed Proof White paint and dotted in the snowfall making sure that I nicked some lines so that it looks more realistic.   I used some star sequins from my stash that toned nicely but didn't compete with the background as final accents.

Hope you enjoyed the card and that you can carve out some happy crafting time soon!

Saturday, October 30, 2021

Pumpkin Patch - Rachelle Anne Miller

A new day and a new Fall themed card for Rachelle Anne Miller Digital Stamps.   This super cute digital download stamp is called Pumpkin Patch and you can make it instantly yours with a quick purchase.  The stamp image will arrive just a minute or two later in an email!


I used my home printer to print off the Pumpkin Patch image on to Copic friendly cardstock and having reduced the size by 10% and printing at 90% of original size.

I coloured the image using Copic markers.  Here is my colour palette:-

Skin - E04, E11, E21, E000
Hair, E44, E50, E51
Dress - BG72, BG75
Boots - E71, E74, E77
Pumpkins - YR21, YR38, YR14, YR09, W3, W4
Wagon - E44, E43, E42, E40
Grass - YG91, YG93, YG95, YG97
Squirrel - E000, E34, W5, W3
Blushing Cheeks - R00, R20, R21

Points were highlighted with a white gel pen.


I used a die in my stash to die cut the panel to a size just shy of A2 and that gives it the faux stitched edge.  I backed this panel with white craft foam and applied it to a panel of milk chocolate micro gingham cardstock which I was gifted by a friend.  This panel in turn was applied to a sturdy white cardstock card base.  The card is simple yet feels very substantial for having this layering.


Finally just a simple embellished finish using little wooden stars which I glued down.

Happy crafting!


Thursday, October 14, 2021

Rachelle Anne Miller Stamps - Little Elf

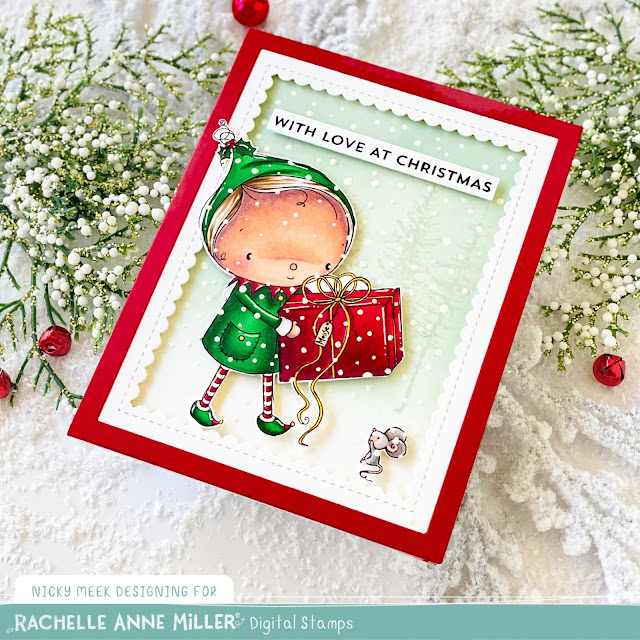
Hello!   I've got a new card for Rachelle Anne Miller Art today featuring a sneak peek of a new digital stamp from Rachelle's forthcoming release.   This is 'Little Elf'.


Creating my card was easy.  I received the digital stamp to my email and I downloaded it to my computer and sent it to print on my home printer after inserting a sheet of Copic friendly cardstock.  I coloured the image with Copic markers - here's my colour palette:-

Skin - E04, E11, E21, E00
Cheeks - R00, R20, R21
Yellow - Y15
Greens - G29, G28, G19, G09, G05
Reds - R39, R29, R27


I fussy cut the image and applied it with foam tape to a panel that I'd stamped using a fir tree stamp from my stash and ink blended with Speckled Egg Distress Ink.   This panel was framed out with white and red frame die cuts for a nice layered look.  Once the frames were applied to the background with foam tape I was able to adhere the Little Elf and tiny mouse.


I used white acrylic paint and a stylus to dot on the snow, ensuring to work from top to bottom and so that it looks authentic I recommend 'nicking' the lines of the illustration with your dots of snow.

The sentiment was stamped and applied and the card was complete!

Thank you coming by today!


Monday, September 27, 2021

Halloween Dress Up - Rachelle Anne Miller Creative Studios

I have a new card for Rachelle Anne Miller Creative Studios today using the 'Halloween Dress Up' digital stamp image.    I downloaded the digital image and sent it to my home printer after reducing the image from 100% down to 90%.  I printed it twice at that size, first copy on to Copic friendly cardstock, second copy on to a sheet of masking paper. 


I trimmed the Copic cardstock printed panel down to an A2 panel and Copic coloured the image using the following colour palette:-

Skin - E04, E11, E21, E00
Cheeks - R00, R20
Costume (left) - E43, E44, R000
Costume (centre) - YR31, Y17, Y38, YR14
Costume (right) - V01, V12, V15, V04, YG95, YG93, YG91

Points were highlighted with a white gel pen.


I fussy cut the masking paper print out and layered it over the primary image and then ink blended using Distress Oxide Ink and then splattered water and coloured paints to soften up the look and add interest.   I carefully removed the mask.


To finish up the card I first applied the panel to a card base.  Next, I die cut the Gallery Frame #4 die by Hello Bluebird Stamps from white cardstock and backed that with foam tape and applied it.    I stamped the sentiment with Versamark Ink on to black cardstock and heat embossed in white.  Last but not least a few sparkling clear sequins add a little fun.

Happy crafting!


Thursday, September 23, 2021

My Favorite Things - Color Challenge 174

Are you up for the challenge?  I hope you consider joining in CC174 the latest Color Challenge by My Favorite Things.  Here's my inspiration card and below it the colour palette you'll be working with for a chance to win a gift voucher.


To create my card I first ink blended a panel using Sno-Cone Ink for a very soft finish.   Over this I layered another panel that I had die cut an opening in using the Watercolor Wash Freeform Die-namics - I used foam tape to elevate it.


I stamped the sweet girl from Bright Holidays illustrated by Pure Innocence and coloured her with Copic markers using the colour palette as my guide.  Here are my colours:-


Christmas Tree Dress - YG97, YG95, YG93, YG91
Skin - E04, E11, E21, E00
Cheeks - R21, R20, R00
Baubles - R05, R22, R20
Hair - E44, E51,  E0000
Star - Y23, Y21, Y00, Y0000

I used the coordinating die-namics to die cut the image out.  She was backed with foam tape and stuck down.


The sentiment is from Itty Bitty Holiday and was stamped with Versamark Ink and heat embossed in white to a strip made using Itty Bitty Strips Die-namics.   This was applied under her boots with foam tape.

Finally I highlighted with my white gel pen and applied sparkling sequins for a festive touch!

I wish you the best of luck with you entry and look forward to seeing what everyone submits.

Happy crafting!


Sunday, September 19, 2021

Halloween Costumes - Rachelle Anne Miller Creative Studios

I have an adorable new Halloween card for you today featuring the digital stamp image called Halloween Costumes by Rachelle Anne Miller Creative Studios.     I downloaded the image and printed it on my home printer on to Copic friendly cardstock.   This panel was die cut to give the faux stitched edge and finish it at a size slightly smaller than A2.


I had fun colouring this perfectly gorgeous image using my Copic markers.  Here's my colour palette:-

Witches Hat - W9, W7, W4
Bunny - E51, W4, W5, R000
Bear - E44, E43, E42, E40
Pumpkin Costume - E01, YR00, YR61, W3
Squirrel Ghost - W7, W5
Ghost Costume -  B0000, B000
Cheeks -  R00, R20, R21
Ground - BG70, W1

As you can see I transferred a little of the orange hues on to the bunny as well as some of the blues so that it took the eye around the gathering of friends.  I then highlighted a few points using a white gel pen.   I adhered the panel to an A2 black panel of cardstock to frame it out nicely and in turn this was applied to a card base.


To create the sentiment I first used the Charlie Alpha Die by Hello Bluebird Stamps and I die cut the letters BOO three times.  Once from white cardstock and twice from black.   I glued these letters together in stacks and slightly offset the top white layer in order to get a dimensional shadow affect.   These letters were glued into position.   Underneath to finish the sentiment I stamped 'be very afraid' using Versamark Ink and heat embossed in white which nicely pops on black cardstock.  This strip was applied with foam tape for some dimension.


I can rarely resist the temptation to add some sparkle and so I glued just 4, four point star embellishments so that the card remained really quite CAS (clean and simple).  Hope you love this sweet image as much as I do!

Happy crafting!