Showing posts with label Shaker Card. Show all posts

Friday, June 27, 2025

Simon Says Stamp - Friend Like You NEW RELEASE


Happy Friday friends, thanks for joining me to read how I made this cheerful shaker card for Simon Says Stamp who have a brand new release out as of yesterday called 'Friend Like You'.  For this card I have used the new Under Water Stencils and the Smile sentiment stamp set together with an A2 Waffle Flower Shaker Cover found here.

I started with a white A2 panel of white cardstock and in turn I used the new stencil set and four shades of pink inks to create a slightly groovy background.  I then came in with a metallic gelly roll pen by Sakura and along the lines of the colour changes so that as the card moves it beautifully catches the light.


I used the shaker cover and enclosed the stencilled panel on three sides and then went through my stash of sequins and embellishments to create a mix that worked with the background tones.  Once happy, I closed the fourth edge, thus sealing the contents inside and I adhered that to a sturdy card base.


To finish the design I grabbed the Smile sentiment stamp set and stamped the combination I was wanting using Versamark Ink and I heat embossed in gold.   I fussy cut the large SMILE and adhered it to the outside of the shaker pocket and the smaller sentiment was done on a little strip which I tucked in place and adhered.

Shake, shake, shake it!  This card was done!

Thank you for stopping by today.


Tuesday, June 10, 2025

Pretty Pink Posh - Seashell Shaker Card


Hello!  Welcome to my blog where I'm sharing the details for this card which I'm featuring on Pretty Pink Posh's Instagram Hop today.  I have used the following products:-

Seashells Stamp Set (sentiment & die)

To kick things off I took a white panel of cardstock and I used to nesting rectangles dies from my stash to create the 2 part frame.  I used the same dies with mint cardstock to create the skinny mint border.  I glued the two part frame to the card base and then with the main panel I used the Shell Background Stencil to ink blend the design.  I used Salty Ocean, Salvaged Patina and Cracked Pistachio Distress Oxide Inks to do this and I used a lighter touch as worked towards to the top right hand corner.


I used the Seashell Shaker die to create the shaker unit.  I ink blended the background die cut with Cracked Pistachio and then I filled with it with the Beach Town Mix before sealing the formed shaker.  I glued this to the background at an angle.


I stamped and die cut the sentiment from the Seashells Stamp Set.  I applied this with foam tape to pop it up and then the simple finishing touch was the addition of a few sparkling clear sequins in different sizes.

Thanks for coming by - happy crafting!


Friday, June 6, 2025

Pretty Pink Posh - Sandcastle Shaker Card


Welcome to my blog and a new card for Pretty Pink Posh showcasing their brand new release which went live yesterday.  Today, my card uses the following new products:-

Beach Fun stamp set (sentiment only)

I took a panel of which cardstock and ink blended a soft sky using a very light touch with Peacock Feathers Distress Oxide Ink.  I glued this to  my cards base.  I then took a second panel of cardstock and I used the Shoreline Borders Die to create sand and water.  I ink blended with Tea Dye and Peacock Feathers and then glued to the background panel.  I added interest with gel pens.


Time to create the Sandcastle shaker using the new die.  I stacked the various die cuts and glued in stacks, finishing with acetate and one more die cut which I ink blended to match the sand.  I added strips of foam and filled with the new Summer Fun Shaker Beads before sealing it close with the acetate and the final frame on top.  I glued the shaker unit to the background.


I finished the card by stamping the sentiment in my Misti.

Thanks for stopping by!


Friday, August 16, 2024

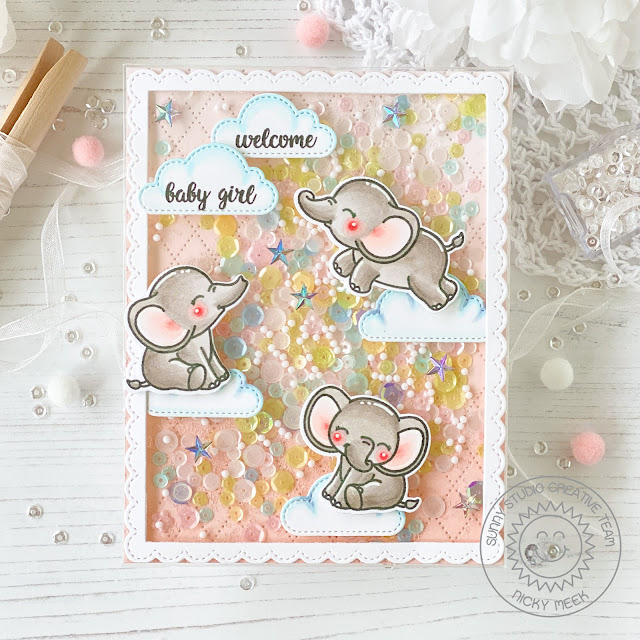
Sunny Studio Stamps - Baby Elephants Shaker Card


Join me today on the Sunny Studio Stamps Blog where I walk you through how I made this shaker card for a new baby.  Use that link to join me there.  Thank you!


Friday, June 7, 2024

Sunny Studio Stamps - Summer Jar Mugs Dies


Friends, I'm over on the Sunny Studio Stamps blog today with everything you need to know about making this summery shaker card.  If you'd like to learn about it please use THIS LINK to visit the blog today.  Thanks and have a great day!


Monday, May 20, 2024

Tuesday, May 14, 2024

My Favorite Things - May Jenoblade Release Day (Card 1)


It's always a good day when MFT Stamps are releasing new Jenoblade stamp sets and today's one of those days because the new release is now available for purchase.   This will be my third of four cards with the other two already blogged here (just keep scrolling if you missed them yesterday) and one more to be blogged today at 12 noon Eastern so please return for that.

Here's what I've used to make this shaker card:-


I took a sturdy white A2 panel of cardstock and I used the Drifts & Hills stencil and I ink blended the rippling water effect.  I die cut using Blueprints 25 to give the stitched edge effect then I used A2 Stitched Rectangle Stax Set 2 Die-namics to cut the panel again, forming a frame.  I stamped the sentiment on the centre panel and I backed the frame with ScorPal tape and attached an acetate panel that would form my shaker window.  I backed the shaker window frame with foam tape and used my anti-static tool to make sure there was no stickiness on the side of the foam tape that would prevent the shaker contents from moving around freely. 

I glued the main background panel to another A2 panel of cardstock sprinkled a selection of shaker fillers from my stash into the centre of the panel and then carefully lowered and adhered the shaker frame and window panel, thus sealing the contents inside.  This was glued to my card base.


Using Memento Ink in Tuxedo Black I stamped the images from Adorable Otters and I coloured with the following Copic marker combinations:-

Otters - E44, E43, E42, E41, E40, W00
Blushes - R22, R21, R20, R00
Greenery - YG01, YG03, YG13, YG17, YG25
Flowers - YR07, YG00

I die cut the images and applied them to the window front using Ad tech Permanent Crafter's Tape but ScorPal tape would of course work well too.


Points were highlighted with a white gel pen and with that this shaker card was complete!  Don't forget to come back and view my fourth card, in fact all four cards can be viewed on my blog as of noon Eastern today May 14th.   Happy shopping!

Thank you for stopping by my blog today and don't forget to visit and subscribe to the MFT You Tube Channel for endless how-to videos, inspiration and product reveals.


Friday, February 23, 2024

My Favorite Things - February Release Countdown Day Four


We're starting the big countdown today to the February 27th new release from MFT Stamps which you can get at 10am Eastern on that day.  Here's what I've used to create my first card for this release:-


Monkey Around is one of the new Jenoblade illustrated stamp sets and I decided to create an always fun shaker card.

I ink blended a background panel with Twisted Citron and Mowed Lawn Distress Oxide Inks.  I splashed the background with metallic watercolor paint loosened with a drop of water.  I die cut twice using the Rectangle Frames to create two identical frames.  I applied an acetate panel to the back of one and then added dimensional tape around the outside. I flipped it upside down and filled it with a sequin and embellishment mix that I created from my stash.  I used my anti static tool to run along the edges of the foam tape to remove the stickiness and then peeled off the backing of the tape.  I applied the second frame die cut to the green blended background and then carefully aligned and stuck down this backing panel to seal the shaker unit.   This was then glued to my sturdy card base.


In creating the frames I was left with negative cuts.  Perfectly sized of course and so I just used the Snow Drifts die-namics to create a grounding for the monkeys.  I attached this to the shaker window using ScorPal tape.

Next I stamped the images using Memento Ink in Rich Cocoa and then I coloured with the following Copic marker combinations:-

Monkeys - E77, E44, E43, E31, E41
Blushes - R22, R21, R00
Bananas - Y19, Y15, Y06, W1
Pink - R22, R21, R00, R000
Teal - BG15, BG32, G00

I used a white gel pen to dot in some interest and highlight certain points then I die cut using the coordinating die-namics and I applied them to the shaker window using dimensional foam tape.


All that was needed now was to stamp the sentiment on a sentiment strip  and stick this down and the card was complete.

Thank you for stopping by my blog today and don't forget to visit and subscribe to the MFT You Tube Channel for endless how-to videos, inspiration and product reveals.


Sunday, January 14, 2024

Streamside Studios - Chocolate Covered Strawberry Cows


Hello friends and welcome to my blog where today I'm guest designing for Streamside Studios using their sweet stamp set 'Chocolate Covered Strawberry Cows' .... which is one delicious mouthful!

To start the card I first prepared an A2 panel of patterned cardstock from Lawn Fawn.  Over this I layered a smaller white panel that I die cut to give it a faux stitched edge and I ink blended the panel using 'Blush' Ink by The Stamp Market.  I popped the panel in my Misti and stamped the sentiment three times over for a  super bold image.  This panel was glued to the patterned panel and it was all attached to my card base and set to one side.


Next up I created the 'Strawberry Basket Die' as a shaker.  This die is by Hello Bluebird stamps and I filled it with a fun mix of shaker filler provided to me by Streamside Studios.  I adhered the shaker to the blended background and then created a grassy edge for the bottom of the card which I also blended with a little 'Blush' ink as mentioned above.  This was attached with an extra thick dimensional foam tape.

I used Memento Ink in Rich Cocoa to stamp the images from 'Chocolate Covered Strawberry Cows'.  I coloured with the following Copic marker combinations:-

Cows - E79, E77, E74, E71, C3, C1, C0, R20, R00, E31
Strawberries - R08, R22, R21, E79, E77, E71, G07, YG06
Hearts - R08, R22


Images were fussy cut and applied to the scene with foam tape.  Points were highlighted with a white gel pen and I emphasised their eyes with a black archival pen so the expressions were more pronounced.

I had great fun guesting for Streamside Studios and hope you like what I created.


Thursday, April 6, 2023

My Favorite Things - April Release Countdown Day 5


Hello and welcome to this first day of the Countdown to the April 11th new release by MFT Stamps.  Here are the products used in the making of this shaker card:-


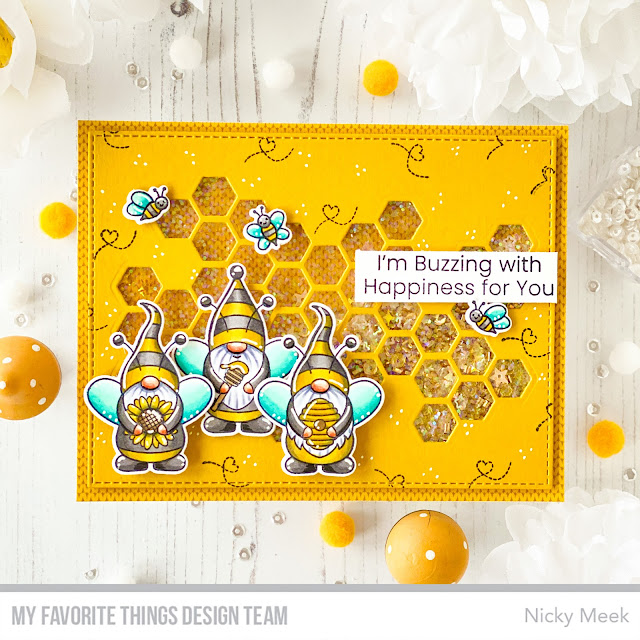
Here's how this card came together.  To kick things off I created an A2 panel using the patterned paper.  I adhered this to my already prepared card base.  I then used the largest die from the Stax Die-namics to create a panel of Butterscotch Prestige Cardstock.  I then used the new Peek-a-Boo Honeycomb Die-namics to die cut the panel again.  I popped out and discarded all of the negative hexagonal cuts and I backed this panel with clear acetate to form a shaker window.

I delved into my stash of glitters and sequins and came up with a mixed concoction to fill my shaker panel.  I centred the filler on the pattern panel and then added dimensional foam tape around the outer edge of the Honeycomb panel.  I brushed the edges of the dimensional foam tape with a little anti static powder to stop the contents from sticking around the edges and so that the ingredients moved about freely.  I then lowered the honeycomb panel down and adhered it to the patterned base.


The next step was to stamp the images from the new and completely adorable stamp set and then I coloured the images with the following Copic markers:-

Black - T6, T5, T4, T3, T2, T0
Yellow - Y26, Y19, Y15
Wings - BG57, BG15, G00, BG11, BG0000
Beards - C3, C1
Skin - R20, E21, E00
Shading - T4, T3, T1

I highlighted with my white gel pen and then die cut using the coordinating die-namics and I applied with either regular foam tape or with extra thick foam tape to build some nice dimension, however, you could just use a double layer of regular dimensional tape to create the same affect.

To finish my card I stamped the bee trails to form a random pattern and then dotted some white gel pen in groups of 3 (pollen lol)!  Last but not least I stamped the sentiment on a strip of white cardstock and added it with yet more foam tape.


Thank you for stopping by my blog today and don't forget to visit and subscribe to the MFT You Tube Channel for endless how-to videos, inspiration and product reveals.


Sunday, July 3, 2022

Hello Bluebird Stamps - Carried Away Shaker Card

Just stopping by my own blog briefly today to tell you that you can find me over on Hello Bluebird's blog with this very summery and fun sprinkles filled shaker card.   Click HERE to go directly to my blogpost to learn how it came together.  Thank you!


Friday, June 24, 2022

My Favorite Things - June Card Kit - Beach Day

I haven't made anything as CAS as this in a little while but make no mistake I love clean and simple cards.   Do shaker cards count as simple?  I think they do, read on for all the details.


Here's what I've used to make this card:-


This is a 4 1/4 inch square card .... I do love a square card, something about the proportions!?   So I prepped a 4 inch square white panel and I die cut the circular opening and I stamped the sentiment.

I inserted the shaker pouch and used tape to secure it on the reverse of the top panel.    I then became a mixologist and filled the shaker pouch with a selection of micro beads and sequins and other shaker filler type embellishments until I was happy with the blend.  I didn't overfill it as I definitely wanted this to be a shaky shaker if you know what I mean!

To seal the shaker closed I used some acetate and then I adhered this top panel down to a 4 1/4 inch square panel which in turn was adhered to my card base of the same size.


All that was left to do was to die cut the white and red parts of the lifesaver ring from the new accessory die set from the card kit release.   The parts were glued together and then glued to the centre of the shaker pocket.

Such a fun little project!


Thank you for stopping by my blog today and don't forget to visit and subscribe to the MFT You Tube Channel for endless how-to videos, inspiration and product reveals.


Friday, May 6, 2022

My Favorite Things - May Release Countdown Day 4

Welcome to Countdown Day 4 to MFT Stamp's May 10th release (10am EST).   I have an infinity shaker card to share with you today that features the new Thank My Lucky Stars stamp set.


Here are the products used in this project:-


I created a 5 1/2 inch square panel of cardstock and ink blended a delicate wave background using the stencil listed above.   In inserted this panel into a stamp storage pocket measuring  5 1/2 inches x 7 3/8 inches.   I went through my stash of sequins and shaker fillers and concocted a fun mix and dropped everything into the front of the pocket.   I wrapped the excess of the pocket around the back and adhered it down firmly so nothing would come out.

I stamped the sentiment on a sentiment strip, adhered this to a strip of vellum and then wrapped the vellum around the shaker panel adhering on the reverse and then the panel was adhered to a sturdy card base able to take the weight of this pretty hefty card!


I stamped the images from the sweet new stamp set and coloured them with Copic markers:-

Bears E42, E41, E40, E0000
Bunnies, C0, C00
Cheeks and other pink areas - R21, R20, R00, R000
Turquoise - BG49, BG15, BG32

Images were die cut using the coordinating die-namics.   Points were highlighted with a white gel pen and then adhered to the face of the shaker pocket.  Card complete!


Thank you for stopping by my blog today and don't forget to visit and subscribe to the MFT You Tube Channel for endless how-to videos, inspiration and product reveals.


Tuesday, January 11, 2022

My Favorite Things - Release Day!!

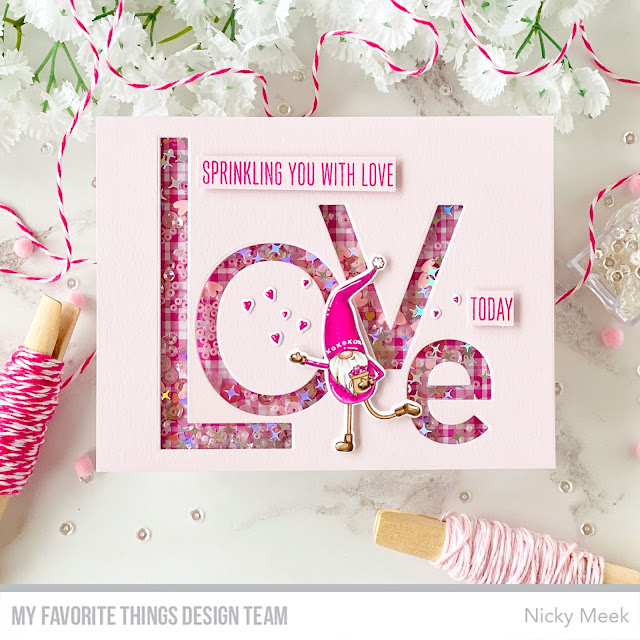
The countdown is over and My Favorite Thing's January release is now available for purchase.   Perhaps you are planning on buying some of the items used in my card today?  I've made a shaker card using the Giant Love Die-namics together with the Love You Gnome Matter What stamp set which has coordinating die-namics of course!

Also used in this project is patterned paper from the Sweet Plaid 6 x 6 Paper Pad and Princess Pink cardstock.


The Giant Love die was used to create the background from Princess Pink cardstock and this was backed with acetate to form a shaker window, on the reverse I applied foam tape around the edges, sprinkled in my shaker contents then sealed the back using the Sweet Plaid paper and the whole shaker unit was glued to the card base.

I stamped the images I was using from Love You Gnome Matter What and coloured with Copic markers.

Gnome - V06, RV17, RV04
Nose - E04, E11, E21
Beard - W3, W1
Legs, Boots, Gloves - E44, E43, E42

I embellished with a white gel pen then die cut and applied with foam tape.   The sentiments were stamped with Poppin' Pink ink and applied with foam tape and with that, this fun little shaker card was complete.


Happy shopping and thanks for stopping by today, as always you can find more ideas and inspiration on the My Favorite Things You Tube Channel!


Saturday, October 23, 2021

Halloween Moon - Rachelle Anne Miller Creative Studio

Hello,   I have a fun infinity shaker Halloween card for you today using the digital stamp image called Halloween Moon by Rachelle Anne Miller Creative Studio.   This is a digital stamp, so you just click and buy, it is delivered to your email address virtually immediately and you can then proceed to print the image using your home printer and immediately have some creative fun with it!


To create this card I first ink blended an A2 panel of white cardstock using Distress Oxides.  I slid this panel sideways into a stamp storage pocket for a really nice snug fit.   I popped open the end by squeezing the edges of the cardstock carefully and tipped in a variety of shaker filler contents in a blend that suited my planned colours for the entire card.  Once I was satisfied with the mix and the degree of fill, I wrapped the excess of the stamp pocket around the back of the panel and securely adhered it down using my tape runner.   I then applied that to a cardstock base.   Everything else happens on the outside of the pocket!


I printed my Halloween Moon image on Copic friendly cardstock and then trimmed down the image using some fussy cutting.  I coloured the image using my Copic markers, here's my colour palette:-

Witch Costume - W9, W7, W4, W3, V01, V12, V15
Hair - E000, E42, E43, E44, E51
Pumpkin Bag - YR82,  E93, E95
Bear - E43, E42, E41, W5, W3
Moon -  RV000, RV10, RV02
Ground - RV000, RV10, W2, W1

I then adhered the image to the top of the pocket using my tape runner again.


Finally for the giant sentiment I die cut the Boo To You Word Die from Hello Bluebird Stamps from black cardstock and applied in the same way.

Try and make an infinity shaker if you never have before.  These are by far the best and the easiest of shaker cards, the contents move about freely and don't stick to anything.

Happy crafting!


Sunday, July 25, 2021

My Favorite Things - July Card Kit - Celebrate You - Countdown Day 2

Hello!   My Favorite Things have a new Card Kit releasing at 10am EST on the 27th July!!   The kit is named 'Celebrate You' and yes ... it is all about birthdays!   Here is my first of three cards to reveal some of what the kit can do!   Today I'm keeping it clean and simple with a fun shaker design.


Firstly, I die cut a white panel of cardstock using the new It's Your Day Die-namics.   On the reverse side I adhered some clear acetate.  I used strips of dimensional foam tape around the edge of the party hat design, used anti static powder to make sure the edges of the tape weren't sticky then sprinkled in my shaker filler contents and then I sealed the back of the shaker unit with more acetate.


I put more dimensional tape around the edges of the white panel and then adhered it to a colourful A2 panel of pattern cardstock from the new Party Time 6 x 6 Paper Pad.

For the decorative hat topper I die cut that piece twice from Poppin' Pink Prestige Cardstock and the second from the Gold Sparkle Cardstock and adhered.


Last but not least the simple design is anchored by the sentiment from the new Itty Bitty Birthday stamp set which I stamped on a die cut made using Itty Bitty Sentiment Strips Die-namics, black cardstock and Versamark Ink.   I heat embossed in white, backed the strip with foam tape and applied.  I mounted the whole panel to a sturdy white cardstock card base and with that the card was complete.

I chose to fill my shaker unit for a fairly stuffed look with little movement of the contents but you could easily do yours with just a few embellishments that are fun to shake around.

I'll be back tomorrow with something new from the kit - see you then hopefully!