Showing posts with label Hello Bluebird Stamps. Show all posts

Sunday, May 17, 2026

Hello Bluebird Stamps - April Showers


My fourth card for the April, 'Rain or Shine' release from  Hello Bluebird Stamps.  If you missed the others, please keep scrolling after this post and they'll show up in order.  This card features the darling April Showers stamp set which of course has a companion die.  I have also used the Ric Rac Card Die and the Ric Rac Frame Die both of which formed part of a previous release but which you can still buy. Also used is the formerly released and still available Tropical Leaves Die.

So I started the card with some patterned cardstock from my stash and I die cut using the Ric Rac Card Die and then I used the coordinating frame die to die cut a frame from white cardstock and glued the frame to the patterned panel.  I then glued this to my card base.


I then created the oval focal point, once again using a smaller die from the Ric Rac Card and Ric Rac Frame dies.  Before glueing the frame to the oval background I ink blended using Stormy Sky and Mowed Lawn Distress Oxide Inks.  I then stamped the sentiment from April Showers in black and then using a light grey ink I stamped an image from the set which is of rain coming down at an angle.  I stamped this 3 or 4 times to cover the entire sky area.  It's subtle but it is there!  Then I glued the frame on and glued the the oval to the centre of the patterned panel.  I wanted to tuck some leaves underneath at the end and I was sure to not get the glue too close to the edges.

I stamped the sweet images from April Showers and coloured with the following Copic combinations:-

Squirrel - E44, E23, E13, E11, E42, E40
Duckling - Y11, Y000, C3, C1, C0
Green - YG06, YG13, YG11
Blue - B32, W4, W2
Yellow - Y15, W5, W4, W2
Blushes - R22, R21, R20, R00

The images were die cut and applied to the focal point with foam tape.  One or two points were sparingly highlighted with a white gel pen and I used the W Copics to add some shadow under each critter and I dotted in some green to the grass.


I took some lime coloured cardstock and die cut some leaves from Tropical Leaves.  I ink blended some with more of the Mowed Lawn and then I trimmed them if necessary and tucked them under the 'corners' of the oval and adhered them with tiny bits of foam tape.

I added water droplet style embellishments in the other two corners and then I had some fun with Spellbinders Glaze & Glue.  Love this glue because it truly does not yellow, it dries perfectly clear and I added it to the entire surface of Squirrel and Duckling's raincoats and then with the rain in the background, I added glossy/wet looking rain by making a tiny dot and then doing a flicking motion in the direction of the stamped rain.  Hard to photograph but great fun when the card is handled and catches the light. Best to practice on some scrap paper first to get control of it.

Hope you enjoyed this card, I'll be back soon with something new before you know it!


Friday, May 15, 2026

Hello Bluebird Stamps - In the Sunshine


Hello friends, I've got a new card for Hello Bluebird Stamps today featuring their new In the Sunshine stamp set which of course has a companion die.  This stamp set formed part of the Rain or Shine collection released a few weeks ago. Some stock is getting low, so don't procrastinate if you are interested in purchasing.

I took a 3 3/4" x 5" panel of cardstock and using some stencils from my stash I created the sky and grass.  I used Mowed Lawn and Salvaged Patina Distress Oxide Inks to achieve this.

Over the grass area I stamped a little tuft of grass image from the In the Sunshine stamp using more of the Mowed Lawn.


Images from the In the Sunshine stamp set were stamped with Memento Ink in Rich Cocoa and coloured with Copic markers:-

Bluebird - B97, B95, B93, B91, E42, E40, W00
Mouse - W6, W5, W4, W2, W0
Bunny - E44, E43, E42, E31, E40
Blushes - R22, R21, R20, R00
Blossom Tree Branch - E44, E42, E40, YG13, RV63, RV02, RV00
Worm - E95 - E01
Bees - Y17, Y21
Butterly - Y17, Y21, B97, B95, B93

I die cut all of the images and applied foam tape to the back of each.


I popped the panel in my Misti and stamped the lovely sentiment in the same Rich Cocoa ink. I arranged and stuck down all of the images and then I added some dots behind the bees and butterflies and I then added some shadow and dirt in and around the grass with W2 and W0 Copic markers.

The panel was then glued to an A2 whie panel with white craft foam layered between them and then that was glued to my card base.  I like to build them sturdy!

Last but not least I added some sparkling clear sequins and highlighted points on some images with a white gel pen.

I just love the image of the bunny and mouse skipping around a field and couldn't wait to make a card with them!

Please keep scrolling after this post to come to my previous two cards featuring this latest release.  Thank you!


Wednesday, May 13, 2026

Hello Bluebird Stamps - Under the Big Tree


Welcome to my blog and a new card for Hello Bluebird Stamps.  This card is made from products that formed part of the April - Rain or Shine release.  I have used their Under the Big Tree stamps and companion dies, and to create the background I used The Big Tree Scene Die.

I started by creating the background.  I die cut sturdy white cardstock using the The Big Tree Scene Die and I ink blended all of the parts using Distress Oxide Inks in Spun Sugar for the blossom, Salvaged Patina for the sky, Mowed Lawn for the grass and for the tree trunk and boughs I used Tea Die and Vintage Photo. I splashed the pink parts with white acrylic paint and a little spritz of pink paint.

With all the pieces ink blended etc I pieced everything together with glue and set within the frame and attached this panel to my card base.


The images from Under the Big Tree were stamped with black ink and coloured with the following Copic marker combinations:-

Bunny - E43, E42, E31, E40, C3, C1
Bear - E44, E43, E42, E40
Birds - BG49, BG45, B00, B0000
Butterflies - Y21, Y19, W4
Blushes - R22, R21, R20, R00
Large Flower - RV63, RV00
Stalks & Leaves - YG13

Points were highlighted with a white gel pen, the images were die cut and they were all applied with foam tape to the background.


When I was choosing the position of each element I made sure to leave a space for the cute sentiment that I had stamped on a white sentiment strip and the finishing tough was to add a little shadow under the bear and to dot in a little interest to the grass.

Thank goodness for the sweetness of Hello Bluebird Stamps they are sure to brighten even the cloudiest of days!  I will be back very soon with something new to share with you all.  Happy crafting!


Monday, May 11, 2026

Hello Bluebird Stamps - Friendship Blooms


Hello, welcome to my blog and a card for Hello Bluebird Stamps featuring brand new products from their Rain or Shine release which is now shipping.  This card showcases the Friendship Blooms stamp set and the companion die, together with the new Ribbon Frame Die.

I kicked things off by creating panels of white and patterned cardstock which I die cut using faux stitched edge dies from my crafting stash.  I adhered these prepared panels to the card base and set it to one side.

Using the Ribbon Frame Die, I die cut 3 times from sturdy white cardstock.  This gave me three frames which I glued together in a stack and I ink blended one of the internal die cuts with Tumbled Glass and Mowed Lawn Distress Oxide Inks.  I splashed the blended area with white acrylic paint loosened with a drop or two of water and then glued the frame in place and then this focal panel within the frame.


I stamped the images I wanted to use from Friendship Blooms and I coloured with Copic markers:-

Mice - E43, E42, E31, W1, W0
Blushes and Ears - R22, R20, R00
Flower Petals - R22, R21, R20, R00
Leaves - YG13, YG11
Yellow - Y19, Y21
Shadow - W1

Points were highlighted with a white gel pen then the images were die cut and applied to the background with dimensional foam tape.


I created the bow which forms part of the Ribbon Frame Die set, by die cutting toning Apricot cardstock twice for each part and then I glued them together, then to the top of the white oval frame.

I selected and stamped the sentiment on a sentiment strip and applied with foam tape and finally a few sparkling clear sequins adorn the top left and bottom right off the scene.

I will be back soon with new inspiration for the Rain or Shine release!


Saturday, October 25, 2025

Hello Bluebird Stamps - Book Buddies


Hello and a warm welcome to my blog and a new card for Hello Bluebird Stamps featuring products from their long awaited new release of Fall themed products.  In this card I have used the following products:-


I created an A2 panel of kraft cardstock and to this I glued a patterned paper panel that I had die cut using the Ric Rac Card Die and which I framed out in white using the Ric Rac Frame Die.

Using the oval Ric Rac die from the frame set I die cut once from white cardstock and once again from kraft.  I die cut the oval shape from white cardstock using the Ric Rac Card Die and ink blended a little sky and grass in muted hues and and using a Copic marker and a white gel pen I created a little interest in the grass.  Over this I layered a white and then kraft cardstock frames, glueing them in place.  I now had my focal point created and I backed it with foam tape and applied to the background and set to one side.

That's a lot of talk about Ric Rac ... I hope you're still with me ......... ?


I stamped and coloured one of the images from Book Buddies together with a stack of books and a mug.  Here are my Copic colours:-

Bear - T7, T5, T4, T3, E43, E31
Fox - E37, E99, E13, E11, C3, C1, C0
Logs - E44, E1, W4, W2, E40
Bear's Scarf - E44, YR27, YR24, Y21
Fox's Jacket & Scarf - YG99, YG97, YG95, YG93, YR27, E44

Images were die cut using the coordinating die set and I highlighted some points and added the stripes to the bear's scarf.  The die cuts were backed with foam tape and applied to the focal oval.


I die cut some leaves and acorns etc from the Forest Floor Die set.  I ink blended in a variety of coordinating hues using Distress Oxide Inks.  I used some gold watercolour paint from the Kuretake Starry Colors paint set and splattered it on to my die cuts using my craft toothbrush for a fine spray.

Using glue and dimensional tape I tucked these little gathered bunches into the upper right and lower left hand corner, pushing them just a little underneath the oval focal.

I stamped the sentiment and floated it over the bottom of the oval and the finishing touch was the application of a few sparkling clear sequins.

I appreciated you stopping by to read the details today.  Have a wonderful weekend - happy crafting!


Friday, October 17, 2025

Hello Bluebird Stamps 'Cider & Cocoa' Fall Release


Hi everyone!  I'm sure you were very happy to see that Hello Bluebird  has come out with a new release after a long wait.  The Cider & Cocoa  release is packed full of Autumnal loveliness and my first card today features the following products:-

Just A Girl (this stamp set & coordinating die is free with purchase whilst stock lasts)

It's possible the Just A Girl free with purchase stamp set is sold out now but this card can serve as some inspiration for those of you who were lucky enough to pick it up when the release went live.

I used the Ric Rac Card Die to die cut some orange plaid cardstock from my stash.  I backed this panel with white craft foam and applied it to an A2 white panel and then glued it to the card base.  I used the Doodle Frame Die to die cut first white and then kraft cardstock.  I used the white inner cut and ink blended a soft background of sky and grass and glued it to the background panel, then I glued the kraft doodle frame to the outside.


I stamped the Just A Girl images using Rich Cocoa ink by Memento and I coloured all images with Copic markers.

Fox - E37, E99, E15, E13, E11, C5, C3, C1, C0
Jacket - E49, E79, E77, E74
Scarf - YR27, BG18
Blush - R22, R21, R20, R00
Pumpkins - YR07, YR27, YR24

I die cut the images using the coordinating die set and then applied everything, including the itty bitty leaves, with dimensional foam tape because I just love dimension!


To complete the card I formed the longer sentiment into a curve and stamped it in the corner and the word FALL was stamped on a strip and applied with foam tape.

Last but not least, I added a little interest to the grass and sky by simply adding some dots to the grass and sky using Copic markers BG93 and YG95. 

Card complete!  Thanks for stopping by, I'll be back with a new card using this release very soon.


Monday, October 21, 2024

Hello Bluebird Stamps - Frosty Friends


I had some time to work ahead on some Christmas cards and opted to use some loved older stamps from Hello Bluebird but please keep in mind that these older stamp sets have been retired.  I've used Frosty Friends along with it's companion die and I also used the Nesting Ovals Die which can be found in HB's Essentials section on the site.

I created several panels of cardstock in decreasing sizes and in tones that worked with the top panel of patterned cardstock selected from my stash.  These were glued in stacks then to the card base.

I die cut two nesting ovals from sturdy vellum and a size smaller in sturdy white cardstock.  To create a background to set the scene I stamped one of the tree images multiple times and then coloured with Copic markers to tone with the patterned panel.  I glued the ovals together and adhered them to the patterned panel.


I stamped the images from Frosty Friends and coloured with the following Copic markers:-

Snowman - C3, C1, C0
Reindeer - E44, E43, E42, E41, E40
Polar Bear - C3, C1, C00, E40
Red - R39, R29, R27
Green - G17, YG09
Top Hat - T6, T5, T4, T2

I die cut the images using the companion dies and adhered them to the background with dimensional foam tape.


I highlighted with a white gel pen and then I used a stylus and white acrylic paint to dot in the snow through the background and across the sweet images.

Last but not least I selected a sentiment from the stamp set, stamped it on a strip and applied this with foam tape and I glued a few sparkling clear sequins to the upper left and lower right corners.

Thank you for stopping by!


Wednesday, October 9, 2024

Hello Bluebird Stamps - Mini Slimline Fall Cleanup Crew


I'm back with a new Fall themed card using Hello Bluebird's latest Fall Kits.  This card was made by combining 'Fall Cleanup Crew' with Nesting Deckle Mini Slimline die which is part of the Essentials collection on the HB site.

I die cut sturdy white cardstock using the largest deckle die then I ink blended using Rusty Hinge, Vintage Photo and Forest Moss Distress Oxide Inks.  I spritzed it with diluted white acrylic paint.  I stamped the sentiment and used Copic markers to add interest to the grass area.


I glued this panel to a fractionally larger white panel and then added this to a slightly larger dark green cardstock panel, then to the card base.  I set this to one side.

I stamped the images from Fall Cleanup Crew with Eiffel Tower ink by MFT.  I coloured the images with the following Copic marker combinations:-

Fox - E18, E09, E39, E15, E13, C3, C1, C0
Squirrels - E37, E35, E33, W3, W1, W0
Dark Teal - B99, BG78, BG75
Pumpkin - YR27, YR04, YR21
Leaves - E18, YG97, YG95, YG93, YG91, YR21, YR27
Log - W5, W3, W1, W0, E41, E40


I highlighted then die cut the images using the companion dies and I applied them to the background using dimensional foam tape until the scene was built out.  So much fun to create with beautiful Autumnal colours!  Thanks for stopping by.


Monday, October 7, 2024

Hello Bluebird Stamps - Happy Autumn


Creating for fun with the September Kits by Hello Bluebird Stamps and I made this Autumnal card using the Fall Cleanup Crew stamp set together with Nesting Circle and Square Dies which you can find in the Essentials section on the website.

I chose some patterned paper from my stash and used the Square Die to create a panel which I adhered to a slightly larger white card base made with nice and sturdy cardstock.  I die cut two circles, one from kraft and one from the same sturdy white cardstock.  I adhered the kraft circle to the patterned background and with the white panel I ink blended with Speckled Egg and Forest Moss Distress Oxide Inks.  I used Copic markers to create a little interest in the grass then splattered the panel with slightly diluted white acrylic paint.  I stamped the sentiment and then adhered the circle to the kraft circle.


The images from Fall Cleanup Crew were stamped with Eiffel Tower Ink by MFT and coloured with the following Copic marker combinations:-

Fox - E27, E25, E23, E13, E11, C3, C1, C0
Bunny - W5, W4, W3, W0, E31, E41, E40
Squirrel - E29, E59, E27, E57, W1, W0, W00
Mouse - T5, T3, T0
Blushes - R22, R20, R00
Brown Pants - E49, E79, E77
Teal - BG72, BG11,  BG70, C3, C1, C0
Pumpkins - YR27, YR04, YR21, E44, E43
Leaves - YG95, YR27, YR21


Images were highlighted with a white gel pen then die cut using the companion dies.  I found an arrangement I was happy with and then began to adhere all of the images using dimensional foam tape.

I didn't feel any embellishments were particularly necessary but I did add a little wooden heart embellishment above the bunny's raised paw which kind of sums up how much I love Autumn!

Thanks for visiting my blog today and happy crafting!


Wednesday, October 2, 2024

Hello Bluebird Stamps - Apple Picking


Welcome to my blog and a new card for Hello Bluebird Stamps featuring the Apple Picking stamp set from their Fall Kits release.  I think everyone on the Design Team went for red apples and so I gave my card a different look by making my apples Golden Delicious!

I took a panel of white cardstock and ink blended sky and grass using Tumbled Glass and Twisted Citron Distress Oxide Inks. I die cut the panel with a die from my stash to give it the stitched edge.  I backed the panel with white craft foam and adhered it to an A6 panel of patterned cardstock in the ombré style since I knew it would pick up on the colours I was going to be focussing on.  I adhered this whole panel to my card base.


I stamped the images from Apple Picking using Eiffel Tower ink by MFT.   I coloured the images using the following Copic marker combinations:-

Apples - Y13, YG01, YG03
Leaves - YG13, YG25
Bark - W5, W4, W3, W1, E31, E41
Bears - E44, E43, E42, E41, E40
Papa Bear Pants - E49, E79, E77, E74
Papa Bear Shirt - YG67, BG72
Mama Bear Dress and Apron - BG72, BG70, C3, C1, C0
Baby Bear Shortalls  - G29, G28, YG67
Baby Bear Shirt - BG72, C3, C1
Blushes - R22, R21, R20, R00
Step Ladder and Barrel - W5, W4, W3, W1, E41

I did a little bit of highlighting with a white gel pen and emphasised noses and eyes with a black glaze pen then die cut the images using the companion dies.


I backed the die cut images with dimensional foam tape then adhered them to the background and using the W1 Copic marker I added just a little bit of shadow underneath some of the images and I used YG01 to dot in some subtle interest into the grass.

I stamped the sentiment on a strip and applied this with foam tape and with that this card was finished.

Thanks for coming by to read about my latest project, I'll be back before you know it with something new to share.  Happy crafting!


Monday, September 30, 2024

Hello Bluebird Stamps - Hey Pumpkin


If you'd like to know how I made this card, please join me on the Hello Bluebird Stamps blog today using THIS LINK, where I've have all the details you need to know.  Thank you!


Sunday, September 29, 2024

Hello Bluebird Stamps - All The Spooks


I'm continuing to play with the amazing Fall Kits from Hello Bluebird Stamps and today my card features the 'All The Spooks' stamp set which was part of the Halloween Speciality Kit (now sold out).

Firstly, I used the Nesting Deckle Mini Slimline die to create what would be the feature panel.  I ink blended using Distress Oxide Inks in Shaded Lilac, Dusty Concord and Black Soot.  I dotted in some interest with a white gel pen and a metallic gel pen then backed the panel with craft foam and applied it to a larger white panel then to a slightly larger black panel then to the card base.


I stamped the images from All The Spooks using black ink then coloured with the following Copic markers:-

Ghosts - C3, C1, C0, BV000, BV0000
Blushes - R22, R20, R00
Pumpkins - YR27, YR09, YR04, YR21

I die cut the images using the companion dies.


Each image was backed with dimensional foam tape and applied to the the ink blended background and then to finish things up I just highlighted the ghost's cheeks and points on the pumpkins with a white gel pen.

I hope you like my Ghost Story card, such a cute stamp set!


Thursday, September 26, 2024

Hello Bluebird Stamps - Fright Mice


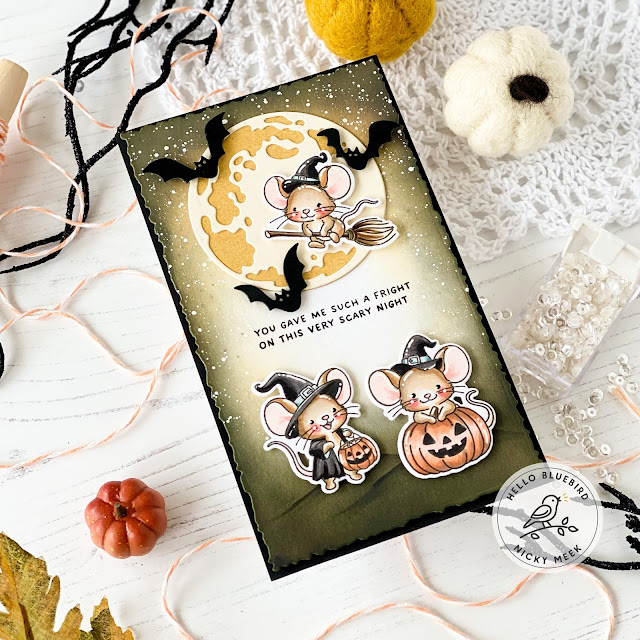
Hello friends!   Today I have created a new card for Hello Bluebird Stamps using the Fright Mice stamp set from the recent (but now sold out) Halloween Speciality Kit.  I already had all of the images coloured from the first time I made and shared a card with Fright Mice and knew when I had a couple of hours I'd get to use the remaining coloured images.  So, without further delay here's what I used to make this card:-

Fright Mice Stamp Set
Fright Mice Die
Light of the Moon Die
Nesting Deckle Mini Slimline Die

I used the deckle die to create a white panel of cardstock (largest die from the set).  I ink blended the panel using Dried Marigold and Black Soot Distress Oxide Inks.  I then covered the bottom portion of the panel with kitchen paper and with the rest I splattered on some diluted white acrylic paint.  I then used Copic markers to give the suggestion of some ground for the mice to eventually stand on.


I stamped the sentiment in black ink and then die cut and formed the 'Light of the Moon' die cut pieces and glued in place.

So I had those Fright Mice already coloured so here are those colours again from my first card a few days ago:-

Mice - E34, E31, E41, W00, W3, W1

Blush - R22, R21, R20, R00

Black - T7, T5, T4

The images were highlighted with a white gel pen, backed with foam tape and then applied to the scene.


The 'Light of the Moon' die set includes the 3 bat images which I die cut from black cardstock and applied with foam tape and I gave them glimmering eyes with a metallic gel pen and dotted in a few stars in the background with the same pen.

This whole decorative panel was backed with a panel of black craft foam and applied to a slightly larger black panel of cardstock which in turn was adhered to the card base.

Thanks for stopping by, I'll be back soon with something new!