Showing posts with label Infinity Shaker. Show all posts

Friday, August 16, 2024

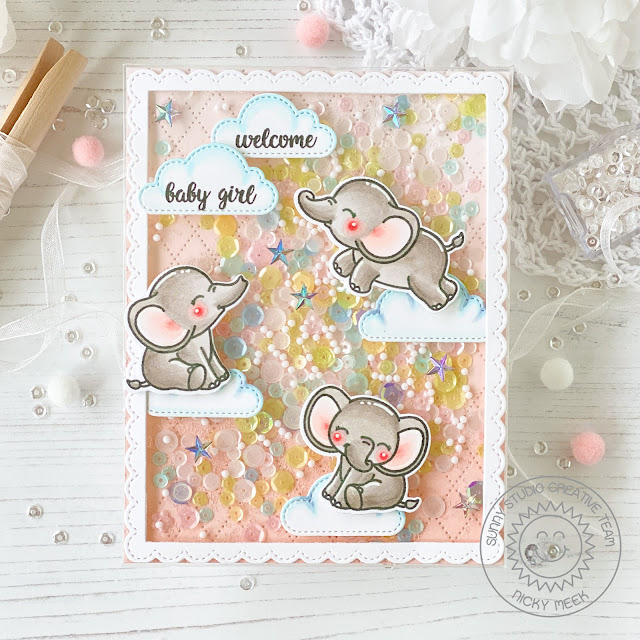
Sunny Studio Stamps - Baby Elephants Shaker Card


Join me today on the Sunny Studio Stamps Blog where I walk you through how I made this shaker card for a new baby.  Use that link to join me there.  Thank you!


Friday, May 6, 2022

My Favorite Things - May Release Countdown Day 4

Welcome to Countdown Day 4 to MFT Stamp's May 10th release (10am EST).   I have an infinity shaker card to share with you today that features the new Thank My Lucky Stars stamp set.


Here are the products used in this project:-


I created a 5 1/2 inch square panel of cardstock and ink blended a delicate wave background using the stencil listed above.   In inserted this panel into a stamp storage pocket measuring  5 1/2 inches x 7 3/8 inches.   I went through my stash of sequins and shaker fillers and concocted a fun mix and dropped everything into the front of the pocket.   I wrapped the excess of the pocket around the back and adhered it down firmly so nothing would come out.

I stamped the sentiment on a sentiment strip, adhered this to a strip of vellum and then wrapped the vellum around the shaker panel adhering on the reverse and then the panel was adhered to a sturdy card base able to take the weight of this pretty hefty card!


I stamped the images from the sweet new stamp set and coloured them with Copic markers:-

Bears E42, E41, E40, E0000
Bunnies, C0, C00
Cheeks and other pink areas - R21, R20, R00, R000
Turquoise - BG49, BG15, BG32

Images were die cut using the coordinating die-namics.   Points were highlighted with a white gel pen and then adhered to the face of the shaker pocket.  Card complete!


Thank you for stopping by my blog today and don't forget to visit and subscribe to the MFT You Tube Channel for endless how-to videos, inspiration and product reveals.


Saturday, October 23, 2021

Halloween Moon - Rachelle Anne Miller Creative Studio

Hello,   I have a fun infinity shaker Halloween card for you today using the digital stamp image called Halloween Moon by Rachelle Anne Miller Creative Studio.   This is a digital stamp, so you just click and buy, it is delivered to your email address virtually immediately and you can then proceed to print the image using your home printer and immediately have some creative fun with it!


To create this card I first ink blended an A2 panel of white cardstock using Distress Oxides.  I slid this panel sideways into a stamp storage pocket for a really nice snug fit.   I popped open the end by squeezing the edges of the cardstock carefully and tipped in a variety of shaker filler contents in a blend that suited my planned colours for the entire card.  Once I was satisfied with the mix and the degree of fill, I wrapped the excess of the stamp pocket around the back of the panel and securely adhered it down using my tape runner.   I then applied that to a cardstock base.   Everything else happens on the outside of the pocket!


I printed my Halloween Moon image on Copic friendly cardstock and then trimmed down the image using some fussy cutting.  I coloured the image using my Copic markers, here's my colour palette:-

Witch Costume - W9, W7, W4, W3, V01, V12, V15
Hair - E000, E42, E43, E44, E51
Pumpkin Bag - YR82,  E93, E95
Bear - E43, E42, E41, W5, W3
Moon -  RV000, RV10, RV02
Ground - RV000, RV10, W2, W1

I then adhered the image to the top of the pocket using my tape runner again.


Finally for the giant sentiment I die cut the Boo To You Word Die from Hello Bluebird Stamps from black cardstock and applied in the same way.

Try and make an infinity shaker if you never have before.  These are by far the best and the easiest of shaker cards, the contents move about freely and don't stick to anything.

Happy crafting!


Saturday, January 23, 2021

Party Parade - Hello Bluebird Stamps

 I have a very fun infinity shaker card for you today featuring Party Parade by Hello Bluebird Stamps together with the Happy Birthday Words die.


Have you made an infinity shaker card before?   They are very easy so don't be intimidated and wayyyy easier than a regular shaker card.   I ink blended an A2 panel of cardstock to create a pink and blue background and I stamped musical notes from the Party Parade stamp set into the background.   I then grabbed one of my stamp storage pockets by Avery Elle that you can find HERE on Amazon but of course can buy direct from Avery Elle.

I slid my panel into the storage pocket sideways, it is a perfect snug fit and then I had fun carefully pouring in different sequins and shaker fillers until I had the look that I wanted.  Make sure these shaker elements go only on the decorated side of your panel.  I then wrapped the excess of the pocket around the back of the panel and thoroughly taped it down with the tape runner. This was then applied to a sturdy card base.


All other elements of this card are adhered directly to the front panel using tape runner tape.   To that end I first die cut the Gallery Frame #4 die and applied it and  I stamped my Party Parade images on to Copic friendly cardstock and used Copic markers to colour them.  A white gel pen was used to highlight some areas and I die cut each image and applied them to the scene.


To finish this card off I die cut some mini gingham cardstock using the Happy Birthday Words Die and adhered the letters and word into position.   With that the card is finished and let the shaking begin!

Happy crafting!


Tuesday, June 16, 2020

'Together' - A Special Edition Release by Stacey Yacula for Purple Onion Designs

Hello friends!

I'm excited you've come by my blog today because I've got a new card for Purple Onion Designs that features a Special Edition stamp called 'Together' illustrated by Stacey Yacula.  This is single image offering and is larger than the majority of Stacey's designs and it comes with several lovely sentiments. It is offered to raise money for the United Way Worldwide Covid-19 Community Response and Recovery Fund.  Please click the link to read more about where your money will go.   This set will retail for $13 and a donation of $10 will be made for every set sold and the donations will be shared both in the US and internationally.  

I decided to make a monochromatic and unapologetically girly infinity shaker card for my project.  Let's hear it for PINK!


I ink blended a panel using Spun Sugar, Worn Lipstick and Festive Berries Distress Oxide Inks and I inserted it into a stamp storage pocket, fits like a glove!   I got out my stash of embellishments and sprinkled in several different types of shaker filler until I was satisfied with the blend and quantity and then I sealed the stamp storage pocked neatly on the reverse and adhered that to my sturdy 110lb cover weight, white cardstock base.


I used a grass edge die to cut the little panel you see at the bottom and ink blended with Festive Berries Distress Oxide Ink.  I stamped the sentiment and adhered it.  I also die cut the clouds and used a little of what remained on my blending brush to just softly ink up the edges of the clouds and those too were adhered.

On Copic friendly cardstock I stamped my new image with Memento Ink in Rich Cocoa.  I coloured my image with Copic markers and highlighted a few points with a white gel pen.  Finally, I fussy cut the image.  I won't pretend the mouse's fine curly tail wasn't a challenge but it worked out perfectly thank goodness and I adhered it to the top of the grass edge.


I hope you will consider purchasing this stamp to treat yourself and in so doing contribute to a great cause.   Thank you and I hope to see you back here soon.  Happy crafting!

Nicky x


Saturday, September 14, 2019

Boo To You and Little Haunters - Hello Bluebird

Hello!  The Hello Bluebird Stamps new release is now available for purchase.  I made this infinity shaker card because I had it in my head for a few days and the only way to deal with that was to actually make it!


For my card I cut an A2 panel of Bristol Smooth cardstock.   I ink blended the background using Distress Oxides in Twisted Citron, Lucky Clover, Chipped Sapphire and Black Soot.  I distressed the background with water splashes that I blotted up and then also splattered on some white acrylic paint that I'd loosened with a little water.  I knew I was going to be adding the black strip of grass later and didn't want all the shaker contents to be lost behind the grass so I applied a strip of tape along the width, right below where the strip of grass would later be going.


I took a stamp storage pocket and slid the 5 1/2 inch length of my background panel into the 5 1/2 width of the storage pocket I pressed down and sealed where I'd applied the tape that will be hidden, thus sealing off the bottom 1/4 of the panel.  Now, you want and need for this to be a very snug fit in this pocket because obviously you will lose some shaker contents around the back of the panel if it isn't a close fit.  I trimmed the pocket down leaving about a 1 inch piece and then I added my shaker contents.  Once happy with the quantity and mix I firmly folded back the 1 inch portion of the pocket and adhered it very thoroughly on the reverse and then applied the whole shaker panel to a 110lb cardstock base.  You need a sturdy base for these infinity shakers!


I die cut the Boo To You die from black cardstock and adhered it to the front of the pocket and from the same cardstock I die cut the Grassy Knoll edge and this was also adhered (and you'll note it covers the tape inside that prevented the shaker contents from disappearing behind.

On Bristol Smooth cardstock I stamped my Little Haunters characters using Archival Ink in black.  I watercolour painted them using Kuretake Zigs in Orange, Flesh Colour, Natural Gray, Marine Green, Light Gray and Beige.  Also used were two Tombow ABTs in 912 and 723. 

Points were highlighted with a white gel pen, they were die cut backed with tape and also applied to the scene.


Finally I found a perfectly sized speech bubble from Photo Stack and stamped the sentiment.  This was applied with a little piece of dimensional tape behind it.

Have you made an infinity shaker card before?  Perhaps this will encourage you to do so - couldn't be more fun either for you or the recipient and actually significantly easier to make than a regular shaker card.

Happy crafting!

Nicky x


Wednesday, May 8, 2019

Lunar Animals Infinity Shaker - Mama Elephant

It's been a little while since I made one of my infinity shaker cards but when I saw the Big Happy Birthday Die by Mama Elephant that I'd probably be making a few of them.  I love a bold sentiment like this and I decided to go back and show Lunar Animals some love!


For my card I cut an A2 panel of Bristol Smooth cardstock.  I ink blended it using Festive Berries Distress Ink making it slightly darker at the top and fading it gradually towards the bottom.  I then laid over a starry stencil I have (you could use anything you like and through that I applied white pigment ink.  I removed the stencil and once dry I die cut my panel using the die from Mama Elephant's Cloud 9.


I then took a stamp storage pocket  and slid the 5 1/2 inch length of my background panel into the 5 1/2 width of the storage pocket.  Now, you want and need for this to be a very snug fit but obviously you don't want the panel to bend.  Take your time and ease it in carefully all the way to the bottom of the pocket.  If it is not very snug you will lose some shaker contents around the back of the panel.


I then flex the storage pocket open, slightly bending the panel so that I can accurately pour in my shaker contents.  I keep adding and checking my quantities until I have the right look and quantity.  You can use anything you like including micro beads seed beads, sequins and other shaker fillers.  Once I'm happy I then lay the unit flat on the my craft table and firmly wrap the other 50% of the storage pocket around the back of the panel ... doubling it back on itself and I stick it down with generous amounts of my Scotch Tape Runner tape.  I then adhere the pocket to my A2 card base.  I recommend 110lb cardstock because the base has to support some weight.

All of the rest of decoration of this card is on top of the storage pocket.  I die cut the sentiment twice, sticking one layer to the next and then I adhered that to the front and the Lunar Animals were stamped with Ranger Archival Ink in Potting Soil on Bristol Smooth.  They were watercolour painted using the following Kuretake Zigs, Yellow, Orange, Light Pink, Light Carmine, Carmine Red, Light Gray, Mid Gray, Dark Gray, Beige, Oatmeal and Brown.  They were die cut and also applied after adding their little party hats.  Points were highlighted with a white gel pen and with that, another card is complete!


I think this card would be loved for kids and big kids alike!  The contents move about freely and make a satisfying noise - using seed beads as part of the mix particularly helps with this and they help to move the sequin mix around.

See you next time!

Nicky x

Monday, September 24, 2018

Merry Merry - Avery Elle - Infinity Shaker

Hi everyone, today I'm sharing an 'infinity' shaker card I made using 'Merry Merry' which is a stamp set from the most recent release.


I took a panel of Bristol Smooth cardstock.  I stamped and heat embossed the sentiments in white then ink blended in Spun Sugar and Cracked Pistachio Distress Inks.   I applied a few sequins and other glittering embellishments with glue and once dry  I slid this panel into a stamp storage pocket, easing it down all the way to the very end.  I then put together a blend of sequins, stars, micro beads ... you name it and poured those into the pocket making sure that they only go on top of the decorative panel and not behind.  Once satisfied with the blend and the quantity I firmly wrapped the rest of the storage pocket around the back of the panel and stuck it down really well and then stuck the whole thing to a sturdy card base of 110lb cardstock which such a weighty card needs.


I'm in love with this moose from 'Polar Peekaboo Pals' and so I stamped it onto more Bristol Smooth using Ranger Archival Ink in Potting Soil.   I die cut the image and I watercolour painted it using Kuretake Zigs and highlighted a few points with a Uniball Signo White gel pen and stuck it onto the lower right of the front panel.


Such a fun and interactive card style for any time of the year.  I hope you like it!

I will see you again soon, thanks for stopping by to read today.

Nicky x

Products Used:-

Peekaboo Polar Pals
Merry Merry


Saturday, July 28, 2018

Frosty Friends Infinity Shaker - Hello Bluebird Stamps

I recently posted a card on Instagram that caused a bit of a stir and many were asking how it was made.  I promised a new infinity shaker card very soon and here it is, this time I've used Frosty Friends by Hello Bluebird Stamps


Now, I've never seen one of these made, I just came up with the idea by happy accident and for me it works well.  There are probably other methods but I reckon mine has to be the easiest!  The good news is that this is so simple many of you will kick yourselves that you didn't figure it out .... certainly a lot of face palming I reckon!!!!  Keep reading to discover my method.


For my card I cut an A2 panel of Bristol Smooth cardstock.   I stamped and heat embossed the snowfall background created from the Sprinkles Background Stamp.  I then ink blended using Distress Ink in Tumbled Glass, fading it away to nothing at the bottom.  I then took a stamp storage pocket  and slid the 5 1/2 inch length of my background panel into the 5 1/2 width of the storage pocket.  Now, you want and need for this to be a very snug fit but obviously you don't want the panel to bend.  Take your time and ease it in carefully all the way to the bottom of the pocket.  If it is not very snug you will lose some shaker contents around the back of the panel.


I then flex the storage pocket open, slightly bending the panel so that I can accurately pour in my shaker contents.  I keep adding and checking my quantities until I have the right look I'm going for and the right quantity.  You can use anything you like including micro beads seed beads, sequins and other shaker fillers.  I'm always very careful to only get the shaker contents on top of the decorative panel and not behind.   Once I'm happy I then lay the unit flat on the my craft table and firmly wrap the other 50% of the storage pocket around the back of the panel ... doubling it back on itself and I stick it down with generous amounts of my Scotch Tape Runner tape.  I then adhere the pocket to my A2 card base.  I recommend 110lb cardstock because the base has to support some weight.


To finish my card I stamped out my images from Frosty Friends onto Bristol Smooth cardstock.   I die cut and then watercolour painted them all using my Kuretake Zigs and then highlighted some points with my Uni-ball Signo White gel pen.  I simply adhered them to the plastic pocket front using more tape, creating the scene I had in my mind!

So that my friends is how I make my infinity shaker cards.  They are quick and easy and sure to please the lucky recipient.  I welcome your questions and comments and I would love to see your projects on Instagram so be sure to tag me so I can see what you made!

Until the next time then ......

Nicky x