Showing posts with label Hello Bluebird. Show all posts

Monday, March 17, 2025

Hello Bluebird Stamps - Baby Card


I thought I'd share this baby card with my followers which I made for personal use and was created using Hello Bluebird Stamps products.  Unfortunately this Sweet Dreams stamp set is now sold out and discontinued, only the coordinating die is available in their blowout sale.  You can find the products here.

I started with a white A2 panel of cardstock which I ink blended using Cerulean ink by The Stamp Market and I die cut using Hello Bluebird's 'Starry Sky Die' which is in stock!  I glued this panel to a sparkling white panel of cardstock and then to the card base.


I stamped the images from Sweet Dreams in black ink and coloured with the following Copic marker combinations:-

Fox - E37, E35, E33, E11, E01, C3, C1, C00
Koala - T5, T3, T1, T0
Lion - E79, E84, Y28, Y26, YR20, E000
Clouds - B91, C0, C00
Blush - R22, R21, R00

I highlighted with a white gel pen and glazed their noses in black then die cut using the companion dies.  Each animal was glued to a cloud and then backed with foam tape and applied to the background.


To complete the project, I stamped the sentiments and applied those with more foam tape and then I grabbed a frame die from my stash and die cut the simple white frame and applied with dimensional tape which nicely finished off this sweet scene.

Thank you so much for visiting my blog today, I'll be back soon with something brand new.


Monday, September 9, 2024

Waffle Flower - Postage Collage Christmas Stencil


Hey everyone!  Lovely to see you here on my blog where I have a new Waffle Flower card all ready for the the Christmas season.  To create this card I used the following products:-

Holly and Pine Die (Hello Bluebird Stamps)
Joy to All (Lawn Fawn)

I created 2 x A2 panels of Princess Pink cardstock (My Favorite Things).  I glued one directly to my card base.  I created incrementally small panels of green and then white cardstock and glued those to the pink panel.  I set this to one side.


The next step was to grab that second panel of Princess Pink cardstock and to work through the numbered stencils from Postage Collage Christmas and ink blend through them.  Here's a list of the Distress Oxide Ink colours used:-

Picked Raspberry
Festive Berries
Pine Needles
Rustic Wilderness
Tea Dye
Vintage Photo
Scattered Straw

On a few small points I actually used a glitter gel pen through the stencil such as patterns on the baubles and designs on the reindeer .... a little bit of essential Christmas sparkle!  This panel was then die cut using the Postage Collage Die.

I then came in with a white gel pen and highlighted and dotted in some snow where needed and then I used stamp images from the Postage Collage Stamp Set and added all the fun elements such as stamp values and air mail.  I like these elements to look a little distressed .... a little like something that has spent several days travelling around the world and I'm always sure to have some images over the edges and such because it looks so much more authentic.

The panel was backed with pieces of dimensional foam tape and I left a channel where the organza ribbon would be tied around.


To complete the card I tied around the piece of bright red organza ribbon and secured the panel to all of the others.  I then die cut and ink blended the sprigs of fir using Hello Bluebird's Holly and Pine Die.  I tucked the fronds where I wanted them and glued in place just at the base of each stem.   I randomly dotted on some glue and then sprinkled glitter over the fronds .... messy .... but so worth it!

Last but not least, I found the perfect sized sentiment from a Lawn Fawn stamp set (listed above) and stamped it on the little sentiment strip which is included in the Postage Collage Die set.  The was added with more foam tape so that it floats above the fir sprigs and ribbon.

Card complete!

I will be back here on my blog with something brand new on Wednesday so I hope to see you then.


Sunday, July 28, 2024

Hello Bluebird Stamps - July Kits


If you'd like to learn how I made this card using products from Hello Bluebird's July Kits, please use THIS LINK to visit their blog where I've a full write-up.  Thank you!


Saturday, March 18, 2023

Hello Bluebird Stamps - Spring Challenge


Hi everyone!  Just a super quick blogpost today to share my inspiration card for the newest design challenge by Hello Bluebird Stamps.

If you're reading this, I encourage you to visit the Hello Bluebird blog today to see lots of design team inspiration and to read the challenge rules.   A randomly selected winner will receive a $50 gift certificate to the Hello Bluebird shop.

This is an Instagram only challenge and you must use the #hellobluebirdspringchallenge hashtag so that your post/entry can be found.  You can make a spring themed card, or use the colours from the mood board above to enter or as I have done, I've combined the two.

My card today was created using the:-

Nesting Circle Die
Little Painters Stamps and Dies
Grass Knoll Die


Tuesday, February 7, 2023


Join me on the Hello Bluebird blog today where I have all the details for this sweet winter themed thank you card featuring Coffee Friends.  Click THIS LINK to go directly to the post.  Thank you.


Tuesday, November 1, 2022

Hello Bluebird Stamps - Merry Carolers


I have a new card for Hello Bluebird Stamps today featuring the brand new stamp set called Merry Carolers which formed part of their recent Holiday Release.  This card uses the following products:-

Merry Carolers Stamps
Merry Carolers Dies
Snowy Countryside Square Scene Die

I die cut the Scene Die from white cardstock and ink blended the sky and snow edges then put it back together again adhering it to a large gray panel of cardstock for a finished card size of 5 3/4 inches.  I glittered the snow edges with Stickles.


I stamped and coloured the images from Merry Carolers using Copic markers - too many to list however if you really need to know a combination please just comment below and I'll happily respond.

The images were die cut using the coordinating dies and backed with foam tape and applied.  Points were highlighted withe a white gel pen and the sentiment stamped and also applied with foam tape.


Sunday, July 3, 2022

Hello Bluebird Stamps - Carried Away Shaker Card

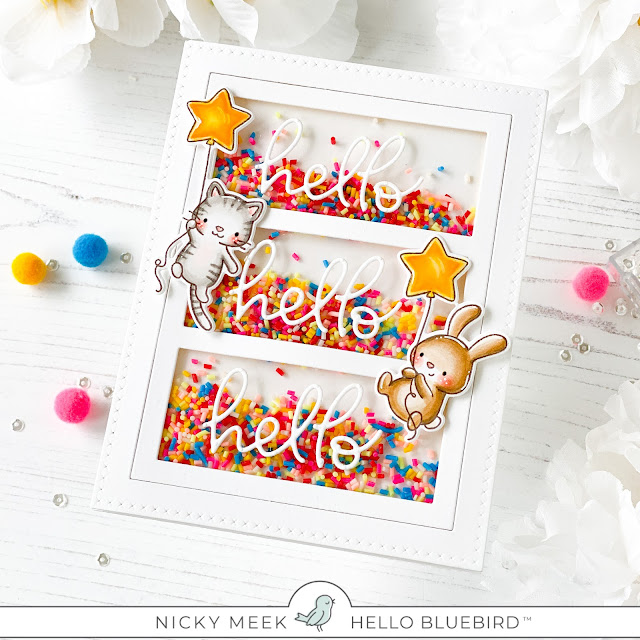
Just stopping by my own blog briefly today to tell you that you can find me over on Hello Bluebird's blog with this very summery and fun sprinkles filled shaker card.   Click HERE to go directly to my blogpost to learn how it came together.  Thank you!


Saturday, July 2, 2022

Hello Bluebird Stamps - July Summer Challenge

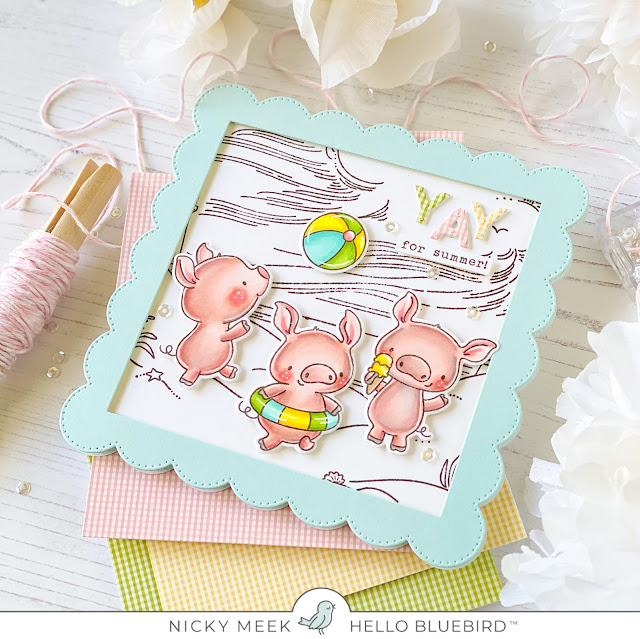
I would love it if you would take a moment to visit the Hello Bluebird blog today where there is a brand new challenge starting that I hope you will enter for a chance to win a $50 gift certificate.   The lucky winner is randomly selected and is not based on your skill level, so you literally have nothing to lose.   All details for entering can be found within the Hello Bluebird blog post and you will also see several other inspiration cards from the Design Team along with mine.   What is different this time is that you can enter the challenge as a color challenge entry or enter as a summer beach theme entry or as in the case with my card, you can use both theme and colors!   Keep scrolling to see and read about my card .....


My card was made using:-


I started by stamping the background stamp image.   Once in a while I like to leave these background stamps completely  uncoloured like an uncoloured page in a colouring book but I layer on some colourful  focal points.   This is a great look if you are intimidated by those big backgrounds too!

So, I applied the background image to my card base and then I die cut the Rainbow Square Die using some pretty pale blue cardstock and applied this popped up on foam tape.


I adhered some mini gingham cardstock to some small pieces of sticky foam sheets and die cut the letters YAY, I peeled off the backing and adhered them in the top right hand corner and underneath I used part of a sentiment included in the Beach Babes stamp set, stamping it to a strip of cardstock and adhering with more foam tape.

I then stamped out the piggies I'd be using from Beach Babes and coloured them with the following Copic markers:-

Pigs - R21, R20, R00, R000, W3, W2, W1
Blush - R22, R21, R20, R00
Greens - YG25, YG13, YG03
Blues - BG32, BG11, BG0000
Yellows -  Y15, Y06

Points were highlighted with a white gel pen and then the images were die cut using the coordinating dies, backed with foam tape and applied.

To finish I just added a few sparkling clear sequins.   Don't forget to visit the Hello Bluebird blog!


Tuesday, May 3, 2022

Hello Bluebird Color Challenge 2

Did you hear about the new Color Challenge from Hello Bluebird Stamps?   The challenge started May 1st  and closes at 11.59pm MST on May 15th.  The randomly selected winner will be announced on May 16th.  I do hope you join in.   You can find all the challenge rules and details on the Hello Bluebird Instagram or Blog.   Find below the color board you're working with and my second of two inspiration cards, you can find the other one here on my blog by scrolling down.


This simple CAS card demonstrates that  you can enter the challenge with quick card and maybe produce several entries to increase your chance of winning.

I created an A2 white panel and a second panel which was cut down smaller.   I masked a line on the smaller panel and above it I blended 'sand' using Fossilized Amber Distress Oxide Ink and a little Squeezed Lemonade and then I used Peacock Feathers for the sky.

I carefully removed the mask and stamped the sentiment from Beach Play, backed the panel with white craft foam and adhered it to the A2 panel and in turn to the card base.


I stamped the image from Beach Play and coloured it with the following Copic markers:-


Peach Reds - R05, R22, R21
Green - G02, G12
Gold Yellow - Y17, Y15, Y13
Bear - E42, E41, E40, E0000
Skunk - W5, W4, W3, W0, W00
Blushed Cheeks - R21, R20, R00

I die cut the image with coordinating dies backed it with dimensional foam tape and applied it.

Three tiny sparkling clear sequins completed this clean and simple scene.


I really appreciate you stopping by my blog today and wish you lots of luck and hope YOU are the lucky random winner!  Happy crafting!


Saturday, April 23, 2022

Hello Bluebird Stamps - Word Buddies Woodland

I have a new card today for Hello Bluebird Stamps that features their darling Word Buddies Woodland stamp set and the High Rise Tree Scene Die.


To start the card I first created an A2 panel of cardstock and ink blended the sky using a cloud stencil from my crafty stash.   I stamped the sentiment which is from the Spring Gatherings stamp set and then applied the panel to my card base.

I die cut the High Rise Tree Scene Die and ink blended it with Distress Oxide Inks and applied it to the scene with dimensional foam tape.  I then used the Grassy Knoll die to create two strips of grass which I ink blended and applied behind and in front of the base of the tree.


I stamped the images from Word Buddies Woodland and coloured them with Copic markers.   Here are the colours I've used:-

Squirrels - T7, T6, T5, T3, T1
Bunnies - E41, E0000
Raccoon - W7, W5, W4, W2, W0
Bear - E87, E44, E43, E42, E41

I also stamped and coloured the Mole from the Bloom and Grow stamp set.

T4, T3, T2, T1

Images were die cut using the coordinating dies and then adhered to the scene.   Many Hello Bluebird stamp sets have little flower images and so I coloured some up and applied blossoms to the tree and tucked them behind the ears of a couple of the cute critters.   Card complete!


I really appreciate you coming by my blog today and I'll be back soon with a new project to share with you.


Sunday, April 17, 2022

Hello Bluebird Stamps - Pig Day

Hello!  I just wanted to let you know here that you can find me over on the Hello Bluebird blog with all the details on this cute card.


See you over there hopefully!


Friday, April 1, 2022

Hello Bluebird Stamps - Color Challenge

Hi!   Very excited today because Hello Bluebird Stamps are going to be offering monthly design challenges on Instagram going forwards and the first one drops today!    This challenge is a Color Challenge and you'll see the graphic and my inspiration card below with a brief write up on how it was made.


This challenge closes on April 17th and the random winner will be announced on Instagram on April 18th.   The winner will receive a $50 gift certificate to the Hello Bluebird Stamps shop.

To qualify to win you must post your card on Instagram and use the #hellobluebirdcolorchallenge1 so that Hello Bluebird can find your submission.  Your card must be NEW and must ONLY USE genuine Hello Bluebird products.   The Challenge is open to all worldwide with no limits on the number of entries.


Products used in this card:-

Rain or Shine stamp set
In the Meadow background stamp
Gallery Frame #7 die
Grassy Knoll die
Rainbow Script stamp set


Copic colours used:-

Yellows - Y23, Y06, Y02, Y000, Y0000
Mauves - BV01, BV00, BV000
Pinks - RV02, RV00, RV000
Greens - G00, G000, G0000
Bear - E42, E41, E40, E0000
Bunny - E42, E41, E40, E0000


Thank you for visiting my blog today - I really hope you will enter the challenge.   If you have any questions please leave a comment below and I promise to respond.

Nicky


Monday, February 14, 2022

Hello Bluebird Stamps - Maverick

Thanks for coming to read my blog today where I have this new card using some old favourites from Hello Bluebird Stamps.


My card uses patterned papers for the two pink designs and I used the Partly Cloudy die for the cover plate which I die cut with white cardstock, glued this die cut to the pink background and inserted the gingham cloud.

I used Shaded Lilac Distress Oxide ink to ink blend some of the negative cuts from Partly Cloudy and an additional cloud from Maverick.   I stamped the word 'Hello' on the one cloud that I planned to put at the bottom right.  These clouds were attached with a single layer of foam tape.


I stamped the larger sentiment to a strip and applied that with foam tape and then I stamped my images from Maverick with Memento Ink in Rich Cocoa and coloured the images with Copic markers.    Here are my colours.

Plane - BV23, BV20, BV13, BV02 BV01, BV00, W5, W4, W3, W2, W1, W0
Puppy Pilot - E44, E43, E42, E0000, R20, R00
Birds - E43, E42, E41, E0000, YR07, R20, R00

Images were die cut using the coordinating dies and depending on where I was placing them they were applied with either a single or a double layer of foam tape ...... I do love some serious dimension!


I attached some sparkling clear sequins for the finishing touch and the card was complete!

Happy crafting!


Friday, July 23, 2021

Hello Bluebird Stamps - Pig Out

Hello friends!   You can find me over on the Hello Bluebird blog today with this card featuring their Pig Out stamp set and they are set against a background created using part of the Farmland Scenic Background stamp.


I hope you will join me over there and read the full tutorial and view other images.

Thank you!


Monday, November 2, 2020

Glad Tidings - Hello Bluebird Stamps

Hi, I have another new card today for the Hello Bluebird Stamps release.  This card features the new stamp set called Glad Tidings with sentiments from the new Joy & Peace set.


The card started with me ink blending the background panel using Distress Inks in Tumbled Glass, Chipped Sapphire and Black Soot.   I then splashed a lot of white acrylic paint for the snow.  When it was dry I dotted in metallic gel pen and glued on four point stars so there is lots of fun twinkle when it is handled.

This was applied to the card base and set aside.


On Copic friendly paper I stamped the angel image from Glad Tidings using Memento Ink in Rich Cocoa.   I coloured it delicately with Copic markers and fussy cut the image and applied it to the scene.

I framed out the scene with a white die cut of the Gallery Frame #2 die that was backed with dimensional foam tape.


Finally I turned to the Joy & Peace stamp set which is sentiment heavy and so useful.   I stamped the longer sentiment with Memento Ink in Fog to a card strip and applied with foam tape and the LOVE was stamped with Versamark Ink and heat embossed in pale blue, a process I repeated in my Misti to build it up nice and thick and dimensional.  This too was applied with foam tape and with that the card was complete.

Happy crafting!


Sunday, November 1, 2020

Holiday Office Party - Hello Bluebird Stamps

I'm back with a new card for the Hello Bluebird Stamps brand new release going live 7pm MST November 2nd.   This card uses 'Holiday Office Party' and obviously since they are critters, then the office is in the winter woods.   Read on for the how-to!


To create this card I first ink blended a slimline panel using Distress Oxide in Speckled Egg.  I then splattered  white acrylic paint into the background for snow.  After this was dried I adhered it to a white card base and then began to layer.  First of all I took the Winter Wood Overlay Die.  This is for A2 cards however I die cut it twice and trimmed it down and glued this to the blended background.


I then die cut a white slimline panel using the Ocean Waves Scene die (horizontal).   I kept just the frame and the two lowest 'wave's which for me is snowy ground.   I used a little residual Speckled Egg on my blending tool to edge those two snowy ground pieces and then I adhered the frame to the background and the other pieces within it.

On Copic friendly paper my images were stamped using Memento Ink in Rich Cocoa.   The cute critters (there are two others included in the set) were coloured with Copic markers, points were highlighted with a white gel pen and I fussy cut each image carefully.


I backed the images with foam tape and applied to the scene, their bright colours really popping against the cool background.

Finally I stamped my sentiments from the set using Cobalt coloured ink by The Stamp Market.  These strips were also applied with foam tape to keep up the dimensional look. Card complete!

Hope you're excited for this super gorgeous release.  Happy crafting!