Showing posts with label pretty pink posh. Show all posts

Monday, June 16, 2025

Pretty Pink Posh - Beach Fun!


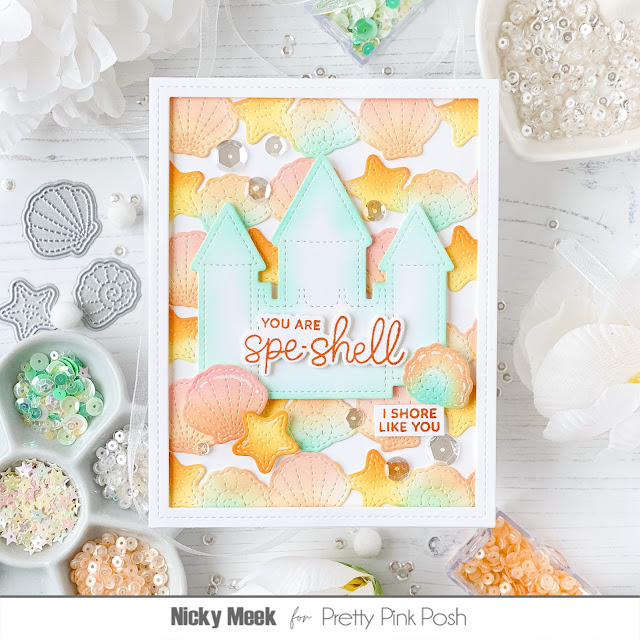
Hello there and thanks for joining me on my blog today for my final card for Pretty Pink Posh's June release.  My card today features the new Beach Fun stamp sets which of course has coordinating dies.

I started by taking a panel of white cardstock and I used masking tape and Distress Oxide Inks in Salvaged Patin (sky), Salty Ocean (water) and Tea Dye (sand) to create a subtle beach appearance.


I glued this background to  my card base and then I found a white die cut frame in my stash that was left over from another project but which in this application, creates a simple focal point.  I glued it in place.

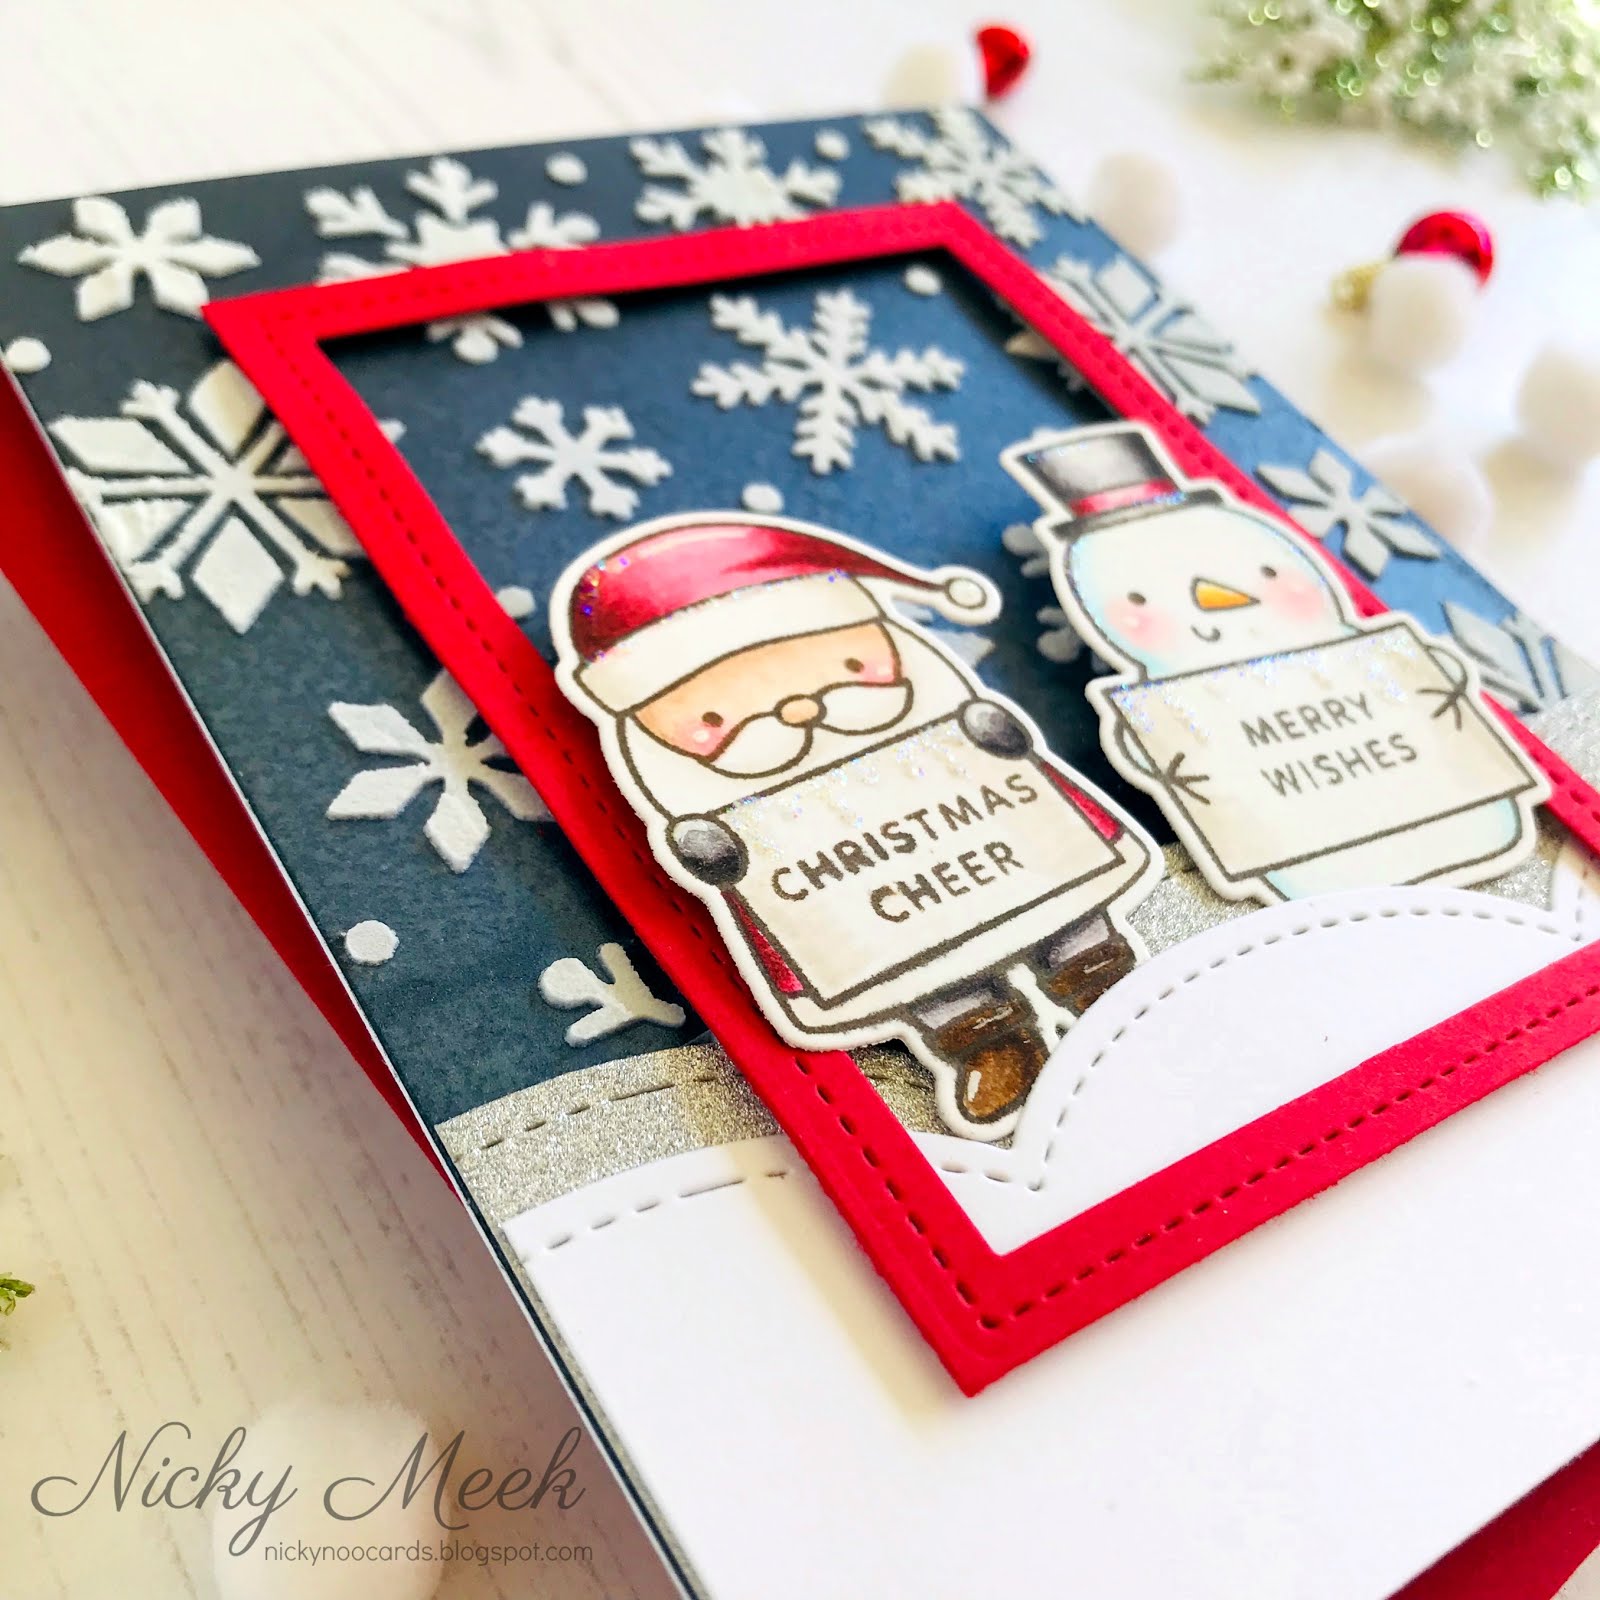
I stamped some of the images from 'Beach Fun' in black ink and I coloured with Copic markers:-

Red - R39, R29, R2, R24, R05
Blue - B24, B23, B32, B21
White - C3, C1, C0, C00

I highlighted with a white gel pen and backed each element with foam tape and applied to the background.


I finished the card simply with the addition of a few sparkling clear sequins and I stamped and applied the sentiment.

Many thanks for coming over to read about this card.  Happy crafting friends!


Thursday, June 12, 2025

Pretty Pink Posh - Seashell Border


Welcome to my blog and a new card for Pretty Pink Posh that uses products from their fun June release.  In creating this card I have used the following products:-


I took a panel of white cardstock and over this I glued die cuts created using the new Seashell Border Die and which I had ink blended using, Tea Dye, Saltwater Taffy, Salvaged Patine, Scattered Straw and Spiced Marmalade Distress Oxide Inks.


I framed out the pretty background with a white die cut frame that was created using a die from my stash. This was applied with foam tape.

I next die cut white cardstock using one of the dies from the Sandcastle Shaker Die and I ink blended with Salvaged Patina to give it it's minty colour and I applied with foam tape.

Around the sandcastle I added shells and a starfish from the Seashell Border Die which along with the borders has individual dies too.  I adhered these in place with foam tape.


To finish the card I stamped the sentiments from the Seashells stamp set, I die cut the main sentiment and both were applied with more foam tape.

A few sparkling clear sequins in different sizes completed this cheerful beachy card.

Thanks for stopping by today!


Tuesday, June 10, 2025

Pretty Pink Posh - Seashell Shaker Card


Hello!  Welcome to my blog where I'm sharing the details for this card which I'm featuring on Pretty Pink Posh's Instagram Hop today.  I have used the following products:-

Seashells Stamp Set (sentiment & die)

To kick things off I took a white panel of cardstock and I used to nesting rectangles dies from my stash to create the 2 part frame.  I used the same dies with mint cardstock to create the skinny mint border.  I glued the two part frame to the card base and then with the main panel I used the Shell Background Stencil to ink blend the design.  I used Salty Ocean, Salvaged Patina and Cracked Pistachio Distress Oxide Inks to do this and I used a lighter touch as worked towards to the top right hand corner.


I used the Seashell Shaker die to create the shaker unit.  I ink blended the background die cut with Cracked Pistachio and then I filled with it with the Beach Town Mix before sealing the formed shaker.  I glued this to the background at an angle.


I stamped and die cut the sentiment from the Seashells Stamp Set.  I applied this with foam tape to pop it up and then the simple finishing touch was the addition of a few sparkling clear sequins in different sizes.

Thanks for coming by - happy crafting!


Friday, June 6, 2025

Pretty Pink Posh - Sandcastle Shaker Card


Welcome to my blog and a new card for Pretty Pink Posh showcasing their brand new release which went live yesterday.  Today, my card uses the following new products:-

Beach Fun stamp set (sentiment only)

I took a panel of which cardstock and ink blended a soft sky using a very light touch with Peacock Feathers Distress Oxide Ink.  I glued this to  my cards base.  I then took a second panel of cardstock and I used the Shoreline Borders Die to create sand and water.  I ink blended with Tea Dye and Peacock Feathers and then glued to the background panel.  I added interest with gel pens.


Time to create the Sandcastle shaker using the new die.  I stacked the various die cuts and glued in stacks, finishing with acetate and one more die cut which I ink blended to match the sand.  I added strips of foam and filled with the new Summer Fun Shaker Beads before sealing it close with the acetate and the final frame on top.  I glued the shaker unit to the background.


I finished the card by stamping the sentiment in my Misti.

Thanks for stopping by!


Thursday, June 5, 2025

Pretty Pink Posh - Layered Coral Stencil Set


Hello friends, welcome to my blog and my first card for Pretty Pink Posh's brand new June release which is available for purchase starting today!  I have SIX cards to share with you over the next 10 days or so and so I encourage you to look out for them.

To make this card I've used the following products:-


I took a white panel of cardstock and I used the two part Layered Coral Stencil Set to create the background.  I used Distress Oxide Inks to achieve this and I used the following combinations:-

Spiced Marmalade, Dried Marigold
Salty Ocean, Chipped Sapphire
Twisted Citron, Bundled Sage, Rustic Wilderness
Shaded Lilac, Seedless Preserves
Picked Raspberry
Abandoned Coral, Dried Marigold


I took this panel and ran it through my Big Shot and used the Chevron Pierced Plate die to give it the zigzag design.  I die cut a frame using a die from my personal stash, I applied this popped up on dimensional foam tape.

Next step was to use the Stitched Coral Die to create the group of coral that I ink blended using colours listed above and which I applied to the lower corner popped up on foam tape to create more dimension.


I then tackled the Good Vibes sentiment.  I die cut both the shadow and the words from sturdy white cardstock.  I applied the shadow to the background with foam tape and I ink blended the words in a rainbow style.  I then glued the ink blended words to the shadow and I applied 'Glossy Accents' glue to the surface of the words to give it a dimensional shine.

A few sparkling clear sequins from Pretty Pink Posh completed this colourful card.


Friday, May 16, 2025

Pretty Pink Posh - New Release Instagram Hop - Day 5


Hello everyone!  As I'm sure you're already aware Pretty Pink Posh released gorgeous new products back on May 7th and I have been guest designing for them with several cards shared both here and on Instagram over the past several days.  You have probably navigated to my blog from Instagram today to learn more about my card but please find my post on Instagram today if you haven't already and hop along with the creators sharing their designs today and enter the giveaway.  You can find my Instagram HERE.

My card today features the following new release products:-


I used the Scallops Pierced Plate to die cut a white A2 panel of cardstock.  I glued this to my prepared card base.


I used the Notched Squares Die to create two frames which I ink blended super softly using Powder Blue ink by The Stamp Market.  The frames were backed with foam tape and applied to the background.

Next, I stamped images from Hummingbird Floral using Versamark Ink and I heat embossed in gold.  i then coloured the images using Copic markers in the following combinations:-

Hummingbirds - B12, B41, RV0000, C00, E40, W00
Pink Flowers - RV17, RV04, RV02, RV00
Leaves - YG45, YG41, YG61
Orange Flowers - YR09, YR07, YR04, Y38, Y19, Y15
Blue Flowers - B12, B41

I used the coordinating die to die-cut the images which I added to the background using a single or double layer of dimensional foam tape to create some changing dimension.


To complete the card I added stamped and gold heat embossed sentiment strip and then added a mixture of sparkling clear sequins and I highlighted one or two points with a white gel pen.

Card complete!  Thanks for stopping by and good luck with your entry in the giveaway on Instagram.


Wednesday, May 14, 2025

Pretty Pink Posh - Hummingbird Floral


Welcome to my blog and another card created for Pretty Pink Posh working with their lovely new release.  My card today features the following products:-

Hummingbird Floral
Hummingbird Floral Die
Layered Blooming Vines Stencil

I took a white A2 panel and used the stencil to create the pretty background.  Distress Oxide Inks used are Spun Sugar, Kitsch Flamingo, Cracked Pistachio, Mowed Lawn and Salvage Patina.

I adhered this panel my card base.


I frame out the panel in pink using a die from my stash and then I stamped the images and sentiments from Hummingbird Floral in black ink.  I coloured using the following Copic markers:-

Hummingbirds - BG15, BG34, BG32, YG41, G40, RV02, RV00, N1, R21
Blush - R22, R21, R00

I used the coordinating die to die-cut all images including the sentiment word 'note' and I adhered to the background with a double layer of foam tape so they are really 'flying' above the background.  With the sentiment I continued with the die cut scrap white cardstock so that I could create a stack with the stamped die cut on top.  These were adhered in place.


For the finishing touches I first used Nuvo Drops in a pale yellow to add dimension to the centre of each bloom and I added sparkling clear sequin accents at the end.

Thanks for stopping by!


Monday, May 12, 2025

Pretty Pink Posh - Floral Wreath Builder Die


Welcome to my blog and another card that I've created for Pretty Pink Posh that showcases products from their very pretty brand new release which is available for purchase.

Today my card uses the following products:-


This is a 5 x 5 inch square card.  I started with creating the pink card base.  I then used white cardstock and the Notched Squares Die to create a pair of notched panels.   One was glued inside the card base for an added surprise and to be written on.

The second die cut was glued to a mini gingham patterned panel from my stash which in turn was glued to a white panel panel.  This was all glued to the pink card base and set to one side.


Using the Floral Wreath Builder Die, I die cut all of the different elements used in my wreath.  The base of my wreath is comprised of two die-cuts from heavy weight vellum that I had first ink blended with a minty shade of ink.  The die set comes with a circle die.  I used this to reinforce the wreath so I glued one leafy vellum round to one circle, then I added another leafy round slightly offset and then the second circle was adhered.  

I teased the leaves to make them lovely and floaty and dimensional and then I added flowers, greenery and the bow which were die cut from pastel cardstock scraps in my stash.


To complete the card I stamped the sentiment from Friend Greetings, I felt this one fit within the wreath nicely.  I die cut using the coordinating die set and applied with a double layer of foam tape.

Last but not least, a few sparkling clear sequins were scattered and glued to the wreath.

Thanks for stopping by!


Friday, May 9, 2025

Pretty Pink Posh - NEW RELEASE - Hummingbird Floral


Welcome to my blog and my second of several cards for Pretty Pink Posh featuring products from their brand new and available for purchase new released.  My card today features the following new products:-


I took a panel of white cardstock slightly smaller than A2 and used the two part Layered Blooming Vines Stencil to create the background.  I used inks by The Stamp Market in Matcha, Cerulean and Lilac to achieve this.

I glued this panel to a nice and neutral 'greige' cardstock panel and this was all glued to my prepared card base.


Using black Memento Ink, I stamped the floral images from the Hummingbird Floral set.  I reached for my Copic colours and used V09, BV13, BV01, YG45 and G12 to colours the blooms in different ways.

Using the coordinating dies, I die-cut the images, backed them with dimensional foam tape and applied them to the background in a little posy.


To complete the card, I stamped the sentiment on a sentiment strip and adhered it with foam tape to the background all the while ensuring that I hid the bottom of the flower stems.

Lastly, I used some Sparkling Clear Confetti Mix to add that all important twinkle to the finished card.

Thanks for stopping by today, happy crafting!


Wednesday, May 7, 2025

Pretty Pink Posh - NEW RELEASE!


Today, Pretty Pink Posh has released a new collection featuring hummingbirds, teacups, florals, and more! This collection of products will take your paper crafts to new heights.  I am happy to be guest designing for this release and have several cards to share with you over the coming days.

My card today features the following new products:-


I took a muted pink cardstock from my stash and I used the Scallops Pierced Plate to die cut the pretty design.  I adhered this panel to my prepared card base.


I stamped the images from Tea Time with black ink and coloured the images using the following Copic marker combinations:-

Deep Pink - R05, R32, R000
Light Pink - R32, R00, R000
Green - G00, G000
Yellow - Y21, E51
White - C1, C0, C00

I used the coordinating Tea Time die to die-cut the images which I played around with to find a nice setting and when I was happy I began to adhere the elements with either a single or double layer of dimensional foam tape to really get some dimension going.


To complete this card I also stamped and die cut the sentiment, adding to the scene with foam tape and last but never least, I added some Sparkling Clear Sequins in a couple of different sizes.

Head on over to Pretty Pink Posh and check out these and many other beautiful products from today's new offerings.


Monday, May 5, 2025

Pretty Pink Posh - A Card for a Baby Girl


Hi!  Back on April 15th I shared a baby boy card using Pretty Pink Posh's Baby Basics Stamp Set together with their Baby Words Stencil and today I'm back with a somewhat similar baby girl version.

I took a panel of white cardstock and blended it with Shaded Lilac, Saltwater Taffy and Squeezed Lemonade Distress Oxide Inks.  I then layered over the Baby Words Stencil and  I used TCW's Light & Fluffy Embossing Paste through it.  I carefully removed the stencil and set it to one side to dry.


I used Eiffel Tower ink by MFT to stamp the Baby Basics images and then I coloured with the following Copic markers:-

Mauve - BV11, BV00, BV000, BV0000
Pink - RV52, RV10, RV0000
Beige - E31, E41, E40.

I shaded with C1, C0 and C00 to mute the colours and blend them out.

I used the coordinating dies to die cut the images.


I created two ovals in neighbouring sizes from my die stash.  The larger was cut from heavyweight vellum and the smaller from white cardstock.  I stamped the sentiment and then added the Copic coloured images using either one or two layers of dimensional foam tape.  I glued the white oval to the vellum and added the the whole thing to the card background.

I framed it out using a skinny frame from my die stash and added a few sparkling clear sequins for the finishing accents.


Tuesday, April 15, 2025

Pretty Pink Posh - Baby Basics


Hey everyone, welcome to my blog today where I'm sure a new baby card that I made recently using some of the amazing baby products produced by Pretty Pink Posh.  I have used their Baby Words Stencil and Baby Basics stamp set to create this project but you should check out all of their other baby products too, found HERE.

The card started with a white A2 panel which I ink blended softly with Salvaged Patina, Cracked Pistachio and Squeezed Lemonade Distress Oxide Inks.  I then layered the Baby Words Stencil over the  panel and I used TCW Light & Fluffy Modelling Paste through the stencil.  This stuff is amazing and gives great and fluffy dimension just as the name suggests!  I carefully removed the stencil and set the panel aside to dry.


Meanwhile I stamped the images from Baby Basics.  For the BABY letter blocks I stamped and heat embossed in white on to a pale blue cardstock  With the other images I stamped in a light blue ink and then Copic coloured with the following combinations:-

Pale Blue - B000, B0000, C1, C0, C00
Pink - RV10, RV0000, C1, C0, C00
Yellow - Y00, Y0000, C1, C0, C00

I also added BG11 to deepen the colour on the BABY blocks.

I used the coordinating Baby Basics Die to die cut the images which I then backed with foam tape and arranged on the now dry stencilled background.


I stamped the sentiment on a sentiment strip and added with foam tape and the final touches were to frame it out using a skinny frame from my stash and adhering the whole thing to a card base and then just a few sparkling clear sequins were glued in place.

Thank you so much for stopping by today, hope you enjoyed the card!


Thursday, October 17, 2019

Pretty Pink Posh Holiday Release Blog Hop


Hello and welcome to my blog, thank you for hopping along to see what is in store with this brand new release by Pretty Pink Posh.  The release is already in the shop!

There are FOUR $25 gift certificates up for grabs and all you have to do is simply ensure that you leave a comment after reading this blog post and before you click through to the next designer's blog!  Winners will be picked randomly and the comments must be left by 11.59PM PST on 10/22/19.  Find out if you are one of the lucky winners by going to the Pretty Pink Posh blog.

I have TWO cards for you today.  This first card features the brand new stamp set Holiday Signs which also comes with coordinating dies. The background was created using a new stencil called Snowflakes,


To make the card a panel of white cardstock was ink blended with Distress Oxide Inks in Chipped Sapphire and Black Soot.  I then sprayed the panel with Nuvo Mica Mist in Midnight Horizon to give it a pearlescent glimmer which is lovely when the card is handled.  Once fully dry I used the stencil and white embossing paste and thickly applied it for nice, dimensional fluffy flakes.  The stencil was removed, the panel was set aside to fully dry whilst I got on with something else.


From white and silver cardstock and using the Stitched Borders 4 die I cut once from each making the silver portion slightly 'taller' so that it would provide a glittery edge to the snow.  Each was adhered to the card base.  I also die cut a frame from red cardstock using the Storybook 6 die.  I trimmed it down so that it was a simple but bold frame.  Backed it with foam tape and applied it to the main panel.


On Strathmore Bristol Smooth cardstock I stamped my images from Holiday Signs using Ranger Archival Ink in Potting Soil.  I watercolour painted these images using Tombow ABTs in 451, 942, 969 and Kuretake Zigs in Natural Gray, Deep Red, Light Pink, Warm Gray 2, Bright Yellow and Flesh Colour.

Points were highlighted with a white gel pen and then they were die cut, backed with a double layer of foam tape and applied inside the frame.

The final touch was to grab my Stickles glitter in 'Crystal' and I glittered up some areas on the two characters and I even made dripping icicles along the tops of their signs which you can make out in the image below.


*****************************************************************************

My SECOND card for this release is a Happy New Year card that features the new Fireworks stencil for the background together with the new Happy New Year stamp set that also comes with coordinating dies.  Finally, the card uses the new Happy New Year Script die.


To make this card I used the Fireworks stencil to ink blend the colourful fireworks using Distress Oxides in Worn Lipstick, Twisted Citron, Fossilized Amber and Peacock Feathers.  The stencil was removed and the panel attached to a 110lb white cardstock base.


The elements I chose to work with from the Happy New Year stamp set were stamped with Versamark Ink onto Strathmore Bristol Smooth and heat embossed in silver.  They were watercolour painted with colours to go with the background, Tombow ABTs in 991, 723, 452.  Kuretake Zigs in Haze Blue, Beige and Light Gray.

These elements (including the embossed words) were backed with foam tape and applied to the scene.


The Happy New Year Script was die cut 4 times from white cardstock and once more from holographic cardstock.  Each was adhered to the next in a stack to that it would really pop off the card and then it was adhered in its entirety to the centre of the card panel.


To finish the card off I found a selection of sequins and shaker fillers to finish the celebratory scene.

I really appreciated you coming to read here today.  Don't forget to comment before hopping along to the next name on the list which you will find below.

Happy crafting!

Nicky x

Caly Person       
Thi Lam      
Melody Rupple       
Alix Davis        
Nicky Meek (you are here)
Dana Kirby    
Heather Hoffman      


Wednesday, June 12, 2019

Summer Surfboards - Pretty Pink Posh


Hello and thank you so much for joining us on this big Pretty Pink Posh hot summer release blog hop.   Before I share my card I want to remind you of what you've probably already read  -  there are 4 x $25 gift certificates up for grabs (two winners each day of our blog hop today and tomorrow). Winners will be picked randomly along the blog hop. Comments must be left by 11:59 PM PST on 6/17/2019. Winners will be announced on the Pretty Pink Posh blog.

For those of you who love Summer you are going to love the brand new Pretty Pink Posh summer release which became available to purchase May 10th.  Here, I'm sharing a card made with two of the new stamp sets by combining Summer Surfboards with the palm tree from Tropical Birds.


I masked off the edges of an A2 panel and then ink blended using Distress Oxides in Peacock Feathers and Fossilized Amber.  I then used a little Brushed Corduroy loosened with water to splash some texture on the sand portion and I used white acrylic paint loosened with water to spritz over both sand and sea.  The mask was carefully removed and the panel set to one side to fully dry.


On Strathmore Bristol Smooth I stamped my palm tree and surfboard images using Ranger Archival Ink in Potting Soil.  I watercolour painted the images using the following palette of Kuretake Zigs.  Beige, Mid Gray, May Green, Persian Green, Orange and Yellow.  Points were highlighted with a white gel pen and the images were die cut and backed with either a single or double layer of foam tape.


I adhered the images to the background panel.  I used a pale gold gel pen to dot in some twinkle into the sand.  I then used my embossing buddy to prepare the corner of the panel where my sentiment would go.  Next, I stamped the sentiments with Versamark Ink and heat embossed in white.


I adhered the decorative panel to a 110lb white cardstock base and then I used jewels from the brand new and gorgeous Citrus Mix by Pretty Pink Posh to embellish the card.  You can see the mix in the storage 'box' and sprinkled around the card in my images too!

Aloha everybody!

Nicky x