Showing posts with label ink blended. Show all posts

Monday, November 12, 2018

Three Hearts Die - Avery Elle

Hey there!   I'm sharing a card I've made using the lovely new and ever so useful 'Three Hearts Die' from Avery Elle's newest release.  This die will make your Valentine's cards incredibly easy!


For this card I called upon an old favourite stamp set Woodland Wonders.  I fancied this card as a love card from parent to younger child and so I imagined it like a children's book.

The card starts with a panel of white cardstock which I die cut using the Large Pierced Scallops Elle-ments die.  I then ink blended the edge softly using Distress Oxide Ink in Tumbled Glass.   I then die cut the Three Hearts Die.  I ink blended the negative heart cuts  with more of the Tumbled Glass and also with Cracked Pistachio and stamped a few tufts of grass from Woodland Wonders.


I stamped the sentiment 'LOVE you' in the top right hand corner using the new 'And Then' sentiment set then applied dimensional foam tape to the back of the panel and applied it to a Kraft cardstock base.  I applied adhesive to the back of each ink blended heart and recessed them carefully through the openings.  On Bristol Smooth cardstock I stamped the characters from Woodland Wonders, I then watercolour painted them then die cut and applied them with more dimensional foam tape.

To finish out this card I applied some toning sequins and then created a white paper writing insert inside the card (80lb weight) and stamped that with another sentiment from the 'And Then' sentiment set which reads:  You Make My Heart Happy.


I appreciate you stopping by to read about this card today, I hope you are a little inspired - happy crafting!

Nicky x

Thursday, November 8, 2018

Blog Hop - Peacock by Avery Elle


Hello everybody, I'm happy to be hopping along with my fellow design team friends for Avery Elle's new release.  I'm introducing Peacock a new mini stamp set that comes with a co-ordinating die.


For this card I took a panel of Bristol Smooth cardstock and I ink blended it to a soft ombré affect using Distress Oxide Ink in Worn Lipstick (seemed appropriate)!!!  I then splashed some water onto it and blotted it up a few seconds later to slightly distress the background.


I made sure the panel was good and dry by using my heat gun on it and then I thoroughly wiped it with my Embossing Buddy.  I randomly stamped my Peacock image using Versamark Ink to form a wallpaper pattern.  I then heat embossed in Antique Gold.  Further adding to the Valentine's Day theme I grabbed a trio of hearts from an older Avery Elle stamp set called 'Sending You' and I used them to stamp and heat emboss in some of the spaces.


The completed panel was then simply die cut to provide the faux stitched edge affect and then applied to the 110lb white cardstock base by Neenah.  Finally I stamped the sentiment on a strip of cardstock using Versamark Ink again and then heat embossed in Antique Gold also.  This was applied with some Scotch Foam Tape.

Thank you for stopping by my blog today, have fun hopping along to see all the new goodies from the rest of the Avery Elle Design Team.

Nicky x

Products Used:-
Peacock Stamp
Peacock Die

Avery Elle  
Caryn Davies
Heather Campbell
Yainea
Melania Deasy
Katie Gehring 
Amy Kolling 
Ashley Marcu
Elena Roussakis

Nicky Meek

To celebrate our Winter 2018 Release Blog Hop, Avery Elle is giving away a $25 Gift Certificate to one random winner.  To enter to win just comment on this post.  There is no purchase necessary and you must be 18 years of age or older to enter.  This giveaway is void where prohibited.  You can also do options 2, 3, 4, 5 or all 6 of the following to increase your chances of winning. You have until midnight Sunday, Novebmer 11th to enter.  The winner will be announced on the Avery Elle Blog on Monday, November 12th .  All products are available for purchase in the Avery Elle store right now.
To enter to win you can do 1, 2, 3, 4, 5 or all 6 of the following to increase your chances:


  1. Comment on any of the design team's posts and/or here on the Avery Elle Blog
  2. Follow us on Twitter and tweet the contest (we are @averyellestamps )
  3. Follow us on Facebook (we are www.facebook.com/AveryElle ) and share us with your friends - make sure they tell us you sent them.
  4. Follow us on Pinterest
  5. Become a blog follower through email (comment on the Avery Elle blog if you already follow us)
  6. Join our Flickr group (comment on the Avery Elle blog if you already belong)
Thanks for stopping by to take a peek. Have a great day!


Sunday, September 30, 2018

Meowy Woofmus - Mama Elephant

Hello Friends!

I'm back with a sweet card using an older but much loved stamp set from Mama Elephant called Meowy Woofmus, maybe some of you have this stamp set, although quite frankly, you could insert any of the Mama Elephant cuties into such a scene!


I started by taking an A2 panel of Bristol Smooth cardstock.  I ink blended it very softly with Distress Inks in Tattered Rose and Squeezed Lemonade.   I then hand applied the 'snow' affect using a Uniball Signo White gel pen.  Next, I die cut the panel using Framed Tags - Union Square and then die cut it one more time using Basic Rectangles - Creative Cuts.     At the top of the main panel I stamped the sentiment from Jingle Greetings using Versamark Ink and then heat embossed in gold.


I die cut the snowy 'hills', trimmed to size and applied them layered into the back of the opening in the panel.  I then lined up the negative cut with the background colour on it behind the opening, found the correct position for it on the card base and adhered it down.   Since the two 'hills' unlevelled things, I added strips of cardstock to match the depth of the hills around the upper part of the opening.  With that done I was then able to apply my Scotch dimensional foam tape and apply the panel to the base making sure to align it perfectly with the negative cut.

On more Bristol Smooth, I stamped my little characters with Ranger Archival Ink in Potting Soil.  I watercolour painted them with Kuretake Zigs and then die cut and applied them into the scene with their cheeks highlighted with a Uniball Signo White gel pen.


The final touch was the application of 3 mini wooden star embellishments.

Hope you enjoyed the card .... many more to come, be sure to sign up to my blog so you don't miss anything!

Nicky x

Monday, July 2, 2018

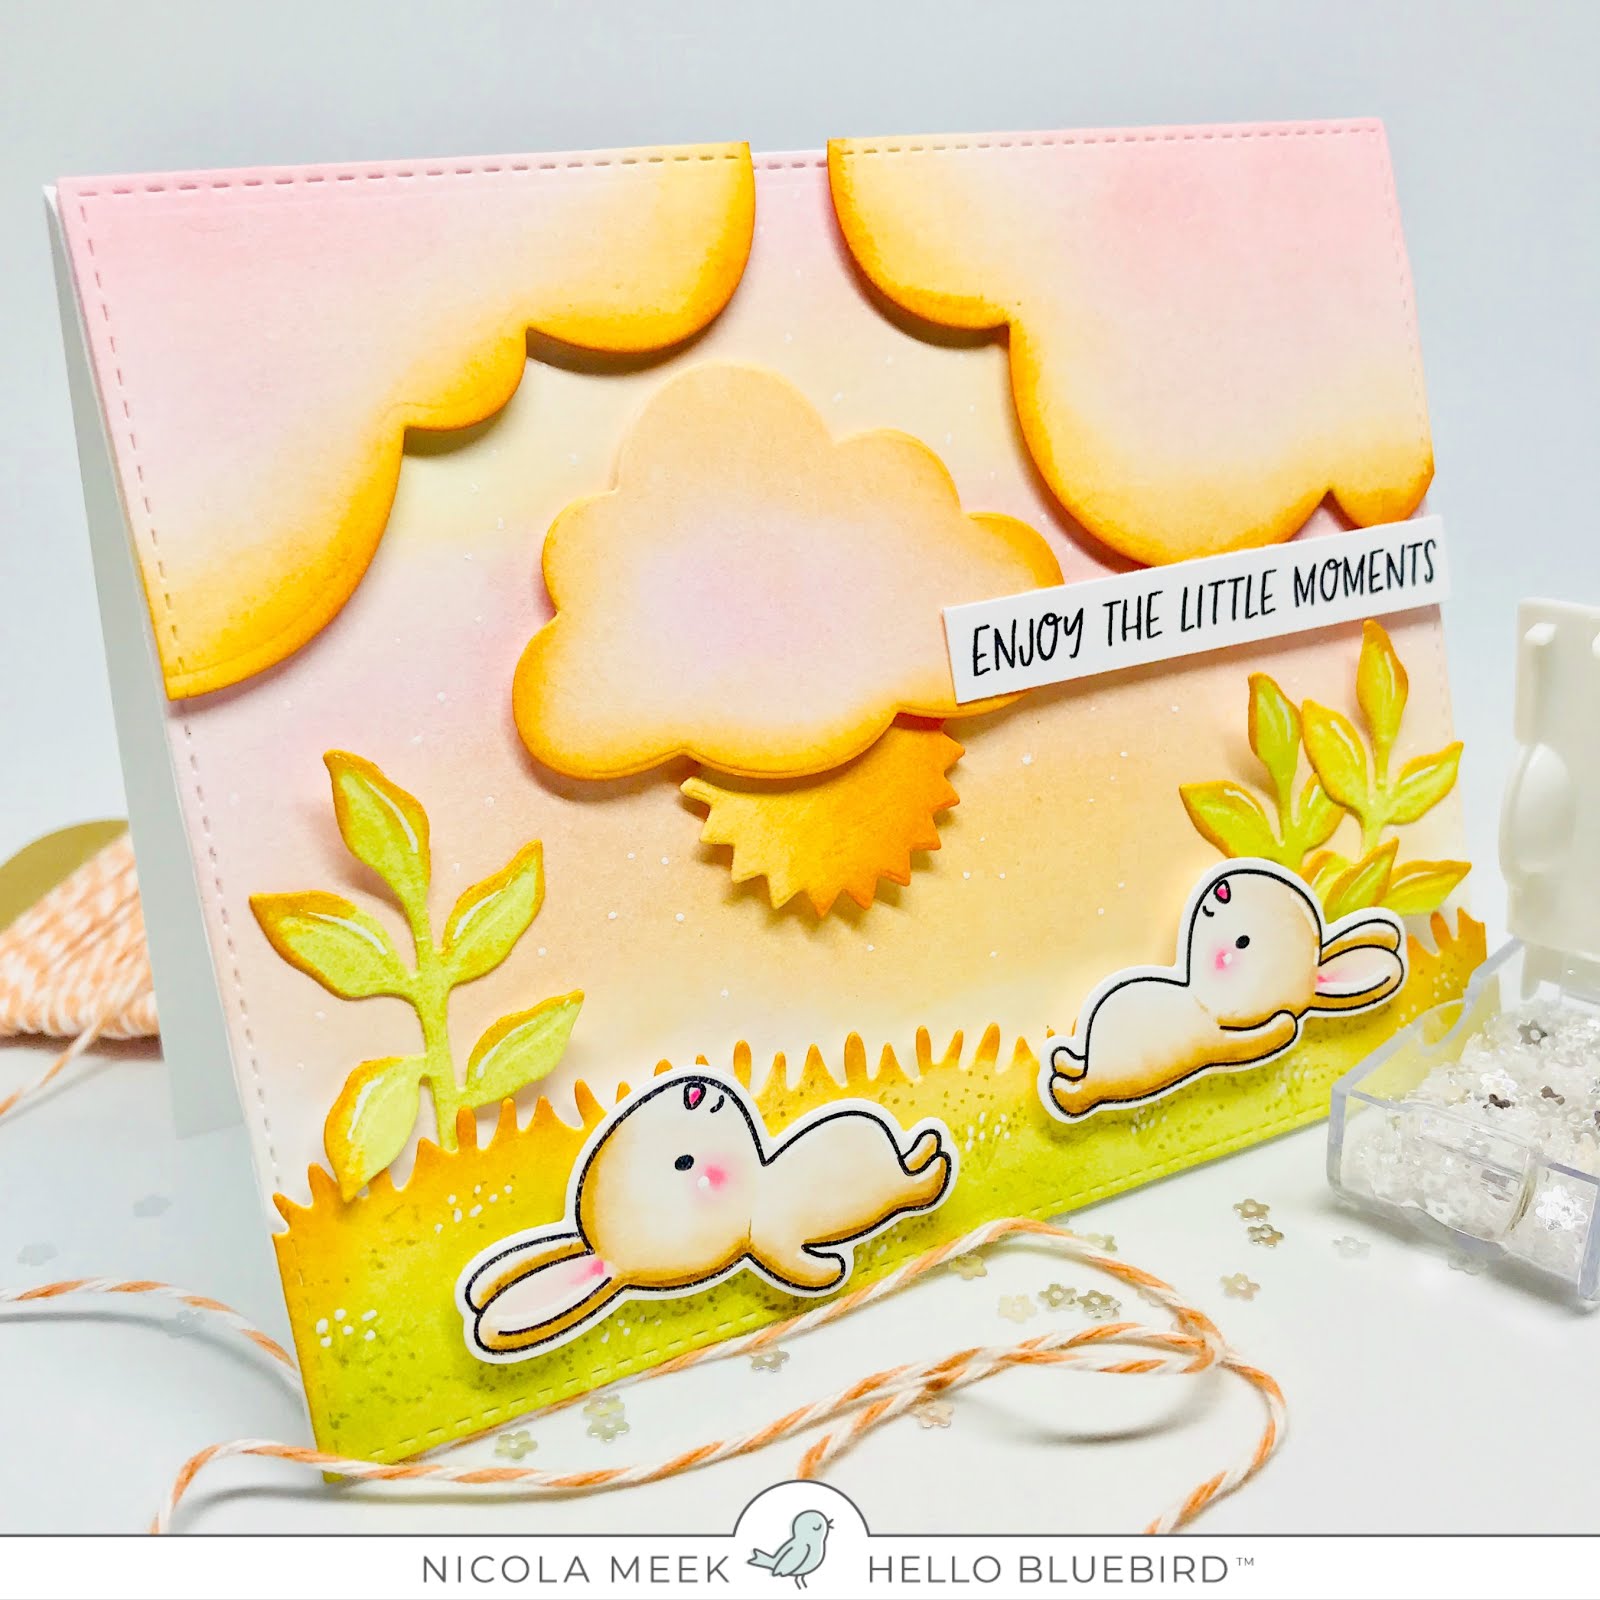
Sunset in McGregor's Garden!

Hello!

Today I'm sharing a card made with Hello Bluebird Stamps products.


For this card I took some Bristol Smooth cardstock.  I ink blended an A2 panel with Spun Sugar and Dried Marigold Distress Inks and applied it to the card base.  On more Bristol Smooth I die cut two of the clouds and grassy edge from the Grassy Knoll Die.  Then using Rainbow Sky Die I die cut the sun and the cloud seen in the centre.  Finally I die cut 3 stems of leaves from the Tropical Foliage Die.  These leaves are wonderful in this set since they also emboss - you'll love them!


All of these die cuts were ink blended with more of the Distress Inks in Spun Sugar and Dried Marigold and also Shabby Shutters at the bottom of the grass and for the leaves.  I used a Distress Ink pen to dot in some grassy texture, as well as a few subtle tufts of grass and then also some dots with a Uniball Signo white gel pen.  All of the components were applied to the panel with dimensional foam tape.


The adorable bunnies are from McGregor's Garden.  I hand stamped them on to more Bristol Smooth, they were die cut  and then watercolour painted using my Kuretake Zigs in Beige 072 and Light Pink 026 and these were applied with more foam tape.  Finally I stamped the sentiment using Ranger Archival Ink in Jet Black (this is also what I stamped the bunnies with) and I adhered it.

This card relies quite heavily on die cutting as opposed to lots of stamping and I hope you like this slightly different look.

Feel free to ask any questions in the comments section and I'll try to get back to you as soon as possible.  Thanks for stopping by!

Nicky x

Sunday, April 8, 2018

I Love you - Bee Friends

I recently shared this card across social media but since I'm fleshing out my blog and because it was a popular post I thought I'd quickly share my method here with you all.  The card uses Bee Friends from Pretty Pink Posh.


I love Bee Friends because who can resist a chubby and cheerful bumble bee?  They also are one of those mini stamp sets and very reasonably price and you can work them in with your floral cards etc.


The card started with Neenah 110lb solar white cardstock.  I then stencil ink-blended a honeycomb design that I have for the background.  I did this very softly and I used my Clarity Stencil Brushes for the job.  I think a cloud stencil or something similar would work equally well for a dreamy backdrop!  I then die-cut the panel with a stitched edge and applied it to the base with a layer of craft foam sandwiched in between which lifts it up and makes the card feel more substantial and since I sell most of my cards, it is important to me that they ship in good condition and this craft foam really helps.


I then die cut one of the 'Storybook' dies from Pretty Pink Posh, any of them would do or something similar to re-create this scene, they really help tie everything together!  It was applied popped up on dimensional foam tape to build depth.  I used one of the negative cuts to stamp the sentiment and I centred it and adhered it.  All of the bees and hearts were stamped in archival ink, they were watercolour painted using my Kuretake Zigs and then die cut and adhered them with more foam tape.  I highlighted some points on the bees  using my Uni-ball Signo white pen (wouldn't be without it)!  The scene was finished out with toning jewel embellishments also by Pretty Pink Posh.


If there is one thing that is very important to me in card making it is that my projects are highly dimensional and as you can see here this card is no exception, it is a look I really love!

Thanks for stopping by the blog today and if you have any questions or comments please don't hesitate to contact me because I'd love to help you out!

Nicky x