Showing posts with label Friendship. Show all posts

Monday, May 11, 2026

Hello Bluebird Stamps - Friendship Blooms


Hello, welcome to my blog and a card for Hello Bluebird Stamps featuring brand new products from their Rain or Shine release which is now shipping.  This card showcases the Friendship Blooms stamp set and the companion die, together with the new Ribbon Frame Die.

I kicked things off by creating panels of white and patterned cardstock which I die cut using faux stitched edge dies from my crafting stash.  I adhered these prepared panels to the card base and set it to one side.

Using the Ribbon Frame Die, I die cut 3 times from sturdy white cardstock.  This gave me three frames which I glued together in a stack and I ink blended one of the internal die cuts with Tumbled Glass and Mowed Lawn Distress Oxide Inks.  I splashed the blended area with white acrylic paint loosened with a drop or two of water and then glued the frame in place and then this focal panel within the frame.


I stamped the images I wanted to use from Friendship Blooms and I coloured with Copic markers:-

Mice - E43, E42, E31, W1, W0
Blushes and Ears - R22, R20, R00
Flower Petals - R22, R21, R20, R00
Leaves - YG13, YG11
Yellow - Y19, Y21
Shadow - W1

Points were highlighted with a white gel pen then the images were die cut and applied to the background with dimensional foam tape.


I created the bow which forms part of the Ribbon Frame Die set, by die cutting toning Apricot cardstock twice for each part and then I glued them together, then to the top of the white oval frame.

I selected and stamped the sentiment on a sentiment strip and applied with foam tape and finally a few sparkling clear sequins adorn the top left and bottom right off the scene.

I will be back soon with new inspiration for the Rain or Shine release!


Friday, February 27, 2026

Simon Says Stamp 'Beautiful Moments' Release Blog Hop


It is always a great time when Simon Says Stamp has a new release and yesterday they launched their 'Beautiful Moments' release which is full to the brim with beautiful, adorable and useful products.  Please use THIS LINK to take you to everything that is new.

This is the first of TWO blog hops celebrating the release, the next one is tomorrow at 8am Eastern so be sure to join that one too!  Today, if you comment below this post before leaving, you will be in the running to win a $25 coupon, make sure to comment on every stop along the blog hop to increase your chances.  The winner will be announced on March 4th on the Simon Says Stamp blog and it will be explained to you then just what you have to do to redeem your prize.  Good luck!

Please keep scrolling to the end of my blogpost to find the blog hop order list, thank you.


Turning now to the card I have made for this blog hop, this is a project for a beautiful friend who needs to know how much you adore them.  I have used the following products:-

Beautiful Friend die
Friend Like You

Taking an A2 white panel of cardstock, I ink blended a focal point using Tumbled Glass Distress Oxide Ink and glued it to my already prepared card base.


I stamped the Friend Like You images using Memento Ink in Rich Cocoa and coloured with Copic markers.  I die cut and backed the images with foam tape and adhered to the ink blended background.

Sentiment time!  I die cut the Beautiful Friend words from white and pink cardstock.  I assembled the two parts and backed it with more foam tape and applied to the background also.  Below it I tucked a smaller sentiment from the Friend Like You stamp set.


To complete this card I simply dotted some specks into the sky.

I hope you like my card, thanks for stopping off on the hop and don't forget to leave your comment below in order to be entered to win a $25 coupon.


Thursday, June 26, 2025

Purple Onion Designs - NEW RELEASE!


Welcome to my blog and a quick look at my first card of several that showcases the brand new release from Purple Onion Designs which is available now!  I shall be working with the stamps from Chilliezgraphy by Pei in her 'Tofu & Friends Spring Is In The Air Stamp Collection'.  The sweet image I'm working with today is called 'Picnic Buddies'.


I ink blended a little grass and sky on a panel of cardstock that I had die cut.  I added a frame around it and backed both pieces with white craft foam and applied to a cream panel then this was applied to an A2 white card base.

I stamped the Picnic Buddies stamp set and coloured with Copic markers.  Pig - YR02, E95, E01, E00, W3, W1.  White Goose - E50, E41, E40, YR07, YR04, Y38.  Blue - B24, B32.  I added a design to the tea set and shadowed white areas with C5, C3, C1, C00.


I backed the image with foam tape and applied to the background and I stamped a sentiment strip with a sentiment from Friendly Warm Wishes Sentiment Set.  This too was added with foam tape.

I completed the card with some highlighting on the image with a white gel pen and the addition of some tiny sparkling clearly sequins

Thank you so much for stopping by.  Check out the new release, there is MUCH to love from different illustrators.  I'll be back very soon with something new for this release.


Monday, October 12, 2020

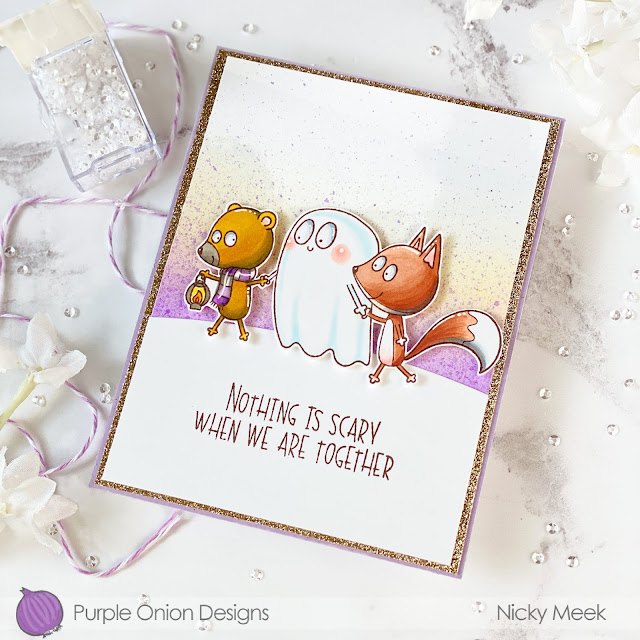
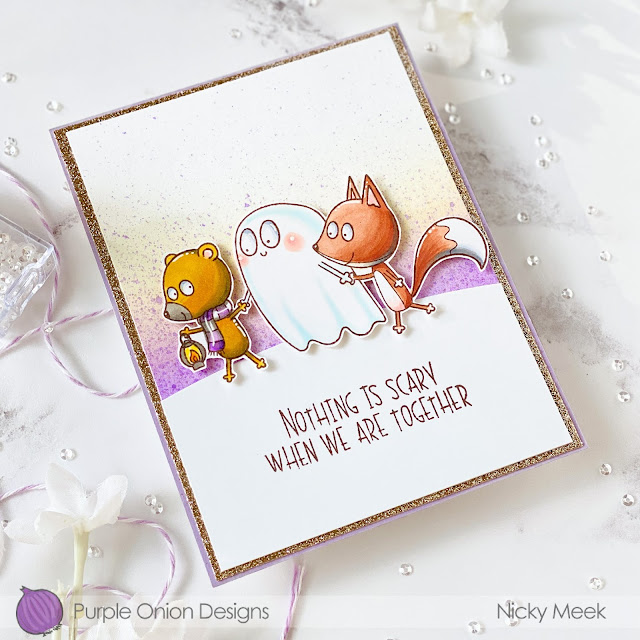
Halloween Friends - Winslow and Rusty - Julian Charlton for Purple Onion Designs

 Today's card is another for the release of illustrator Julian Charlton's Winslow and Rusty designs for Purple Onion Designs.  This stamp is called Halloween Friends.


This is a simple Halloween/friendship card that started with an ink blended A2 panel of cardstock that I also splattered pretty well with an old toothbrush but I did it with the gradient of the colouring so that where the colouring was the deepest I did more splatter,  decreasing to very little at the top.   This panel was trimmed and was layered over a panel of cardstock which in turn was adhered to a purple panel that I attached to the card base.   I die cut the snowy ground (winter came early!) and stamped the sentiment and attached it to the top panel.


Winslow and Rusty are a lot of fun to colour and for this release I've always used the same colour palette using Copic markers for consistency.  The fox character was E11, E33 and E35 and I used W3 and W5 to add shadow.   The bear character uses Y26, YR24 and YR27 and again W3 and W5 for shadow.  Please see my last card featuring these cuties and I've got another Autumnal one coming in a few days.  Images were stamped with Memento Ink in Rich Cocoa.


I fussy cut the image, it was a pretty easy one to do and backed it with foam tape and applied it.   The final touch was to add white gel pen to highlight certain points and I used a metallic gel pen to dot in a little glimmer around them so that you get a little added interest when the card is handled ... I love movement!

This stamp can be reimagined so many times with so many backgrounds and I absolutely adore it.

Happy crafting! 


Saturday, October 10, 2020

Campfire Friends - Winslow and Rusty by Julian Charlton - Purple Onion Designs

Hi!  Today I'm revealing part of a new release by the illustrator Julian Charlton for Purple Onion Designs featuring the adorable Winslow and Rusty.  This is a one layer Copic coloured card and the stamp is called Campfire Friends.


It wasn't necessary to do any masking since the image with the duo huddled around their campfire nicely tucks underneath the separate tree image.   With those two images stamped on to Copic friendly cardstock I was quickly turning my attention to a couple of hours of colouring.


I started my colouring with the campfire and then the halo of blue surrounding it and rising up and up into the deeper BG shades.   I then turned my attention to producing a halo affect under the campfire using increasingly darker YG shades.   The tree trunk is E31, E55 and E27.


The fox (Rusty) was E11, E33 and E35 and I used W3 and W5 to add shadow.   The bear (Winslow) uses Y26, YR24 and YR27 and again W3 and W5 for shadow.  I finished by colouring the other tiny elements which give some nice pop of colour here and there and then I stamped the sentiment.  Finishing touch was to grab my white gel pen and draw in 4 point stars and some more dotted ones and add some highlighting to the characters and ground beneath them.

Finally I just die cut the scene to provide the simple faux stitched edge and with that the card was finished.

I will be back very soon with another card using these cuties in a different setting but the whole release is Fall and Halloween themed.

Happy crafting!