Showing posts with label Kuretake Zigs. Show all posts

Thursday, May 2, 2019

Peek-A-Boo Pets - Avery Elle

Hi!  I'm sharing a cute card featuring the Peek-A-Boo Pets stamp set and coordinating Elle-ments by Avery Elle and it also features a sentiment from their So Kind stamp set.  The frame you see here is the Arrow Mat Die from Avery Elle.


To make this card I first ink blended two panels of cardstock so that they matched (loosely speaking).  I used Distress Oxide in Shaded Lilac and Distress Ink in Tattered Rose and I splashed on some water and blotted it up then splattered a little Shaded Lilac using a wet paintbrush.   One panel was attached to my card base and the second was die cut using the Arrow Mat Die.


I applied the frame to the card base backed with dimensional foam tape to lift it up.  The negative cut was stamped with the sentiment from So Kind using Versamark Ink and heat embossed in white.  Since I used my Misti and this is a chunky sentiment I like the ultra embossed look and so I re-stamped and heat embossed so it stood out even more - you could even go back a third time!   I adhered this panel back through the space in the frame.

On Bristol Smooth cardstock I stamped my images from Peek-A-Boo Pets using Ranger Archival Ink in Potting Soil.  I watercolour painted the cuties using Kuretake Zigs in the following colours - Oatmeal 064,  Mid Gray 096, Flesh Color 071, Light Pink 026, Pale Pink 028, Warm Gray(2) 900 and finally Pale Orange 054.  Each image was then die cut.  They were applied to the scene with more dimensional foam tape.


Points on the pets were highlighted using a Uni-ball Signo White gel pen and I found some toning jewel embellishments to dot around the scene which I adhered with Ranger Multi Medium Matte.

Hope you like the card and I look forward to seeing you next time with something new!

Nicky x

Monday, April 8, 2019

Market Stand - Avery Elle

Hello!

I'm sharing a card made for Avery Elle today that uses Market Stand which comes with coordinating Elle-ments.  I also used the new Ray Die for my background panel and the cow from Peek-A-Boo Pets.  All items are from the most recent release.


To know me is to know that I can't pass up an opportunity for a good pun or to insert a little humour.  To that end and with some simple masking, I converted the word LEMONADE to LEMOONADE.

To make this card I ink blended a panel of cardstock using Distress Oxides in Squeezed Lemonade and Cracked Pistachio.  I then squished a little of the Cracked Pistachio onto my craft mat, spritzed some water next to it and using an old toothbrush I mixed the solution picking it up on the brush and then splattered it onto the panel softly blending some of the green into the yellow.  I then die cut the panel using the Ray die and I put the pieces back together on the reverse with tape and secured it to my card base.


I stamped my images from Market Stand and Peek-A-Boo Pets onto Bristol Smooth cardstock.  It was at this stage that I masked and stamped the word LEMONADE to become LEMOONADE and I then die cut the images using the Elle-ments that coordinate and then I watercolour painted everything using Kuretake Zigs in the following colours - Yellow 050, Haze Blue 302, Green Shadow 049, Pale Yellow 055, Beige 072, Light Pink 026, Warm Gray(2) 900 and Mid Gray 096.  You can decorate the front of your farm stand however you like but I chose to draw in a whitewashed boards look!  All images were adhered to the scene using dimensional foam tape.


My final touch was to add a few sparkling clear sequins as a final embellishment.  This summery card could be used for all number of occasions especially with a sentiment stamped inside.

Thank you for stopping by my blog today to read about the card, see you next time!

Nicky x

Sunday, March 10, 2019

Fly With Me - Mama Elephant

Hi!  Few things are more fun than creating new baby cards!  My extended family have just welcomed a new baby girl and so I set about making the perfect card!  I have used Fly With Me by Mama Elephant.


Finished card dimensions are 3 1/2" wide x 8 1/2".  From an A4 sheet of cardstock cut the length at 7 inches then score and fold in half (4 bar).  My panel is cut from the remainder of the A4 sheet and the dimensions are 3.2" x 8.2".  Worth writing those down for future reference!  For your coordinating envelopes just Google 'slimline envelopes' (this search yields the best results).  Sometimes they are referred to as 'invitation envelopes' and also '#9 envelopes' or even 'Size 9 envelopes'.


I masked off the edges of my panel and ink blended it using a Clarity Stencil Brush in Spun Sugar Distress Ink.  I then squished a little Worn Lipstick Distress Ink onto my acrylic block, spritzed a tiny bit of water next to it, mixed it and then splashed it randomly.  I removed the masking and stamped the sentiment from New Family using Ranger Archival Ink in Potting Soil and set the panel to one side.


On Bristol Smooth cardstock I stamped my images again using Ranger Archival Ink in Potting Soil.  I watercolour my images using Kuretake Zigs and Tombows.  The following colours were used.  Elephants are Zig in Blue Gray.  Balloons are Zig in Light Pink and Tombow  020.   Blushing cheeks, ears and hair bows also done with Zig in Light Pink.

I die cut the images and applied them to the scene using dimensional foam tape then attached the panel to the card base with a piece of white craft foam behind it to lift it up.


The final embellishing touches were to add Nuvo Crystal Drops.  The colours I've used are Simply White,  Buttermilk and Bubblegum Blush.

I was so happy with how this card turned out and I love the height of it which helped me play with having the elephants floating through the sky.

I'm fighting the urge to make this card all over again in a baby boy theme - it may very well happen!

Happy crafting everybody!

Nicky x


Monday, February 18, 2019

Bee Friends - Pretty Pink Posh

Hello, I have a new card today for Pretty Pink Posh and I'm enjoying what might be my favourite stamp set of theirs - Bee Friends.


This congratulations card features a panel that was Ink blended with Distress Oxide Ink in Spun Sugar then embossed with a subtle hexagon design - perfect for Bumble Bees here!  Using Ranger Archival Ink in Potting Soil I stamped the two sentiments which are from Everyday Greetings.


Using Bristol Smooth cardstock I stamped my Bee Friends characters.  I fussy cut the images then watercolour painted them using the following colours - Tombow ABT 020 and Kuretake Zigs in Haze Blue 302, Light Pink 026 and Gray 090.  Areas were highlighted with a Uni-ball Signo white gel pen.

I decided on a layout for them on my background panel and then stamped their 'buzzy trails' using more Potting Soil ink.  Next, I applied the bees with dimensional foam tape.


At this point I was enjoying the sweet simplicity of this card and decided no other embellishment was necessary other than to glitter up the bee's wings using Stickles in 'Crystal'.

The decorative panel was applied to a shimmering white cardstock card base.  Card complete!

Happy crafting everybody and I'll see you next time!

Nicky x


Saturday, February 9, 2019

A Birdie Birthday Card for Purple Onion Designs

Hi!  As promised I'm back with another design using Stacey Yacula Studio for Purple Onion Designs.  This time I have a birdie themed birthday card full of yummy girly goodness!


I used Ranger Archival Ink in Potting Soil to stamp a panel of white cardstock using the Wood Grain Background Stamp.  I then die cut the panel with a simple faux stitched edge to make it look finished and used some circular dies I have to die cut the three openings.  I like that these circular dies also leave a faux stitched edge so that it matches the border!


I ink blended a panel of cardstock using Distress Oxide Ink in Spun Sugar and using dimensional foam tape, I backed my decorative panel and applied it to the ink blended panel which in turn was adhered to the card base.

On Bristol Smooth cardstock I stamped all of the images by Stacey Yacula Studio from her Sweet Occasions, Garden Blooms and A Sweet Summer ranges with the floral sprig from A Beautiful Day and I watercolour painted them using a limited colour palette of Kuretake Zigs in the following colours - Yellow Green 053, Oatmeal 064, Mid Gray 096, Pale Orange 054 and S. Almond Pink 200.

I then set about fussy cutting all that I had stamped and painted (yes the branches were fiddly but I survived the ordeal) and applied them with foam tape into the scene.


Time to finish out this 'tweet' card.  I stamped the sentiment with Versamark Ink and heat embossed in white, backed the strip with foam tape and applied.  I then delved into my embellishment trays and added a little pink twinkle with these jewels by Pretty Pink Posh.

This card screams Spring no? I think a lot of us right now are craving a dose of Spring!

I thank you for coming by to read and I hope you make something pretty today.

Nicky x

Thursday, February 7, 2019

Avery Elle New Release Blog Hop!


Hello and thank you for joining in the fun on the Avery Elle Blog Hop as we celebrate a big new release!  My card today features the brand new Easter Chicks mini stamp set that comes with coordinating dies.


My card consists of a panel of Bristol Smooth cardstock that was repeatedly and randomly stamped using all the elements from the mini stamp set using Distress Ink in Antique Linen.  I watercolour painted all images using the following ...... Kuretake Zigs in Oatmeal 064, Pale Orange 054, Pale Pink 028, Pale Yellow 055, Green Shadow 049 and Haze Blue 302.  Butterflies were done with an Arteza Real Brush Pen in Ice Blue/A173 and cheeks were blushed with a Tombow ABT in  shade 761.  Phew!  That was quite the list today!!

I love to do background cards, especially when images are as cute as these are.  Had I just stamped the three chicks once each I'd have been left craving to colour them more and more - so doing what I did was pure self indulgence!


I have this lovely cardstock in my collection that is right on the cusp of where pale pink meets pale beige and I love the subtlety of it and I thought it worked well with the egg shells.  I framed my panel using the Reverse Pinked Die because the inner edge echoed the broken eggshell image and applied it with dimensional foam tape.  I then applied all of that to a panel with a basic stitched edge in the same pink cardstock since I knew the stitched edge would still show.

From the negative cut I had remaining after die cutting the frame I made the Wonky Bow.  Now ..... the United States Postal Service will iron this bow flat for the bargain price of a 1st class stamp!!!!  Ultimately that is not the look I'm going for, I want my bow 'pert' and to help keep its shape I use some extra thick dimensional foam tape, I cut a piece that will disappear inside the loops of the bow.  I adhered the bottom down but I leave the peel away paper on the top side, that way, when the card is compressed 'ironed' it will bounce back up (I do hope that is clearer than mud)?  The good news is that I know what I mean and that's half the battle, much like making yourself laugh!


I adhered the bow into position and then using one final piece of the pink cardstock I stamped the sentiment from the Easter Chicks stamp set with Versamark Ink and heat embossed with silver embossing powder!  This was adhered with a double layer of foam tape.  I attached the entire decorative panel to a 110lb white cardstock base which is super sturdy and hey presto, card complete!

Thanks for stopping by to read today, hope you enjoyed my card, please keep scrolling to find the next designer on the the hop to click on.

Nicky x

Avery Elle  
Caryn Davies
Heather Campbell
Yainea
Melania Deasy
Katie Gehring 
Amy Kolling 
Ashley Marcu
Elena Roussakis
Nicky Meek (you are here)
Betsy Veldman

To celebrate our Spring 2019 Release Blog Hop, Avery Elle is giving away a $25 Gift Certificate to one random winner.  To enter to win just comment on this post.  There is no purchase necessary and you must be 18 years of age or older to enter.  This giveaway is void where prohibited.  You can also do options 2, 3, 4, 5 or all 6 of the following to increase your chances of winning. You have until midnight Sunday, February 10th to enter.  The winner will be announced on the Avery Elle Blog on Monday, February 11th .  All products are available for purchase in the Avery Elle store right now.  You can check them all out here
To enter to win you can do 1, 2, 3, 4, 5 or all 6 of the following to increase your chances:


  1. Comment on any of the design team's posts and/or here on the Avery Elle Blog
  2. Follow us on Twitter and tweet the contest (we are @averyellestamps )
  3. Follow us on Facebook (we are www.facebook.com/AveryElle ) and share us with your friends - make sure they tell us you sent them.
  4. Follow us on Pinterest
  5. Become a blog follower through email (comment on the Avery Elle blog if you already follow us)
  6. Follow us on Instagram (we are https://www.instagram.com/averyellestamps/).

Thanks for stopping by to take a peek. Have a great day!


Monday, February 4, 2019

Cupcake Critters - Pretty Pink Posh

Hi!  I couldn't wait to use the Cupcake Critters from Pretty Pink Posh again and re-imagine them in different colours!


For this card I ink blended a panel of Bristol Smooth cardstock using Distress Ink in Peacock Feathers and Squeezed Lemonade.   I stamped the sentiment in Ranger Archival Ink in Potting Soil and adhered the panel to my card base.

From another panel of white cardstock I die cut the stitched frame using the Stitched Notes Die, I backed the frame with dimensional foam tape and applied it to the panel.


All of the Cake Critters images were stamped on to Bristol Smooth cardstock again using the Archival Ink in Potting Soil.  The images were die cut then watercolour painted using the following - Tombow ABT in 020 and Kuretake Zigs in Beige 072, Mid Gray 096, Light Pink 026, Bright Yellow 052, Orange 070, Light Blue 036 and Cobalt Blue 031.  Points were highlighted with a Uni-ball Signo white gel pen and I then decided on a layout and adhered them with more foam tape.


I kept my finishing embellishments to a minimum and added a little Stickles sparkle in gold around the candles and used a few gold jewel embellishments by Pretty Pink Posh to accent.

I appreciate you stopping by to read about this project, see you next time!

Nicky x


Friday, February 1, 2019

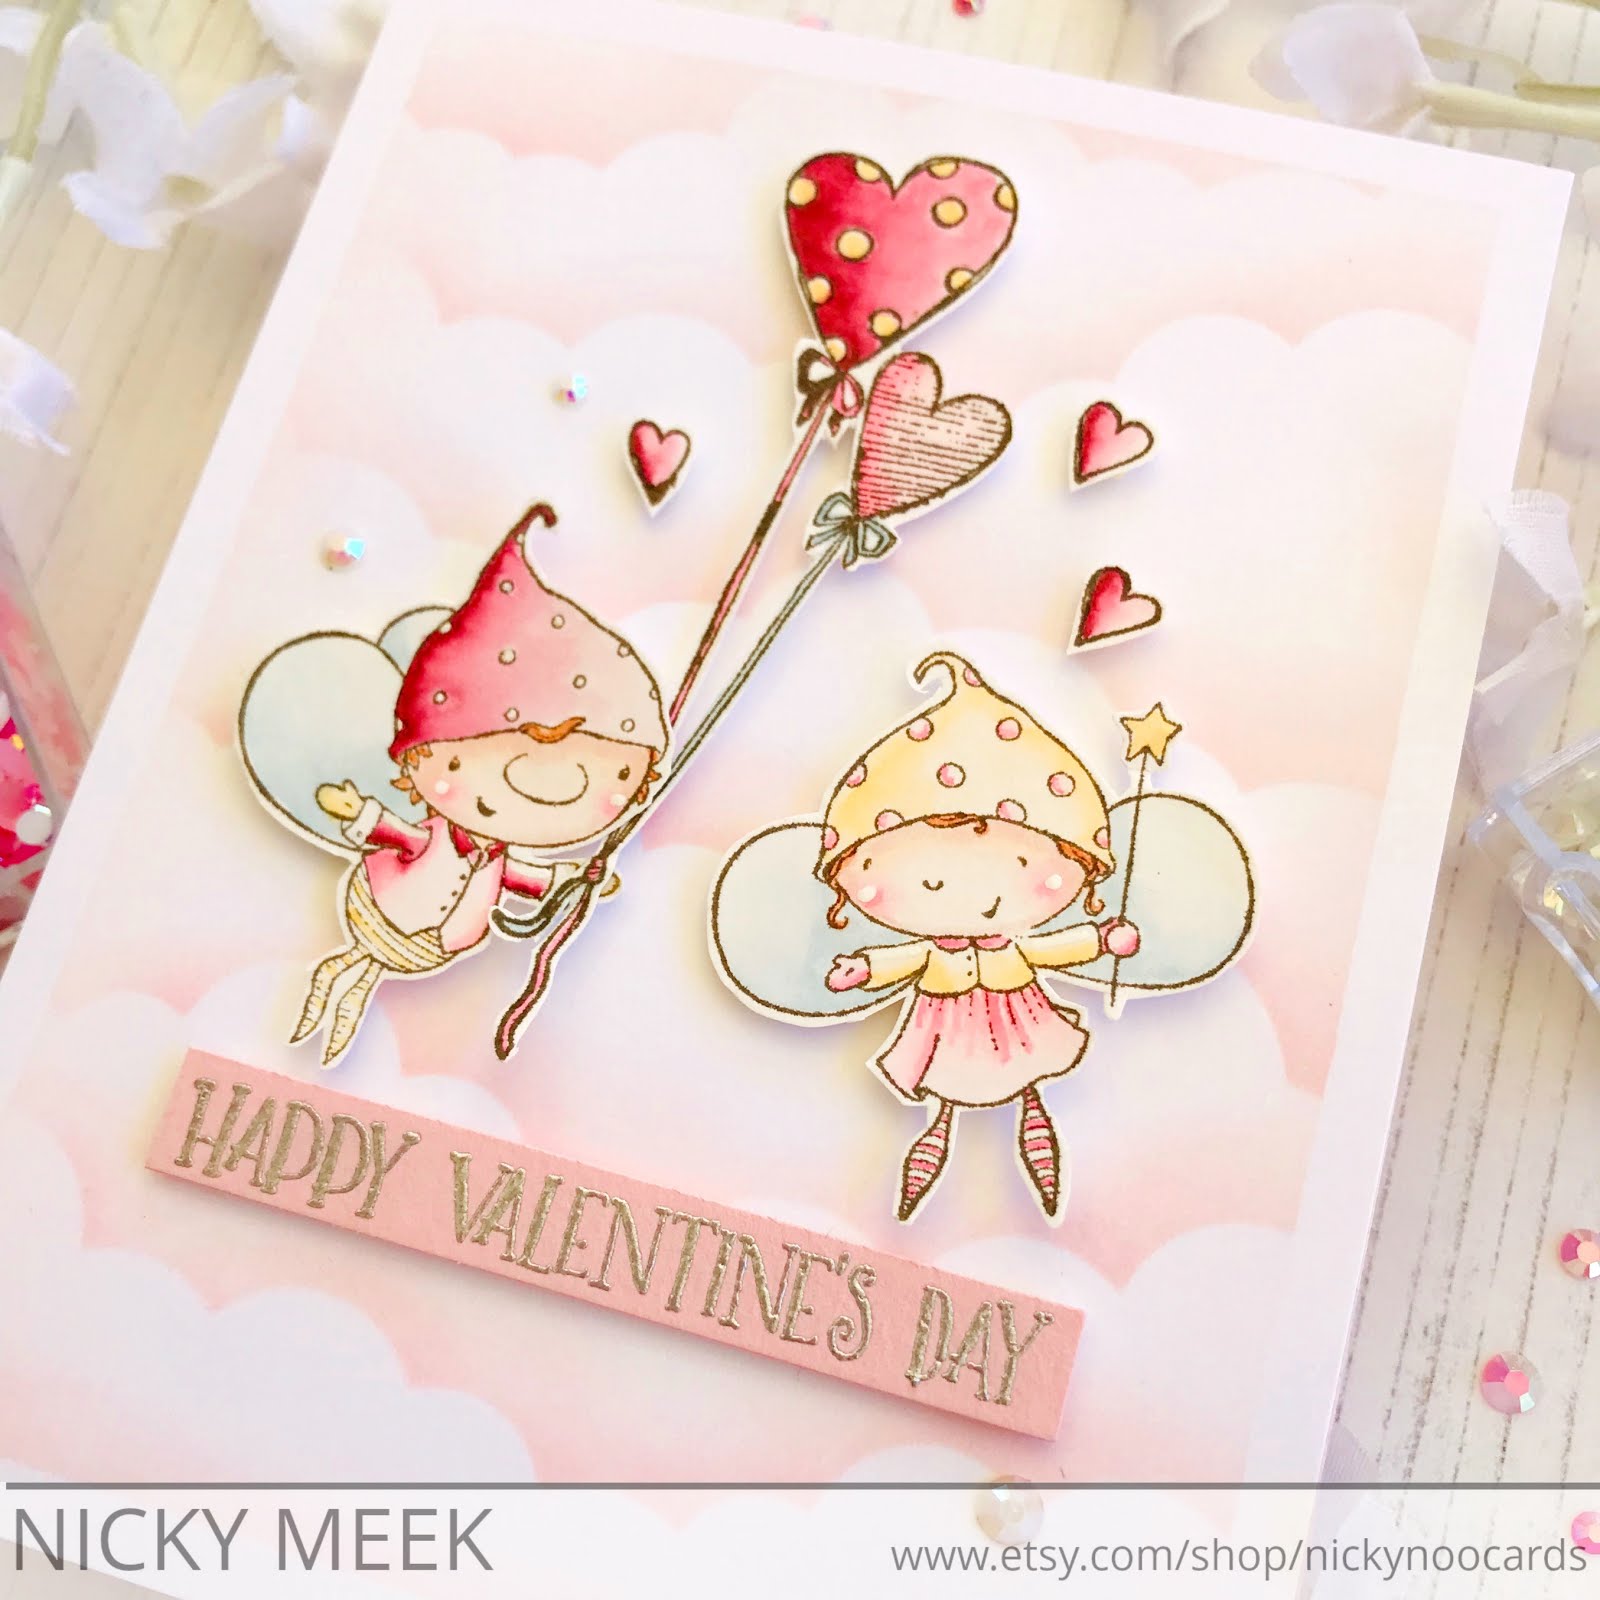
Valentine's Card for Purple Onion Designs

Hello!  I have a relatively quick Valentine's card for you today using stamps from Stacey Yacula Studio for Purple Onion Designs.  Characters are from the Spread Kindness category and the balloons are from the Sweet Occasions category.


I masked off the edges of an A2 panel of white cardstock.  I used a cloud stencil and Distress Oxide Ink in Spun Sugar to create a romantic, cloudy background.  The mask was then removed.


On Bristol Smooth cardstock I stamped all of the images using Ranger Archival Ink in Potting Soil, I stamped my sweet characters.  I watercolour painted them using Kuretake Zigs in the following colours - Deep Red 260 (also for hearts), Light Pink 026, Haze Blue 302, Pale Pink 028 and Flesh Colour 071.  I also used Tombow ABT's in shades 912 and 020.

I fussy cut the images and applied them to the scene using dimensional foam tape.  The decorative panel was applied to a pink cardstock base and a writing insert was adhered inside.

Using a piece of scrap cardstock of the same type used for the card base I stamped and heat embossed the sentiment in silver, I trimmed up the strip and added that with foam tape also.


The final touch was the addition of a few jewel type embellishments which reflect some of the colours used in the project.

Thanks for coming by to read about this Valentine's card, I'll be back with another card for Purple Onion very soon!

Happy crafting!

Nicky x

Wednesday, January 23, 2019

Winston - Purple Onion Designs

Hi, I have a new card for you today using the adorable little Winston from Purple Onion Designs as illustrated by Stacey Yacula Studio.


The card also features Garden Bushes which I stamped twice onto Bristol Smooth cardstock.  I also stamped Winston, May (the flying bird) and  Finch the little bird in the shirt.  I used my favourite ink for watercolour painting - Ranger Archival Ink in Potting Soil.  I painted all of my images and here is a list of the colours used.  Kuretake Zigs in Mid Gray 096, Beige 072, Warm Gray(2) 900, May Green 047, Light Green 041 and Mid Green 046.  Cheeks were blushed using a Tombow ABT in shade 761.  A few points were highlighted with a Uni-Ball Signo white gel pen.


I masked off the bushes at their base and ink blended the grass using Distress Ink in Cracked Pistachio. The mask was removed and I fussy cut the bush line.  I took another A2 panel of cardstock and ink blended it for the sky using Distress Ink in Peacock Feathers.  I applied the grass and bushes over the sky panel with dimensional foam tape.  I also fussy cut the bunny and birds and also attached them with foam tape.   I die cut a slim frame using kraft cardstock.  I backed the frame with foam tape and applied it.


The final touches were to stamp the sentiment.  I then hand dotted and flecked in tufts of grass using a Kuretake Zig in Green Shadow 049  which nicely tones with the Cracked Pistachio.  I blended it out a little with a waterbrush pen and dotted in some white daisies.

I found the wooden floral daises in my sequin stash and adhered them using Ranger Multi Medium Matte which is beautifully strong.

Hope you enjoyed my card, thanks for stopping by.

Nicky x

Monday, January 21, 2019

Simple Sentiments with Party Fox - Avery Elle

Hi, thanks for coming by the blog.  Today I'm sharing a card that puts the new Simple Sentiments stamp set from Avery Elle, front and centre.  Simple Sentiments comes with coordinating Elle-ments which makes your sentiment strips incredibly simple to make!


To create my card I ink blended my background using Distress Inks and then splashing a watered down amount of the ink into each colour zone to distress it a little further.  I dotted in some silvery gold gel pen dots and then die cut the panel to give it the subtle stitched edge.


I adhered the panel to the card base.  I die cut a whole bunch of the Simple Sentiments Elle-ments and then chose a few of the stamp sentiments that would say what I wanted them to declare and then stamped them in Versamark Ink and heat embossed in Antique Gold embossing powder.  I masked a line down the left hand length of my card and aligned my sentiment strips along it and adhered them with foam tape before removing the mask.


On Bristol Smooth cardstock I stamped the foxes from Party Fox, I watercolour painted them using Kuretake Zigs then die cut them using the Party Fox Elle-ments.  These too were adhered with  foam tape and the final touch for the card was the addition of a generous amount of flat, gold, micro star embellishments for a celebratory twinkle!

Hope you enjoyed today's card, happy crafting everybody and see you next time!

Nicky x

Saturday, January 12, 2019

VW Bus - Purple Onion Designs - Design Team Announcement!

Hey everybody I have some exciting news to share with you today .... I have been invited to join the Purple Onion Designs Design Team and I can't wait for all the creativity that lies ahead.

I've got a cute card for you today that seems quite fitting for the occasion and it features the incredibly sweet VW Bus and Trio of Balloons by Purple Onion Designs as illustrated by Stacey Yacula.  The scene also includes the Stacked Luggage with Bird stamp that nicely compliments the bus.


This is one of my slimline cards (use my search feature to find more) the finished dimensions of which are 8 1/12 x 3 1/2 inches with my panel cut to 8.2 x 3.2 and you can make this from one sheet of new cardstock with only a slim strip left over making it very economical and those strips are great to keeping for sentiments!  Envelopes for this size of card can easily be sourced by searching for slimline, invitation, #9 or size 9 envelopes.


I started by masking off an edge around my panel and then using Clarity Stencil Brushes I delicately ink blended using Distress Inks in Spun Sugar, Squeezed Lemonade and Dried Marigold which is a favourite combo of mine.  I finished by squishing a little Picked Raspberry onto my acrylic block and then spritzing a little water into it and then using a paint brush I splattered a few times to distress the background and then a few more times after that just with water alone.  This all makes the background so soft and dreamy.


I removed the mask and set the panel aside whilst I stamped my images onto Bristol Smooth cardstock using Ranger Archival Ink in Potting Soil and that I then watercolour painted using the following colours.  Kuretake Zigs in Warm Gray 900, Beige 072, Mid Gray 096, Bright Yellow 052, Light Carmine 021 and Haze Blue 302.  Also used was a Tombow ABT 020.  All images were then fussy cut out - nothing too complicated here but I did use a craft knife for in between the balloon strings!  

I decided on my exact layout and stamped my three sentiments with more of the Potting Soil Ink then applied dimensional foam tape behind the bus and balloons and applied them to the scene.


The final touch was to delve into my substantial sequin stash and find a variety of toning sequins which I glued using Ranger Multi Medium Matte.  The panel was attached to the card base using my Scotch Tape Runner and my card was complete.

Thanks for coming by to read today!  I'll be back very soon with new inspiration.

Nicky x

Friday, January 11, 2019

Sweetheart Owl and Arbor Valentine's Card - Purple Onion Designs

Hello!  I have a sweet little watercolour painted Valentine's card to share with you today using product from Purple Onion Designs I have always enjoyed using the stamps illustrated by the talented Stacey Yacula.


For this card I used Clarity Stencil brushes to delicately ink blend the background using Distress Inks in Tumbled Glass and Shabby Shutters.  I then die cut the panel for some simple interest to give it the faux stitched edge.


On Bristol Smooth cardstock I stamped my arbor stamp three times and also the sweetheart owl and the two little birdies using Ranger Archival Ink in Potting Soil.  Needing more hearts to place in the vines I stamped just that part of the owl stamp several times.  Everything was watercolour painted using Kuretake Zigs.  Colours used for this card are .... Beige 072, Oatmeal 064, Mid Gray 096, Light Pink 026, Light Green 041 and Carmine Red 022.


Points were highlighted with a Uni-ball Signo white gel pen and then I set to work fussy cutting out all the images.  It was super fiddly but totally worth it because I wanted a great deal of dimension on my card.  Once cut I adhered them to my background panel with either a single or double layer of dimensional foam tape.  I flecked in the grass by hand using the Zig in Light Green again.  For the sentiment, I curved it on to my stamping block and stamped with the Potting Soil ink again and added two little exclamation points by hand.


To complete the 'dewy garden' look and feel I pulled out some water droplet embellishments and dotted them around glueing with Ranger Multi Medium Matte since it dries clear and adheres strong!

Hope you enjoyed my card, thank you for coming by the blog to read today.

Happy crafting!

Nicky x

Wednesday, January 9, 2019

Puddle Play - Hello Bluebird

Hi!  I have a slimline card featuring all the cuties from Puddle Play by Hello Bluebird Stamps


A slimline card gives you so much more 'real estate' to work with to build your scenes and get all those characters and elements in that you love!   Finished size is 8 1/2 x 3 1/2 inches.  Panel cut at 8.2 x 3.2 inches.  Envelopes for this size are easily sourced and are called slimline, invitation, #9 and size 9.


I used a Clarity Stencil Brush to ink blend my gray background using Distress Ink in Weathered wood.  I die cut the clouds without stamping them from the stamp set and ink blended them too.  I stamped some of the water splashes upside down to become raindrops using Memento Ink in Fog.  I backed my panel with craft foam and applied it to the card base.  The craft foam backing means that your card makes it through the postal system in much better shape especially when you have embellishments such as I have on this card.


I stamped my images using Ranger Archival Ink in Potting Soil on to Bristol Smooth cardstock.  I watercolour painted the images using the following colours.  Kuretake Zigs in Gray Brown 094, Bright Yellow 052 and Light Pink 026.  Also Tombow ABT in 020.  I die cut all the elements and highlighted some points with a Uni-ball Signo white gel pen.  I decided on a layout then adhered everything using dimensional foam tape - making sure all my characters were interacting with one another to tell a story.


To finish out the card I stamped the sentiment with the same Fog ink onto a sentiment strip and backed it with foam mounting tape and adhered.  Embellishments needed to be water droplets and so I used 4 different sizes to add some fun dimension to the card.

I hope you like this encouragement card and feel inspired.

Thanks for stopping by - happy crafting!

Nicky x

Friday, January 4, 2019

Tea With Friends & Picnic With Friends - Mama Elephant

Hi!  I have a pretty card to share with you today where I've combined both Tea With Friends and Picnic With Friends by Mama Elephant.


The scale of these two stamp sets is perfect for combining as you can see and in order to fit everything into the one card, I opted for one of my slimline cards.  Finished dimensions are 8 1/2 x 3 1/2 inches with a panel cut at 8.2 x 3.2 inches - it can be made from one new panel of cardstock with just a skinny strip left over (useful for sentiments).  My panel was ink blended using Clarity Stencil Brushes.  Colours used are Distress Inks in Tumbled Glass, Stormy Sky and Shabby Shutters.


I stamped all of the images using Bristol Smooth cardstock and Ranger Archival Ink in Coffee.  I watercolour painted the images using Kuretake Zigs in Oatmeal 064, Brown 060, Pale Rose 230, Beige 072, Blue Gray 092, Mid Grey 096, Light Pink 026 and Carmine Red 022.

Everything was die cut and I decided on an arrangement, took a photo on my phone so that I didn't forget it and then I set about adhering everything into the scene, sometime glueing it directly and sometimes popped up on dimensional foam tape.

I dotted in some crumbs and flecked in some tufts of grass directly with my Zigs and the final touch was delicately glittering a few areas as if glistening in the sunshine (it is super subtle).  I backed the panel with white craft foam and adhered it to the card base.  I had some left over little birds which I adhered inside the card where I also stamped a Happy Birthday sentiment.


I do thank you for stopping by the blog to read about this card today.  See you next time!

Nicky x

Sunday, December 30, 2018

Page Huggers - Mama Elephant

Hello!  I'm continuing to have some fun creating some cards just for pleasure whilst I have some spare time from my Design Team work!  Today I've been playing with Page Huggers by Mama Elephant.  I made this card for one of my sisters who has a very special teacher in her daughter's life to thank.


First things first, I very softly ink blended my panel using Clarity Stencil Brushes.  Distress Inks used are Tumbled Glass and Shabby Shutters.  I then die cut the panel to give it the decorative edge using the Cloud Nine Creative Cuts.   I then popped this panel into my Misti and stamped the sentiment which is from Sweetest Greetings.  I used Ranger Archival Ink in Potting Soil and stamped it twice so that it was perfect.  Inside the card I stamped the smaller 'You're The Best' sentiment from the same set.  I then attached the panel to my card base of 110lb Neenah white cardstock.


On Bristol Smooth (I favour Strathmore) I stamped and die cut my images from Page Huggers using the Ranger Archival Ink in Potting Soil again.  Using my waterbrush pens I watercolour painted each of the cuties.  For the bear I used Zigs in Oatmeal and Mid Gray.  For the kitty I used a Tombow in shade 912.   The mouse was done with Zig in Mid-Gray and the bunny with Zig in BlueGray.  All cheeks were blushed with Zig in Light Pink.  

Their spectacles are painted with Zig in Haze Blue and any red on the card was painted using Zig in Carmine Red.  Any green is Zig Light Green.  The yellow shade is Tombow 991.

I decided on a layout for my characters and adhered them with varying amounts of dimensional foam tape, I highlighted some points with a Uni-Ball Signo White gel pen.


My finishing touch was the simple addition of these miniature wood butterflies that I adore!

Thank you so much for stopping by to read, please leave me any comments or questions you may have!  Happy crafting!


Nicky x