Showing posts with label Stacey Yacula. Show all posts

Tuesday, July 30, 2024

My Favorite Things - July Release Day!!


It's time to shop the July Release by MFT Stamps which is now LIVE!!!  Perhaps you'll pick up this new stamp set illustrated by the incredible Stacey Yacula.   Here are links to what I've used to make this card:-


I prepared a slimline panel of sturdy white cardstock with finished dimensions of 8 1/4" x 3 1/4".  I ink blended using Bundled Sage and Speckled Egg Distress Oxide Inks and I stamped the sentiment in the corner using MFT's Eiffel Tower Ink.  I backed this panel with white craft foam and applied it to a full size white slimline card base with dimensions of 8 1/2" x 3 1/2".


Using the same Eiffel Tower Ink I stamped the images from Special Delivery and I coloured the images using the following Copic marker combinations.

Turtle - YG97, YG95, YG93, YG91, E44, E43, E42
Fox - E39, E17, E15, E13, C3, C1, C0
Black Bear - T9, T6, T5, T4, T3, R000, C0, E31, E41
Mouse - C3, C1, C0
Bunny Mailman - E44, E31, E41, C3, C1, C0
Birdie Mailman - E44, E43, E42
Blushes - R22, R21, R20, R00
Cap - B99, B39, B37, B97
Mailbag - E77, E74, E71
Brighter Blue - B29, B26 B24
Red - R59, R39, R29, R27, R24
Yellow - Y19, Y15, Y13
Khaki - YG97, YG95, YG93, YG91


I used the coordinating die-namics to die cut the images which were then backed with foam tape and applied to the ink blended background.  I used a white gel pen to highlight points on the images and I placed a few sparkling clear sequins around the scene for a little celebratory sparkle.

Happy shopping everyone!

Thank you for stopping by my blog today and don't forget to visit and subscribe to the MFT You Tube Channel for endless how-to videos, inspiration and product reveals.


Saturday, July 27, 2024

My Favorite Things - July Release Countdown Day 3


Hello everyone!  I'm sure you've all been impatiently waiting for MFT's next big release, well, here it is as we kick off the countdown to release day which is July 30th at 10am Eastern.  My first of five cards for this release features a brand new Stacey Yacula illustrated stamp set.  Here's what I've used:-


I took an A2 panel of white cardstock and I did a delicate ink blend of Saltwater Taffy and Mowed Lawn Distress Oxide Inks.  I stamped the sentiment and then backed this panel with white craft foam and adhered it to a slightly larger white card base.


I stamped all of the images from Pick of the Patch using MFT's Eiffel Tower Ink.  I then set about colouring the images and here are the Copic colours that I used:-

Strawberries - R39, R37, R05, R21, G20, G14, YG03, Y15
Bunnies - E44, E31, E41
Mice - W4, W3, W1
Blushes - R22, R21, R20, R00
Terracotta Pot - E35, E33, E11
Bucket - C3, C1, C0
Ladder - E43
Ladybugs - E37


I then die cut these pretty images using the coordinating die-namics and arranged then as I had had them in my mind before I started.  Once I was happy with the layout I took a photograph of my phone so that I wouldn't forget, then I started to add dimensional foam tape to the back of each element and build the scene again from the back and working forwards.

Last but not least, I grabbed my white gel pen and began highlighting certain points which makes the whole thing pop!

Thank you for stopping by my blog today and don't forget to visit and subscribe to the MFT You Tube Channel for endless how-to videos, inspiration and product reveals.


Sunday, May 26, 2024

My Favorite Things - May Release Countdown Day 2


Today I'm revealing the latest Stacey Yacula stamp set which forms part of the new release from MFT Stamps which you can buy on Tuesday May 28th at 10am Eastern.  Here's what I used to make this slimline card:-


I took a slimline panel of Poppin' Pink cardstock from MFT's cardstock line-up.  I then ink blended using Chipped Sapphire and Black Soot Distress Oxide Inks using some areas of pink to create a sky not dissimilar to some of the recent Aurora Borealis many people got to experience.  I also created some 'grass' using the Grassy Edges Die-namics in exactly the same way starting with the coloured cardstock.  I applied one piece of grass with glue to the main panel and the second section of grass I popped up on foam tape to get some dimension going.


I stamped some of the star images and the sentiment with Versamark Ink and I heat embossed in white.  I used a white gel pen to dot in more distant stars then I set this panel to one side.

I stamped the images from Twinkle Twinkle using Eiffel Tower Ink by MFT.  I coloured the bears using Copic markers in E44, E43, E42, E41, W00.  I blushed their cheeks with R22, R21, R20, R00.  I added a little BG000 to the jar of stars and C1 to the lid.  I highlighted with a white gel pen and used a black Glaze pen to define their noses.


I backed the images with dimensional foam tape and adhered them in position.

To finish, I grabbed my Ranger Stickles in 'Diamond' and I applied it to the entire surface of the large roped star and to the stars in the jar and to the inside of the open star images in the night sky.  Card done!

Thank you for stopping by my blog today and don't forget to visit and subscribe to the MFT You Tube Channel for endless how-to videos, inspiration and product reveals.


Friday, April 26, 2024

My Favorite Things - April Release Countdown Day 4


A warm welcome to my blog today where I'm starting to reveal my cards for the April 30th release by MFT Stamps.  Kicking things off with a new Stacey Yacula illustrated stamp set, here's what I've used to make this project:-


I took two A2 sturdy white panels of cardstock .  With one, I die cut using the Eyelet Lace Die-namics then I masked off a line in the bottom 20% and masked the sides of the portion above it and I softly ink blended using Twisted Citron Distress Oxide Ink for the grass and Sno-Cone ink by MFT for the sky.   I removed the masks and then added interest to the grass with Copic markers and then I stamped some tufts of grass using a couple of little images from Next To You.


I stamped the other images I was needing from Next To You using Memento Ink in Rich Cocoa.  I coloured using the following Copic marker combinations:-

Bunnies - E31, W3, W2, W0
Green - YG17, YG13, YG11
Blue - BG11
Toadstools - R39, R27, R08, E74, E71, E70
Blushes - R22, R21, R20, R00

I die cut using the coordinating die-namics and applied the images to the background with dimensional foam tape.


I chose my favourite sentiment from the stamp set and stamped it at the bottom of the card then I backed the panel with white craft foam, glued it to the other white A2 panel and then to the card base.

Thank you for stopping by my blog today and don't forget to visit and subscribe to the MFT You Tube Channel for endless how-to videos, inspiration and product reveals.


Monday, February 26, 2024

My Favorite Things - February Release Countdown Day One


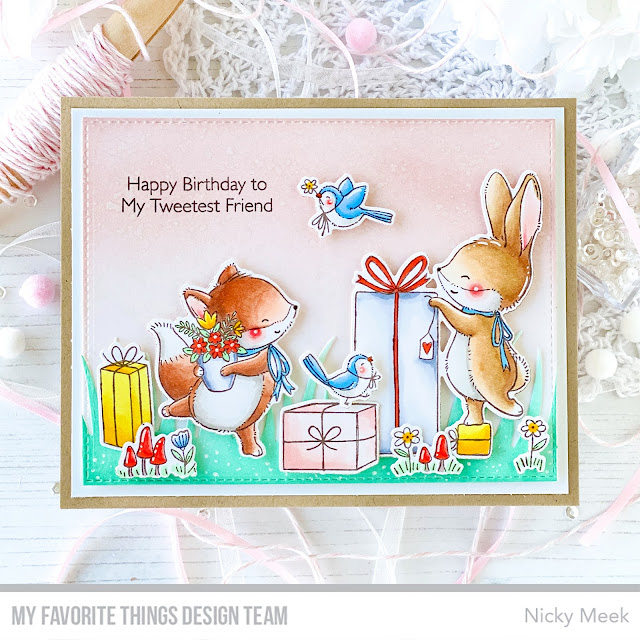
Welcome to my blog and countdown Day 1 to tomorrow's release from MFT Stamps which you can buy at 10am Eastern!  My card today uses the new Stacey Yacula illustrated stamp set, here's what I've used to make it:-


I took an A2 panel of white cardstock and die cut using Blueprints 25 to give it the stitched edge affect.  I grabbed another panel used the same die again and then used the Tall Grass Die-namics to cut my grassy border.  I ink blended the panels and splashed them with Perfect Pearls loosened with water.  The grass was glued directly to the pink panel and I stamped the sentiment.  I backed the panel with white craft foam and sized this card up to A6 by adding a white mat then a kraft mat behind it, then glued to the card base.


I stamped the images with Memento Ink in Rich Cocoa and coloured with the following Copic marker combinations:-

Bunny - E23, E55, E31, E30, E50, W2, W0, W00
Fox - E25, E75, E13, E11, E00, W2, W0, W00
Birds - B12, B41, W00
Red - R05, R22
Yellow - Y19, Y15, Y13
Pink - R00, R000
White - C3, C1, C0, C00
Blushes - R22, R21, R00


Images were highlighted with a white gel pen and applied with foam tape and then the card was complete.


Thank you for stopping by my blog today and don't forget to visit and subscribe to the MFT You Tube Channel for endless how-to videos, inspiration and product reveals.


Monday, January 8, 2024

My Favorite Things - January Release - 1 More Day To Go!


I'm very happy you have stopped by my blog today where I'm sharing this easel card that was created using the latest stamp set illustrated by Stacey Yacula.  Here's what I've used:-

Blueprints 27

The photo at the top of this blogpost shows the card opened into an easel in one of two positions.  Below is the card in it's second easel position.   A recipient can choose which position to sit the card open depending on the height it will be at but also the sender can choose to write above the inside sentiment or around it or just write on the back of the whole card.


Here's a link to an easel card tutorial by Jennifer McGuire.  Start out with a basic design and as you grow in confidence you can do endless more complicated, charming designs.  They're really not tricky!

So for this design I used Blueprints 27 to cut the same scallop edged panel twice.  I ink blended both panels after masking off the edges and stamped the larger sentiment.  I was then able to attach the easel to the back of the panels with glue.


I stamped the images from Micest Thing using Memento Ink in Rich Cocoa and I coloured with the following Copic markers:-

Mice - E31, E41, E40, C3, C1, C0, W3, W1
Blushes - R22, R21, R00
Ears - R21, R00
Hearts - R08, R22, R20

I then die cut with the coordinating die-namics.


Images were backed with foam tape and I also stamped the smaller sentiment and backed it with foam tape too.   I applied the sentiment for one position to sit the easel and then with the second position I made sure to align the top of the mouse with the top of the thought bubble so that the easily would sit straight if placed in that position.  I then stuck the elements to the main front of the card.

Points were highlighted with a white gel pen.


Thank you for stopping by my blog today and don't forget to visit and subscribe to the MFT You Tube Channel for endless how-to videos, inspiration and product reveals.


Friday, November 17, 2023

My Favorite Things - November Spotlight Day 3


It's Spotlight Day 3 for the November release by MFT Stamps and here are the products used in the making of this card featuring images illustrated by Stacey Yacula:-

A2 Stitched Rectangles Stax Set 2 Die-namics
Orange Sherbet 6 x 6 Paper Pad

I die cut cardstock using the two largest frames from the new Fanciful Frames Die-namics.  With the white/smaller panel I stamped a couple of the background images from the stamp set using Versamark Ink and heat embossed in silver.  I glued the two frames together and backed it with foam tape and adhered to a patterned panel which in turned was adhered to an A2 white panel then to my card base.


I added a little colour to the background and stamped and coloured the snowman and bear and I used the following Copic colours to do so:-

Background Sky and Ice - V000, V0000
Trees - BG93
Snowman - C1, C0, YG09, V01, W6, W5, W3, BG93
Bear - W6, W5, W3, C3, C1, C0, V17, V15, V12, BG93
Blushes - R22, R21, R00

Images were die cut and applied with foam tape.


To finish I stamped the sentiment on a sentiment strip and applied underneath the scene with foam tape and 3 little wooden star embellishments were the perfect little finishing touch to this winter country scene.

Thank you for stopping by my blog today and don't forget to visit and subscribe to the MFT You Tube Channel for endless how-to videos, inspiration and product reveals.


Friday, November 3, 2023

My Favorite Things - October Spotlight Day 3


Thanks for coming by my blog today where I'm sharing this card spotlighting the new release from MFT!  Here's what I've used:-

Stitched Snow Drifts Die-namics
Birch Tree Forest Cover-Up Die-namics
A2 Rectangle Frames Die-namics

I kicked things off by creating the background.  I like my backgrounds to inform the rest of my colour choices when colouring the different elements.  For the blend I used Festive Berries, Aged Mahogany and Black Soot Distress Oxide Inks.  I then liberally splashed the background with white acrylic paint loosened with water.

Over this I layered a white cardstock die cut made using the Birch Tree Forest Cover-Up Die-namics and then I framed this out using the A2 Rectangle Frames Die-namics.


I used the  negative cut created when cutting the frame and die cut some snowy ground for them to stand on using the Snow Drifts Die-namics.  Before applying it within the frame I stamped the sentiment.

I stamped the Christmas Carols images I'd be using with black Memento Ink and I coloured with the following Copic marker combinations:-

Red - R89, R39, RV29
Green - G29, G28, YG67
Black - T6, T5
White - C3, C1, C0
Fox - E09, E07, E17, E15
Blushes - R22, R21, R20, R00
Skin - E33, E11, E21
Santa's Beard, W5, W3

I highlighted with a white gel pen and die cut using the coordinating die-namics.  I applied Santa with regular depth dimensional foam tape but with the other two characters I used a thicker foam tape to add even more dimension.  Of course you can just double stack the regular stuff to give much the same affect.


Thank you for stopping by my blog today and don't forget to visit and subscribe to the MFT You Tube Channel for endless how-to videos, inspiration and product reveals.


Monday, October 30, 2023

My Favorite Things - October Release Preview


Welcome to my blog and the first day of showing you a card made with the brand new release from MFT which you can buy at 10am Eastern tomorrow the 31st October.  My card today reveals the new Stacey Yacula illustrated stamp set called 'Christmas Characters'.  Here are the products used in the making of this project:-


This is a one layer card and whilst there are coordinating dies for Christmas Characters I didn't use them for this card.

I started this project by stamping the images on masking paper using Memento Ink and carefully fussy cutting them out.   I stamped the images in the foreground first and then overlaid the corresponding image in masking paper.  I then continued to stamp the images behind the characters and cover those and finally the images in the very back which I also covered.


Before ink blending the sky I made sure my masking was stuck down snuggly and then I used Spun Sugar, Victorian Velvet and Black Soot Distress Oxide Inks to blend the sky -  a favourite combination of mine.  I splattered the pretty sky with white acrylic paint loosened with water and die cut the panel using A2 Stitched Rectangles Stax Die-namics.  I popped the panel in my Misti and stamped the sentiment.

I coloured the scene using the following Copic markers:-

Elf/Penguin - T6, T5, T4, W0, W00, R000, Y38, Y19, R39, R29
Moose/Mouse - W5, W4, W3, W00, R000, T7, E44
Blushes - R22, R21, R00
House - C3, C1, C0, C00, RV0000, BG11, E44, E43
Fir Trees - YG95, BG93, BG90

I highlighted with a white gel pen.


To finish the card I mounted the panel to fractionally larger panel in a dark grey.   If you  have A2 Stitched Rectangles Stax Die-namics in both sets 1 and 2 you can easily make these close in size panels which kind of frame your scene.

I attached the panel to a white die-cut of the Blueprints 27 Die-namics and backed this with white craft foam and adhered it to an A2 white panel then to the card base.   My cards feel very sturdy and substantial when handled, I love that quality feel.

Thank you for stopping by my blog today and don't forget to visit and subscribe to the MFT You Tube Channel for endless how-to videos, inspiration and product reveals.


Tuesday, July 11, 2023

My Favorite Things - July Release!


The July release from MFT Stamps is now LIVE!  Perhaps you'll want to make this new stamp set from illustrator Stacey Yacula all yours?  Here are all the details:-


I took an A2 panel of white cardstock and softly ink blended to a fade using Spun Sugar and Faded Lilac Distress Oxide Inks.  I distressed and softened the background by using a toothbrush to spritz water and then I mixed in a little white acrylic paint with water and similarly applied.  I glued this panel to my card base and die cut the largest frame from 'Classic Rectangle Frames Die-namics' and backed this with dimensional foam tape and adhered.  One thing to note about this new frame die-namics set .... these frames are the same as the A2 Rectangle Frames Die-namics except that they are in the 'in between' sizes, so the two sets will work seamlessly together creating some fun affects.


I stamped the images using Memento Ink in Rich Cocoa and coloured with the following Copic marker combinations:-

Pup - E31, E41, E40, C3, C1, C0,
Mouse - W3, W1, W00
Kitten - E74, E71, E70
Pink - RV10, RV000
Yellow - YR31, Y21, E00
Purple - RV95, RV93, RV00
Aqua - BG11, BG0000
Brown - E44, E43, E42

I die cut the images using the coordinating die-namics, highlighted some points with a white gel pen and then applied with a single or double layer of dimensional foam tape to build some nice dimension.

To finish, I stamped the sentiment directly to the background using my Misti so that I could repeat stamp for a nice crisp image and I glued in some tiny wooden star embellishments.

Happy shopping everyone!


Thank you for stopping by my blog today and don't forget to visit and subscribe to the MFT You Tube Channel for endless how-to videos, inspiration and product reveals.