Showing posts with label birthday card. Show all posts

Thursday, April 16, 2026

Simon Says Stamp - Flourish Rabbit Birthday Card


Thanks for joining me today to learn how I made this birthday card featuring products from the In My Heart release by Simon Says Stamp. Please find below a list of links to the products used:-


I took a panel of white cardstock and used the embossing folder to create the detailed background.  I applied this to my card base then die cut a frame using the A2 Thin Frames die and glued it directly. From the same pink cardstock I die cut an oval using the Stitched Ovals die and I backed it with dimensional tape and applied it.


Next step was to create the Flourish Bunny by simply die cutting the image and applying colour with Copic markers to highlight the pretty features.  I also teased the leaves and petals upwards carefully for some dimension before applying it with foam tape and whilst I did that I added grass behind the bunny.  This grass was just shredded pieces of green cardstock cut with scissors.

I stamped the sentiment from Birthday Messages with a metallic silver ink and applied the banner with foam tape.


For the finishing touches I considered my embellishments.  I decided to use the little butterfly dies that come with the embossing folder and create 3 butterflies to flutter around the bunny and I simply ink blended their wings with Tattered Rose Distress Oxide Ink and applied them with yet more foam tape.

I used some mirrored 'Fairy Jewels' for the final embellishments and then this card was complete.

Happy crafting friends and have a wonderful day!


Tuesday, March 22, 2022

My Favorite Things - Stylish Bouquet Card Kit Release Day!


Are you going to treat yourself to beautiful new Stylish Bouquet Card Kit which is now available for purchase at MFT Stamps.   Here's my second card made using the kit.  Read on for the details.


To create this card I prepped an A2 panel of Blue Beyond cardstock adhering it to my card base.  I then used the A2 Stitched Rectangles Stax Die-namics (Set 2) to create the white focal panel which I backed with white craft foam and attached to the blue panel.   I ink blended the panel  softly with Blue Yonder Ink and splattered on a little Blue Beyond Ink that I loosened with a drop of water.


I used the Bouquet Wrap Die-namics and I die-cut a colour panel from the Colorful Canvas paper pad from the kit.  It provides score lines to guide where you fold and then I adhered in place and glued it to the panel.

Using a variety of other MFT card stocks (several colours will come with your kit) I die cut the flowers and greenery using the Stylish Bouquet Die-namics.  I used the Stylish Bouquet Builder Stencil and white pigment ink to add detail to the centre of the blue flowers and then I built my bouquet.  I did this very organically, starting at the back with the green stems and building forwards ... they're flowers ... you can't go wrong!  Just gather them!   I added white Nuvo drops to some flower centres.


Last but not least I used the Stylish Happy Birthday Die-namics and Cornflower cardstock to create the pretty sentiment.   Card complete!

Thank you for stopping by my blog today and don't forget to visit and subscribe to the MFT You Tube Channel for endless how-to videos, inspiration and product reveals.


Monday, March 14, 2022

My Favorite Things - Bubbly Birthday

The moment I set eyes on the new stamp set Bubbly Birthday by MFT Stamps my brain flooded with several ideas for how to design with it, so here is my second card this month that I'm sharing with it in use.   Read on for all the details.


The card started with me creating two A2 panels of cardstock.  One using Cornflower and the other Something Blue.   I die cut the darker panel of Cornflower using Watercolor Wash Free Form Die-namics  and then I used Chipped Sapphire and Black Soot Distress Oxides to ink blend the outer edges of the underwater cave opening.

With the Something Blue panel I did a very light amount of ink blending with Blue Yonder and Blue Beyond Inks and then I dried this with my heat gun.   Following this I layered over the Ray of Light stencil and I used White Pigment Ink to blend in the streaks of bright sunlight.  I removed the stencil and again used my heat gun to dry it.   I grabbed my embossing buddy and prepped the surface and then stamp in some bubbles from Bubbly Birthday using Versamark Ink and heat embossed in white.   Whilst I had the ink and embossing powder out I also stamped and embossed the sentiment.


I backed the darker die-cut panel with foam tape and applied it to the backing panel.   I applied the sentiment strips with more foam tape and set this to one side.

I stamped the Mermaid and coloured her with the following Copic colours:-


Skin -  E11, E21, E00, E0000
Pinks - R22, R21, R20, R00, R000
Purples - V12, V01, RV00
Mints - G00, BG10, BG70
Yellows - Y17, Y15, Y06
Shading - W4, W3, W2, W1

A white gel pen added some highlights and then I die-cut using the coordinating die-namics for Bubbly Birthday.


I backed the image with foam tape and arranged her at the entrance to the cave and I tucked a few sparkling clear sequins here and there for a final touch.

Thank you for stopping by my blog today and don't forget to visit and subscribe to the MFT You Tube Channel for endless how-to videos, inspiration and product reveals.


Thursday, August 26, 2021

My Favorite Things - Color Challenge 172

Hello and welcome to a new Color Challenge 172 for My Favorite Things.   Check out my inspiration card below together with the colour palette you'll be working with .... some lovely cool tones.


For my card I've used Cool Day by Birdie Brown which has just been released from the vault and I decided to make a winter birthday card in the clean and simple (CAS) style.

I stamped the images and coloured them with Copic markers - here is my colour palette:-

Bear - E40, E50 E0000, T2
Greys - T5, T4, T3, T2, T1, T0
Bluey Greens - B11, BG0000
Purples - V01, V000

Images were die cut using the coordinating die-namics.


I used the A2 Stitched Rectangles STAX Die-namics (set 2) to create a background panel which I ink blended with Grapesicle Premium Dye Ink.   I die cut a second panel using the same die but time I created two snow hills using Stitched Snow Drifts Die-namics cut from each end of the panel so that dimensions matched.   These were adhered then I backed the Cool Day elements with foam tape and applied.

I popped the panel in my Misti and stamped the sentiment and then used Summer Splash Premium Dye Ink to stamp the snowflakes around the bear in a random pattern.


To finish the card I backed the panel to a full A2 panel of Chantilly Cream with a layer of white craft foam in between to elevate it.  This was adhered to my card base and then I used Stickles to glitter the snow on the sign.

Last but not least I used white Nuvo drops  to create the fun dimensional snowfall.   This completed the card.

Many thanks for stopping by - I do hope you enter the challenge and I wish you the best of luck with your entry.


Monday, August 16, 2021

My Favorite Things - August Vault Release Countdown Day 1

Tomorrow at 10am Eastern you'll be able to buy all of the newly released from the vault stamps and coordinating dies illustrated by Birdie Brown for My Favorite Things.   My card today uses Happy Hippos which forms part of this release.


First I prepped a background by ink blending with Squeezed Lemonade Distress Oxide Ink and then I splashed on Blueprint Sketch and Candied Apple.

I framed the panel with a white cardstock die cut made using A2 Rectangle Frames Die-namics which I backed with foam tape and applied to the panel.


I used the Happy Birthday Script Die-namics and die cut 4 times from white cardstock and I adhered each. one to the next in a neat stack and then glued this as the top. of the panel for a nice chunky/dimensional sentiment.

I stamped the images from Happy Hippos and coloured them with Copic markers.  Here is my colour palette:-

Hippos - W4, W2, W1, W0, W00
Cheeks - R00, R20, R21
Yellows - Y17, Y15, Y06, Y00
Reds - R39, R29, R24
Blues - B14, B04, B12

Points were highlighted with a white gel pen and I die cut using the coordinating dies and backed them with foam tape and applied.


The finishing touch was just the addition of a few scattered sparkling clear sequins for an extra festive touch.

Very grateful to you for stopping by today.   Join me for the vault release post I'll have up tomorrow featuring another stamp set by Birdie Brown.


Tuesday, August 10, 2021

My Favorite Things August Release Day - MFT & Friends

Hello Friends!   You are now able to purchase all the new and wonderful products from My Favorite Things August release.   My card today features 'Pin It' illustrated by Pure Innocence for a sweet CAS card.


I used the A2 Stitched Rectangle STAX die-namics to create a white panel which was then softly stencilled using the new Slimline English Brick Wall Stencil and Antique Linen Distress Oxide Ink. I then popped the panel in my Misti and stamped the sentiment.


I stamped the images from this small stamp set and coloured them with Copic markers.   Here is my colour palette:-

Skin - E04, E11, E21, E00
Hair - E44, E42
Dress - RV69, RV17, RV55
Shoes  - T7, T6, T4
Donkey Picture - T5, T4, T3, T1, B00, BG000, YG01, YG03

These elements were die cut and backed with foam tape and applied.


To finish things up I highlighted a few points with a white gel pen then backed the decorative panel with white craft foam and applied it to an A2 panel of Ripe Raspberry Prestige Cardstock which was glued to my card base.   A few sparkling clear sequins were the finishing touch.  Card complete!

Check out all the inspiration over on the MFT Blog today and get shopping!

Happy crafting!


Saturday, August 7, 2021

My Favorite Things - August Release Countdown Day 3

We've reached the halfway point today of the Countdown to My Favorite Things August release going live on 10th at 10am EST.   My card today reveals a new Tiddly Inks illustrated stamp set called Smell The Cake.


To create this card I first created a background panel of patterned cardstock from the Perfect Plaid 6 x 6 Paper Pad.    This was attached to my card base.

Next, I created a white stitched edge panel using Stitched Rectangles STAX Die-namics Set 2.   I masked off a portion and ink blended using Distress Oxide in Spun Sugar and stamped the sentiment.  The panel was backed with white craft foam and glued to the patterned panel on the card base.


I stamped my images from Smell The Cake  and coloured with Copic markers.   Here is my colour palette:-

Oranges - RY09, YR04, Y38
Yellows - Y17, Y15, Y06
Pinks - RV63, RV02, RV10
Greys - W4, W3, W2, W1
Skin - E04, E11, E21, E00
Cheeks R00, R20, R21
Hair E44, Y28, Y26, Y21, E30

Points were highlighted with a white gel pen then I die-cut using the coordinating die-namics.

Each image was backed with foam tape and adhered to my background panel.


To complete the card I just added a few sparkling clear sequins.

Please leave me your lovely comments and questions and then visit the MFT Blog today to see more inspiration and see other products being revealed.   Commenting might win you a $75 gift voucher!!

Happy crafting and hopefully I'll see you back here tomorrow for the next Countdown reveals.


Tuesday, July 27, 2021

My Favorite Things - July Card Kit Release Day - Celebrate You!

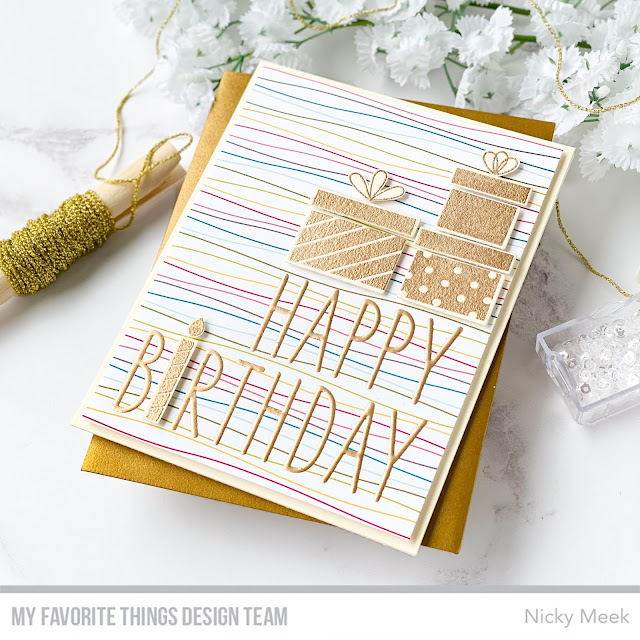
Happy to share that the July card kit Celebrate You by My Favorite Things is now available for purchase.  I have a new card today to share with you featuring elements from this release.


The card started by creating an A2 panel of Chantilly Cream Prestige Cardstock and adhering it to a prepared white cardstock base.    Then I created a small panel of cardstock using a design from the Party Time 6 x 6 Paper Pad which forms part of the kit.


I popped the patterned panel in my Misti and stamped the oversized sentiment from Celebrate you using Versamark Ink and I heat embossed in gold.  I repeated this process 2 or 3 more times so that the sentiment was nicely raised and embossed.

The panel was backed with white craft foam and mounted on the Chantilly Cream panel.

I stamped the candle and gifts with Versamark Ink on more of the cream cardstock and heat embossed just once in gold.  Elements were die cut and backed with foam tape, arranged and applied.


Above zoomed in photo shows how nicely the wiggly coloured line paper works with the smart gold.

I hope you treat yourself to the kit .... you deserve it after all!   Happy shopping and crafting friends, I always appreciate you stopping by and love to hear from you all in the comments below.   Take care!


Monday, July 26, 2021

My Favorite Things - July Card Kit - Celebrating You - Countdown Day 1

Did you hear about July's new Celebrate You Card Kit by My Favorite Things?   It will be released tomorrow July 27th at 10am EST.    My card today is my second of three projects using this fun kit.


So rare for me to make cards that are just pure die-cutting with no stamping or colouring but here it is!!!  (OK, I guess I stamped the sentiment does that count)?

Creating this card was really quite simple.   Starting with an A2 panel of Poppin' Pink Prestige Cardstock and then over that I layered a die cut made using the Double Stitched Rectangles Die-namics and a patterned paper sheet from the Party Time 6 x 6 Paper Pad.  I chose this sheet to go with my confetti theme but there's a huge variety to choose from.


I backed this panel with white craft foam and glued it to the pink backing panel which in turn was glued to my prepared card base.

I used Prestige cardstocks in Poppin' Pink, Butterscotch and Tropical Teal because they tie in nicely with the patterned paper's colours and die cut the balloons from the Celebrate You Die-namics, balloon strings were made using Eiffel Tower.   Strings were glued directly and balloon die cuts were applied with foam tape.

I used Gold Sparkle Cardstock to die cut the cascading confetti piece which were either glued directly or added with foam tape for a fun affect.


For the final touch I stamped the sentiment from Itty Bitty Birthday to a sentiment strip created using Itty Bitty Sentiment Strips Die-namics and applied this with foam tape to float above everything else.  Card complete!

Come back tomorrow for a final card with a very different look and thanks for stopping by, happy crafting!


Sunday, July 25, 2021

My Favorite Things - July Card Kit - Celebrate You - Countdown Day 2

Hello!   My Favorite Things have a new Card Kit releasing at 10am EST on the 27th July!!   The kit is named 'Celebrate You' and yes ... it is all about birthdays!   Here is my first of three cards to reveal some of what the kit can do!   Today I'm keeping it clean and simple with a fun shaker design.


Firstly, I die cut a white panel of cardstock using the new It's Your Day Die-namics.   On the reverse side I adhered some clear acetate.  I used strips of dimensional foam tape around the edge of the party hat design, used anti static powder to make sure the edges of the tape weren't sticky then sprinkled in my shaker filler contents and then I sealed the back of the shaker unit with more acetate.


I put more dimensional tape around the edges of the white panel and then adhered it to a colourful A2 panel of pattern cardstock from the new Party Time 6 x 6 Paper Pad.

For the decorative hat topper I die cut that piece twice from Poppin' Pink Prestige Cardstock and the second from the Gold Sparkle Cardstock and adhered.


Last but not least the simple design is anchored by the sentiment from the new Itty Bitty Birthday stamp set which I stamped on a die cut made using Itty Bitty Sentiment Strips Die-namics, black cardstock and Versamark Ink.   I heat embossed in white, backed the strip with foam tape and applied.  I mounted the whole panel to a sturdy white cardstock card base and with that the card was complete.

I chose to fill my shaker unit for a fairly stuffed look with little movement of the contents but you could easily do yours with just a few embellishments that are fun to shake around.

I'll be back tomorrow with something new from the kit - see you then hopefully!


Tuesday, July 6, 2021

My Favorite Things - MFT & Friends - Release Day!!

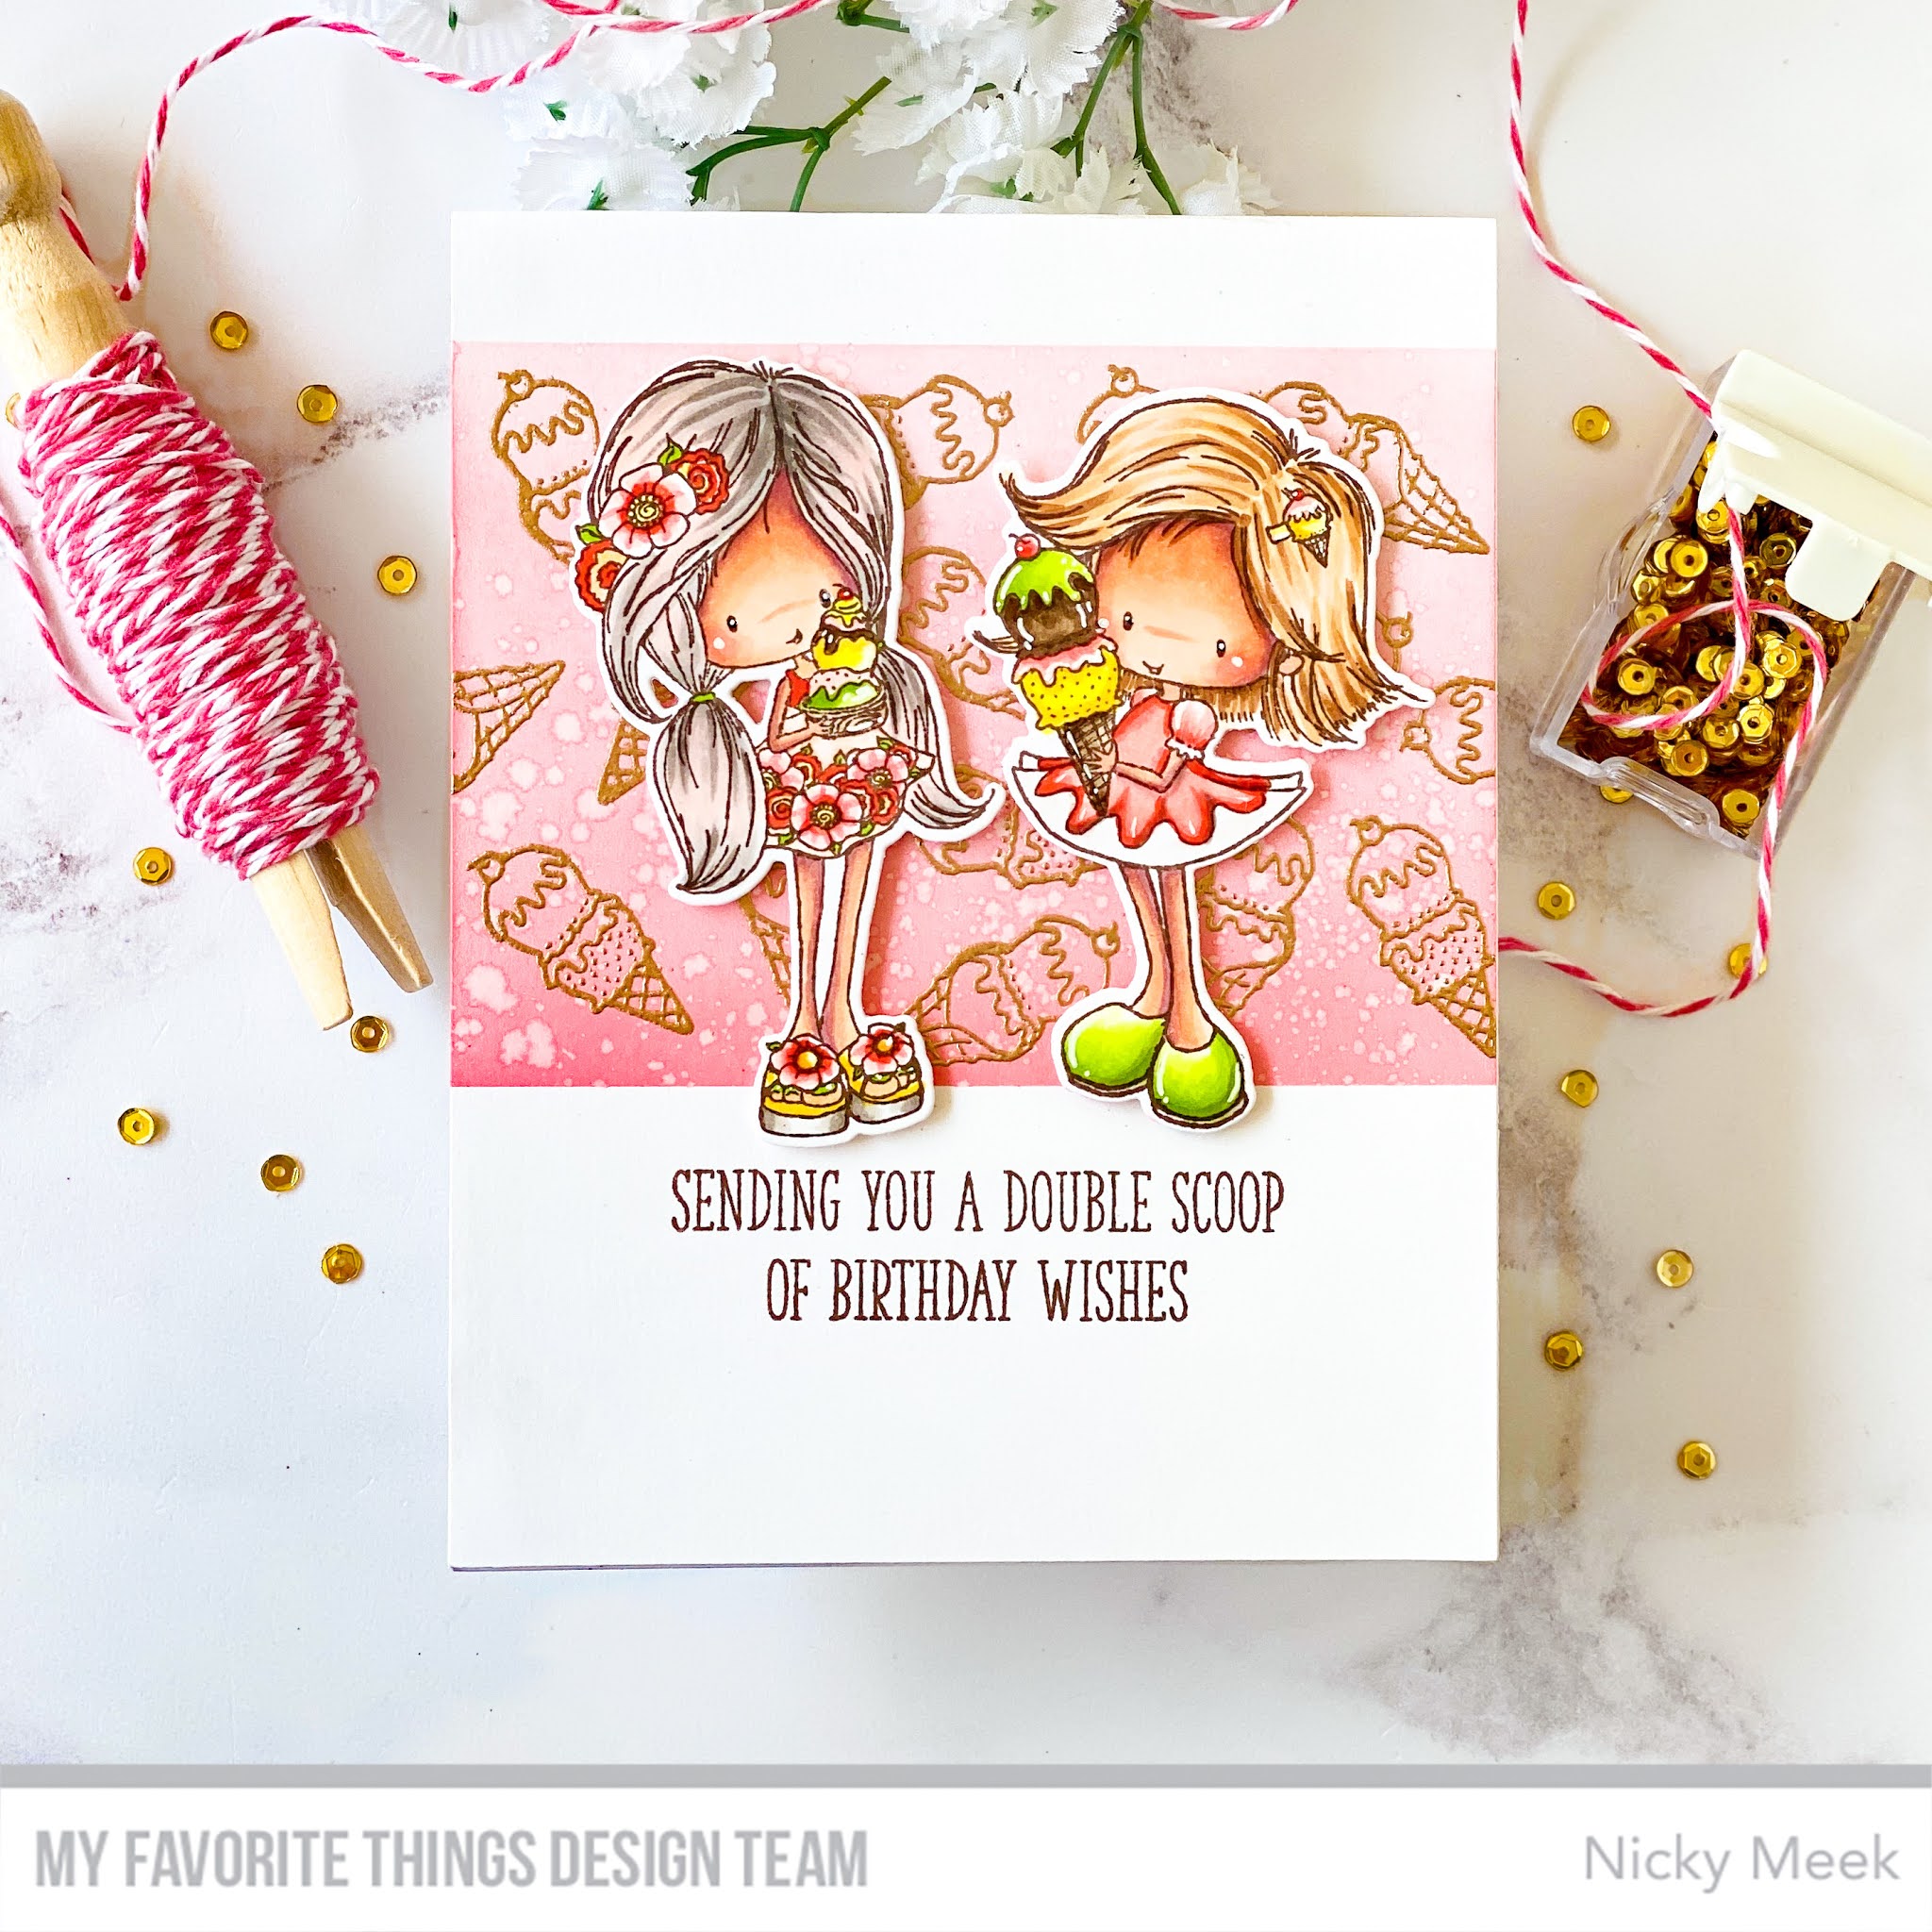
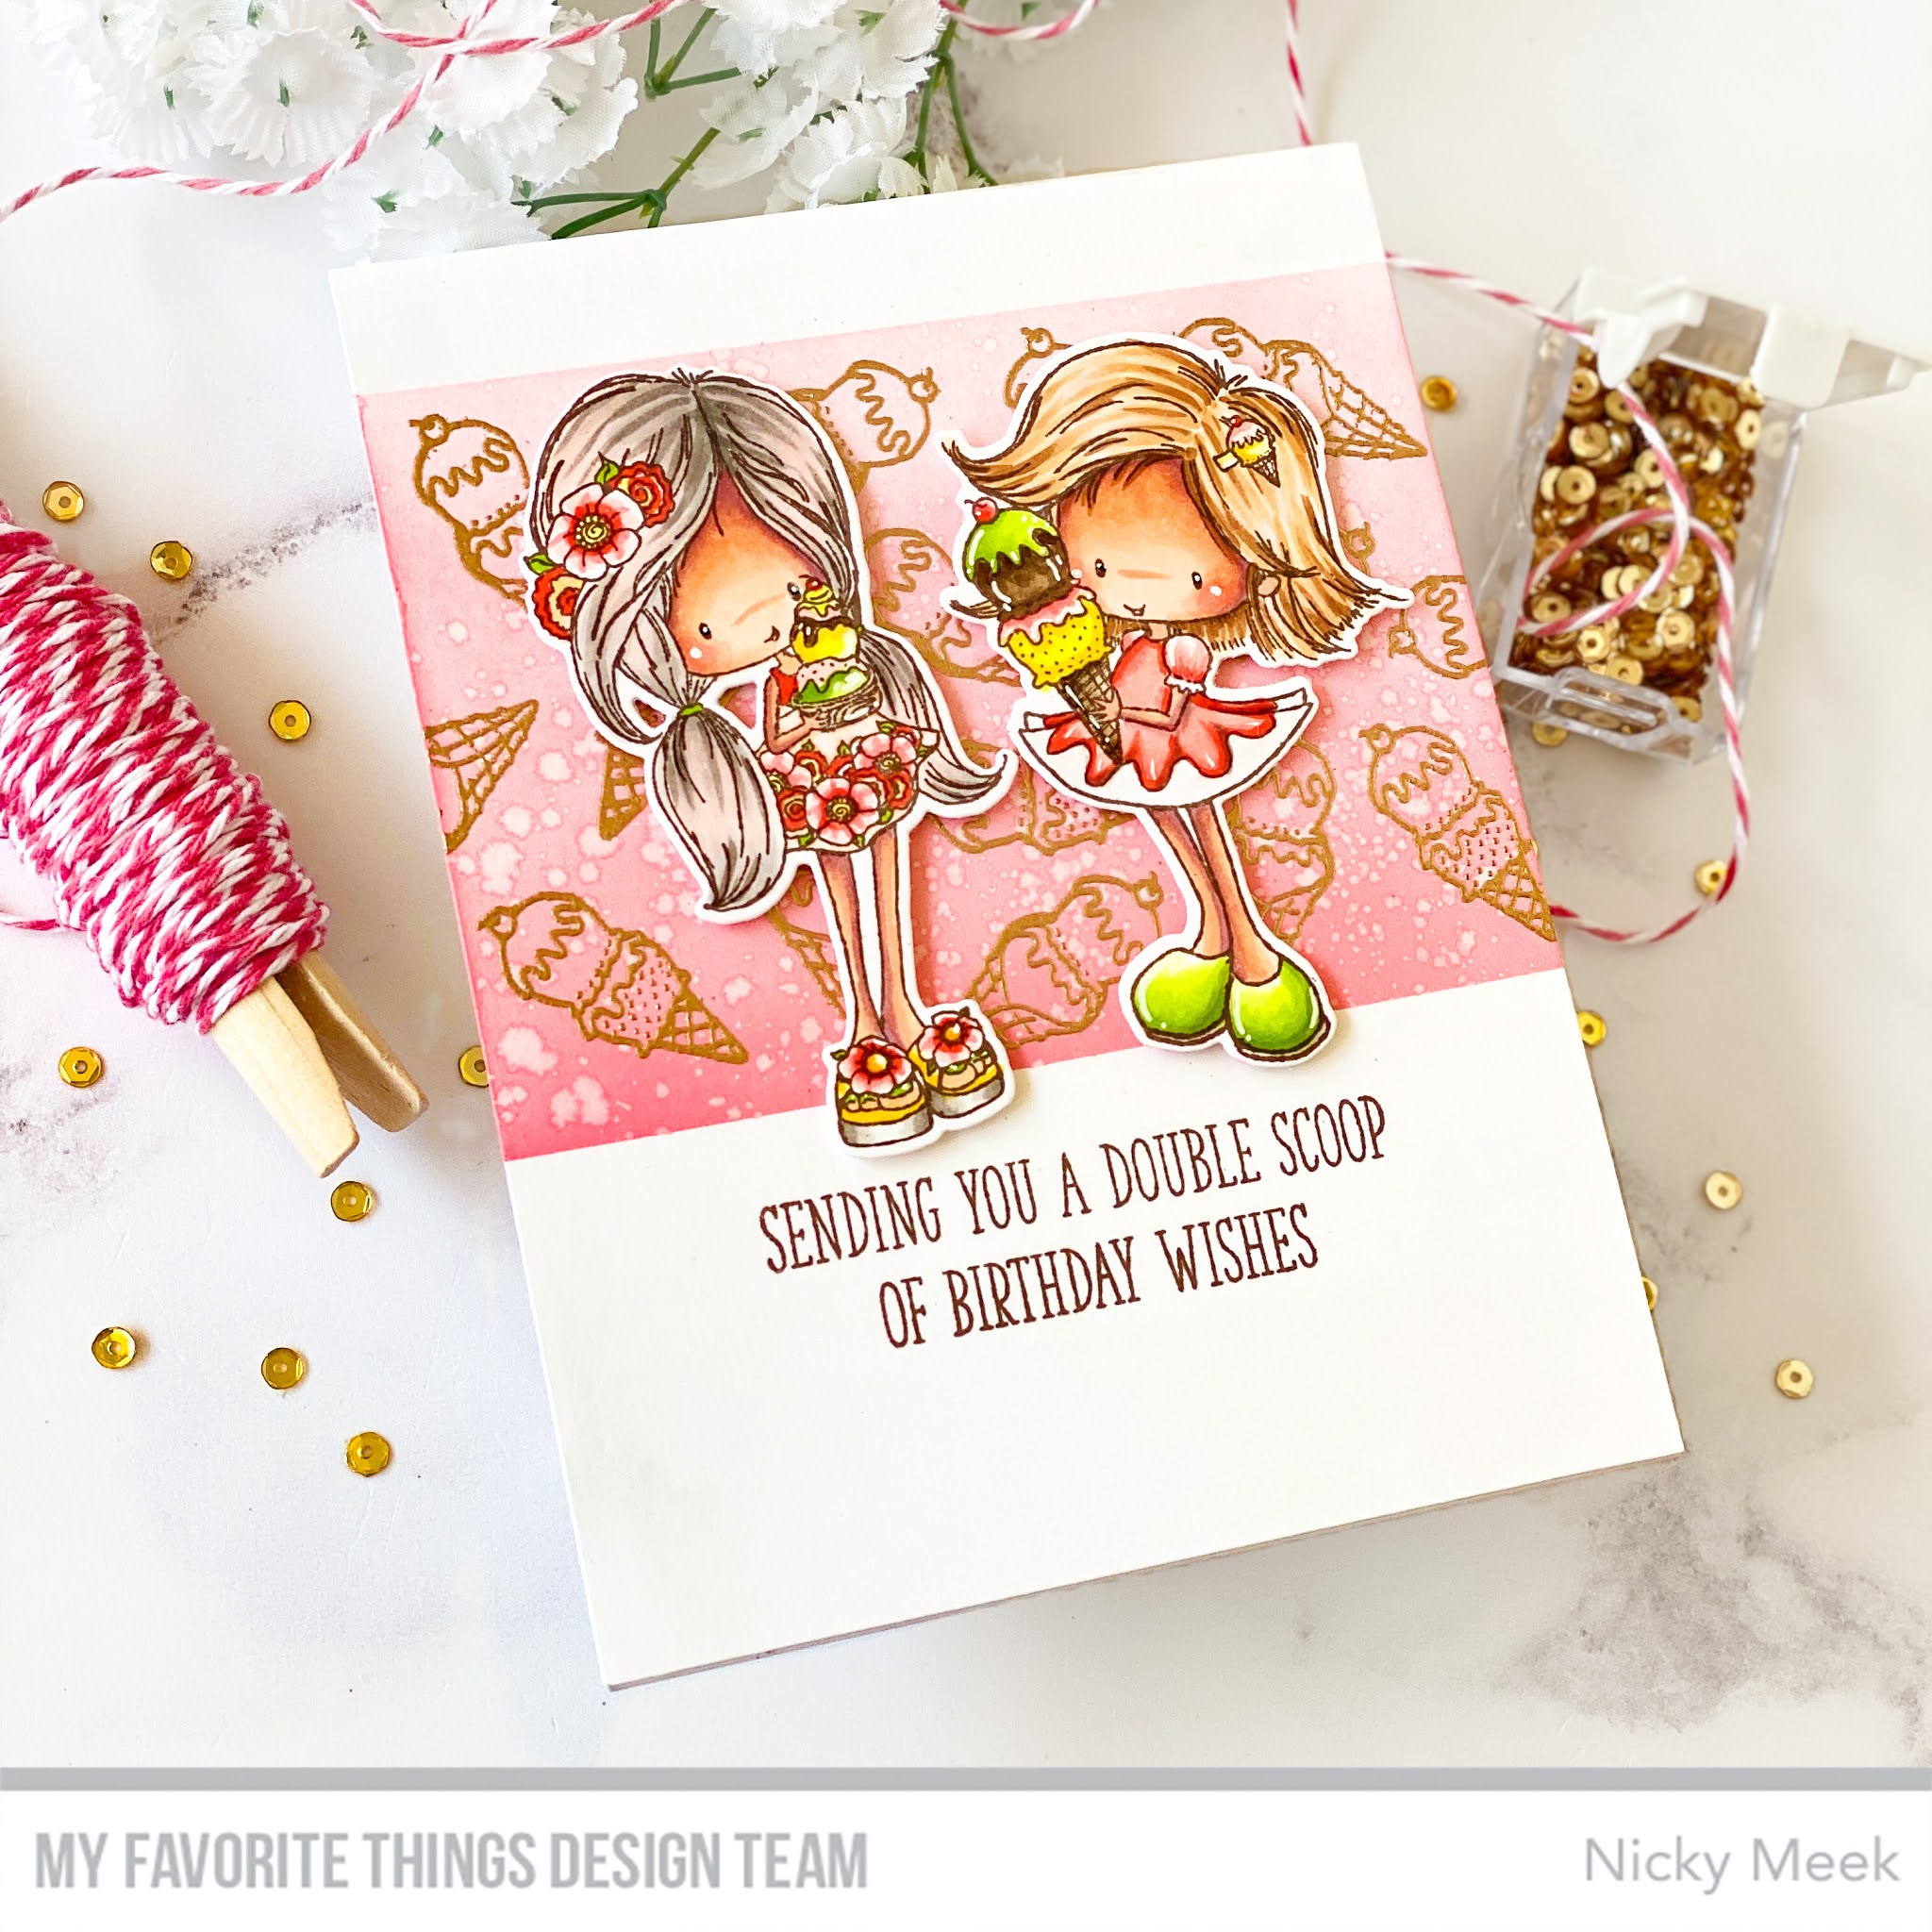
Woohoo!   The My Favorite Things July release is now available for purchase and to celebrate the highlight of the MFT crafty month I created this card using the new Tiddly Inks stamp set called 'Double Scoop of Cute'.


To create this card I masked off a section of an A2 panel of white cardstock.   I used Distress Oxide Ink in Worn Lipstick to ink blend the section that was to be my focal point and I created an ombré type fade.  I splashed the ink with a little water and blotted it up and  then I carefully removed the mask and dried the cardstock very thoroughly in front of mini handy dandy little desk fan.


Satisfied that it was now dry I used my embossing buddy to remove any static and then randomly stamped the ice cream cone images from the stamp set using Versamark Ink and then I heat embossed in super fine gold embossing powder.

I popped the panel in my Misti and stamped the sentiment and then attached it to my prepared white cardstock card base.

I stamped the two girls from Double Scoop of Cute and coloured them with my Copic markers.   Here are the colours I used:-

Skin - E000, E21, E11, E04
Cheeks - R00, R21
Hair (girl left) - W1, W2, W4, R000, R00
Hair (girl right) - E50, E51, E55, E44
Pinks - R05, R22, R21, R00
Greens - Y00, YG01, YG03, YG25
Yellows - Y06, Y15

A few points were highlighted with a white gel pen and the coordinating die-namics were used to die cut the images which I backed with dimensional foam tape and applied to the background.


Happy shopping everyone, I hope you treat yourselves to the lovely goodies you deserve!


Friday, July 2, 2021

My Favorite Things - July Release - Countdown Day 4

It's Countdown Day 4 at My Favorite Things and I'm previewing a new Stacey Yacula illustrated stamp set called Penguin Party in my card today.


Also featured in this card is the new Watercolor Wash Rectangle Stencil and that is where my card began.  I created a panel measuring 4 inches x 5 1/4 inches and adhered the stencil over the top of it and blended the background in a wash of pastels.   Distress Oxides in Speckled Egg, Spun Sugar and Squeezed Lemonade were used.   This panel was backed with white craft foam and adhered to a full size A2 panel which in turn was applied to the card base I'd already prepared.


I popped the card in my Misti and stamped the musical notes and sentiment.

On Copic friendly cardstock I stamped the images I was going to use from the stamp set and I coloured them with Copic markers.

Penguins W00, W1, W3, W4, W5 and W6 with Y00, Y38 and YR04
Cheeks R000, R00 and R21
Pinks RV10, RV02, RV04
Yellows Y06, Y15

I die cut the images using the coordinating die-namics and highlighted a few points with a white gel pen.


All the elements were backed with foam tape and applied to the scene and for a finishing touch I added Nuvo Glitter Gloss to the balloon and yellow ribbon on the gift box together with a touch on the fluffy topper on each of their party hats.

I hope you like my card today, I love to hear from you so please leave me your comments and questions.

Be sure to visit MFT's blog today to see more inspiration from the team and other product reveals, leave a comment for the chance to win $75 in the form of a gift voucher.