Showing posts with label Itsy Bitsy Polka Dot Backdrop. Show all posts

Monday, February 24, 2025

Lawn Fawn - Ruff You!


Welcome to my blog and a card made for fun using Lawn Fawn products.  Here's a list of links to the products I've used:-

Magic Iris Beehive Add-On (for the flowers)

To create the card I took a panel of pale blue cardstock.  Over this I glued a white panel that I had die cut using the Itsy Bitsy Die and which I had ink blended with a little Speckled Egg Distress Oxide Ink.

Next, I die cut a sturdy white panel of cardstock using the Meadow Backdrop Die and I ink blended using Twisted Citron and Mowed Lawn Distress Oxide Inks.  I also spattered with water and blotted that up and then splattered some Mowed Lawn loosened with a couple of drops of water.  I backed this panel with dimensional foam tape and applied it to the other panels.
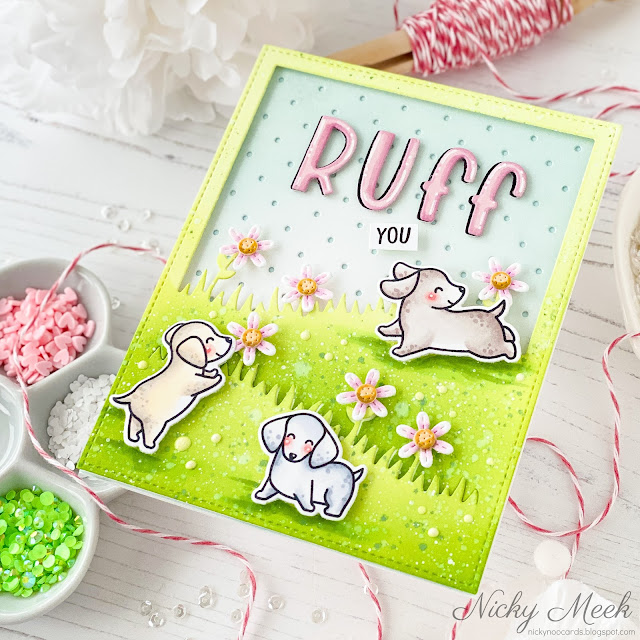


I die cut 6 flowers using the Magic Iris Beehive die and coloured them with Copic markers and then adhered them with glue to the meadow background.  I also added a little piece of foam tape behind each bloom to support it and make sure it stays nice dimensional.

I stamped 3 puppies from Furry and Bright and coloured with the following Copic markers (clockwise from the top):-

Puppy 1 - E70, E71, W2, W1, W0
Puppy 2 - C3, C1, C0, C00
Puppy 3 - E51, E40, E0000

I blushed and highlighted their cheeks and then die cut and applied with more foam tape.


For the punny sentiment I die cut RUFF using the Henry's ABCs die.  I offset the black behind the pink for a shadow when glueing them together and I used Copic markers to shade the pink for the look of more dimension.  I then came in with a white gel pen and highlighted the letters and glued to the sky and lastly I stamped the word YOU on a strip and added it underneath.

I used Copic markers under each pup to add a shadow and a few Nuvo drops completed the scene.

Appreciate you visiting my blog today,  I'll be back soon with something new to share.


Wednesday, May 31, 2023

Lawn Fawn - Really High Five with Secret Garden Window Die


Hello and welcome to my blog and a new card created using products by Lawn Fawn that I recently treated myself to.  Here's what I've used:-


Here's how I made the card.  I first prepped an A2 panel of a lime green coloured cardstock.  Over this I layered a white panel that I die cut using the Itsy Bitsy Polka Dot Backdrop die.   I adhered the panels together and then used the Secret Garden Window die and die cut the decorative opening.  Since the cardstock was double thickness I run it back and forth through my Big Shot a few times until fully and cleanly cut through.

I coloured the greenery attached to the window and added a few more sprigs of flora to flesh it out a little more and then backed the panel with dimensional foam tape and applied it over a panel of cardstock where I'd created a soft pink cloudy background.  This in turn was glued to my card base.


I stamped the images from Really High Five using Memento Ink in Rich Cocoa and coloured the images using the following Copic marker combinations:-

Mouse - W4, W3, W2, W1, W0, R00, R000
Orange Balloon - Y15, Y17, Y19
Bear - E31, E41, R00, R000
Pink Balloon - RV09, RV25, RV06, RV04
Blushes - R22, R21, R20, R00

Images were highlighted with a white gel pen and die cut then applied to the scene with more dimensional foam tape.

To complete the project I stamped the sentiment in a bright pink ink and applied the sentiment strip with ... you've guessed it .... more foam tape!

Thanks for visiting my blog today, I'll be back in a couple of days with something new to share!