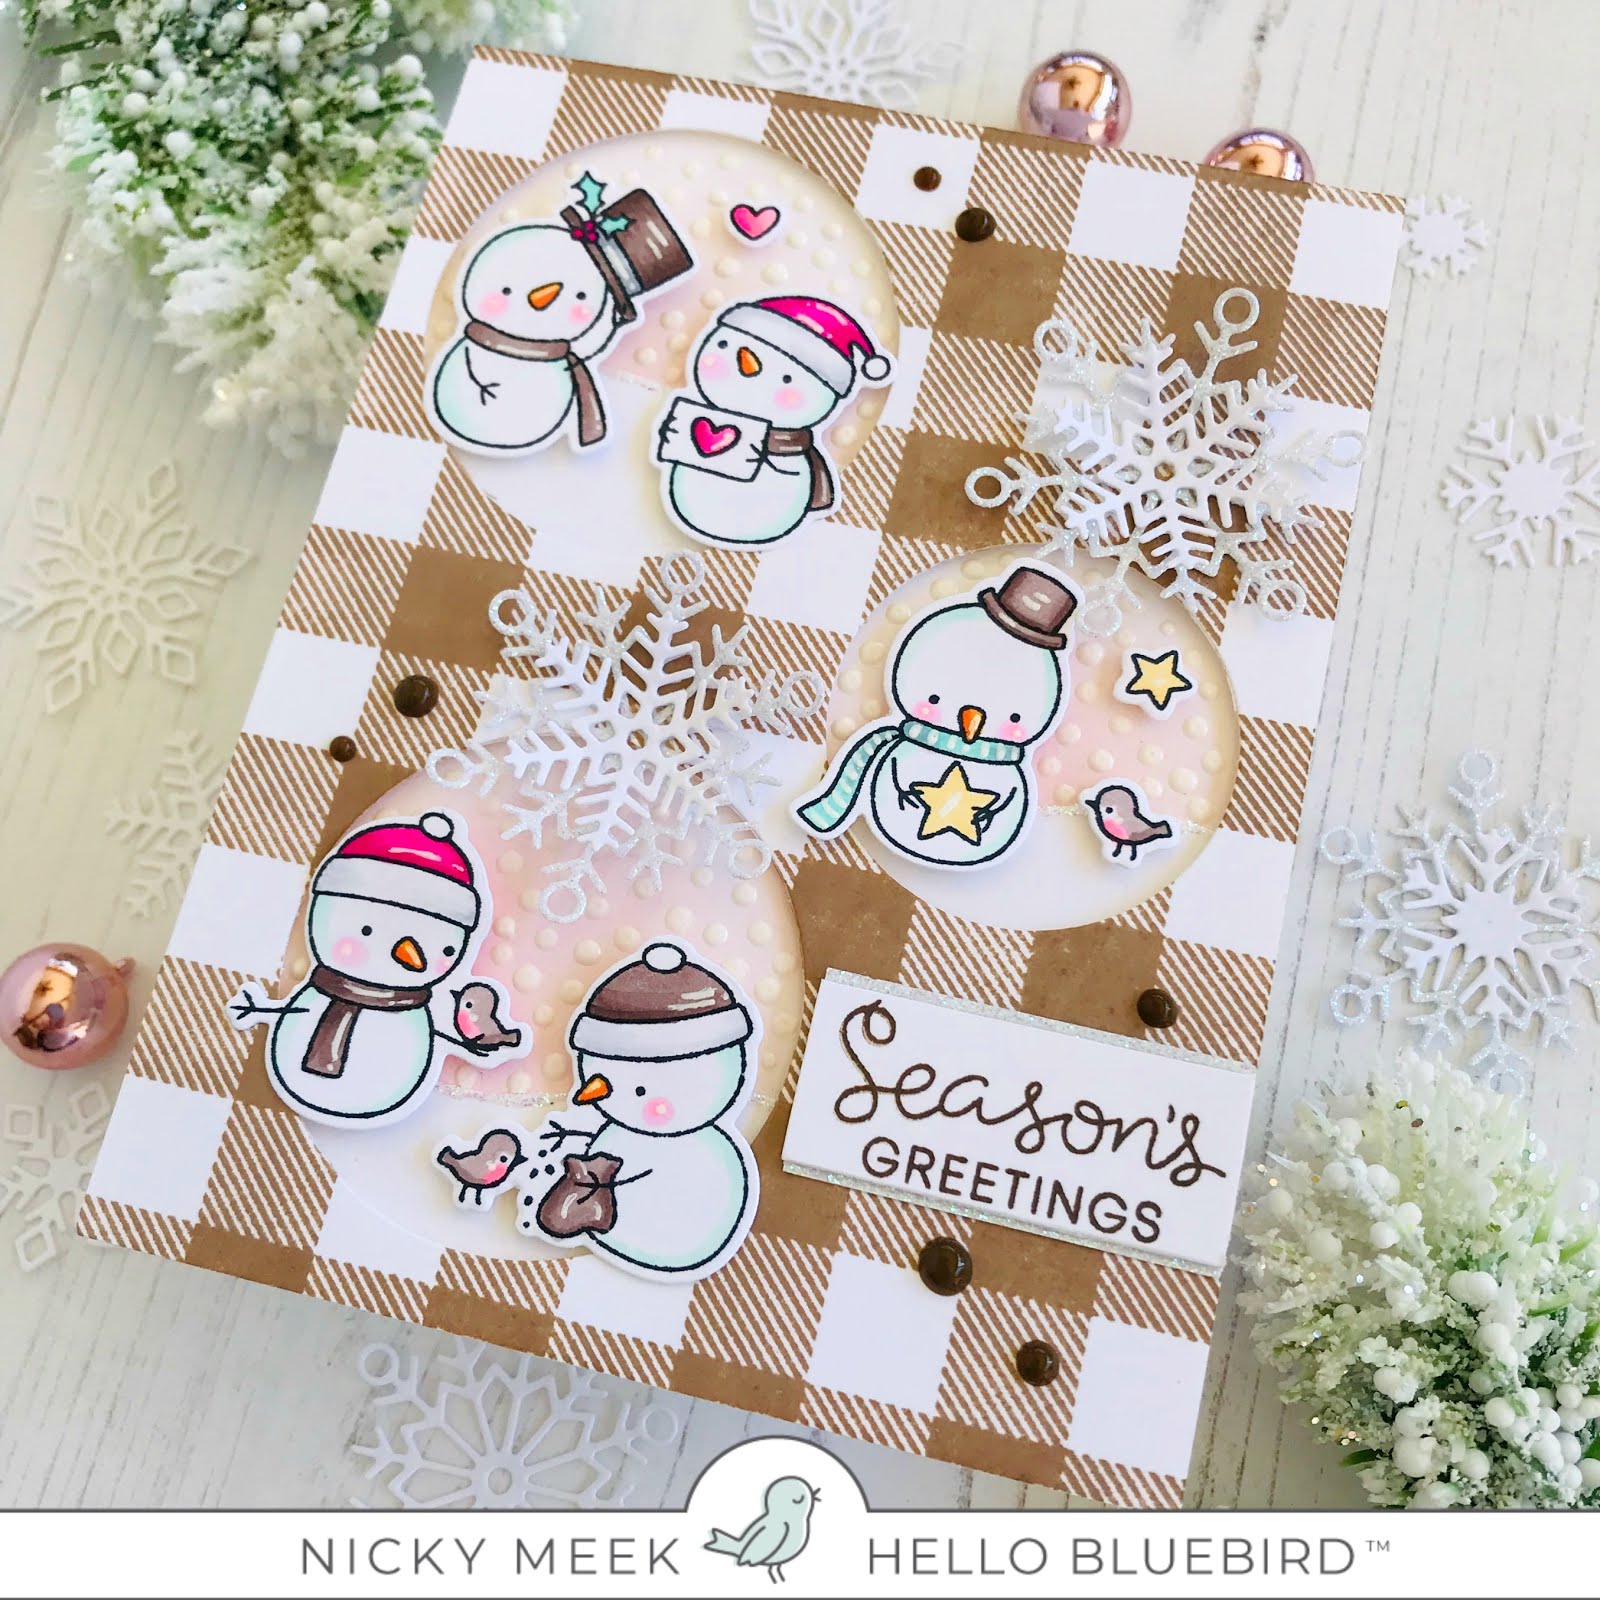
You can find me over on the Hello Bluebird Stamps Blog today with all the details for this new Christmas card using their ever popular Frosty Littles stamp set. Hope to see you over there!
Feels so good to be back making Christmas cards again, it has to be my favourite card making 'season'. Today, for Hello Bluebird Stamps I have a card using a favourite set from last year called Frosty Littles and the coordinating dies can be found here. Since we just got a good cold front through my area thoughts turned to hot chocolate, pink peppermints and sparkle and this is what inspired my card. To make this card I used the Buffalo Check background stamp. I inked it up with Nuvo Hybrid Ink in Soft Suede and stamped it to a panel of white cardstock, repeating for a better stamped image. I used 2 different sizes of some standard circular dies from my stash to die cut the three openings. I did a little Distress Oxide ink blending with Spun Sugar where each opening would be on another panel of white cardstock. I die cut 3 mini sections of 'snowy hills' using the Hill and Dale Die and edged each with some Stickles glitter in Crystal. I backed the checked panel with foam tape and applied it to the ink blended panel and in turn this was applied to a sturdy 110lb white cardstock base. I used Nuvo Crystal Drops in Simply White and dotted in some dimensional snowfall into each circular opening. On Bristol Smooth cardstock I stamped my Frosty Littles images and coloured them with Copic markers. They were die cut, backed with foam tape and applied to create 3 little scenes in each opening. Points were highlighted with a white gel pen. The card was finished with layered snowflakes die cut using Frosty Flakes. The larger flake was die cut with white sparkly paper and the smaller one layered on top from white lightweight cardstock. These were glued together and to the card. Finally the sentiment was stamped from Snow Play and I used Nuvo Crystal Drops in Dark Walnut for a few chocolatey embellishments. I'm so happy you navigated to my blog today to read about this card. Happy crafting! Nicky x
Hello! I have a new card for you today. If you follow my card making journey then you know that I am totally into 'Slimline' cards right now. I build scenes and love the characters I get to work with and therefore I like to cram as much into one card as I can! An A2 card doesn't give you much real estate to work with and so with increasing regularity I'm turning to Slimline cards. My card today scales new heights since I've adorned it vertically - tall and slim - the supermodel of cards! Finished card dimensions are 3 1/2" wide x 8 1/2". From an A4 sheet of cardstock cut the length at 7 inches then score and fold in half (4 bar). My panel is cut from the remainder of the A4 sheet and the dimensions are 3.2" x 8.2". Worth writing those down for future reference! For your coordinating envelopes just Google 'slimline envelopes' (this search yields the best results). Sometimes they are referred to as 'invitation envelopes' and also '#9 envelopes'. So, with the card form made I sourced everything I needed from my Hello Bluebird stash! Front and centre are those adorable Frosty Littles. They are perched amongst the banks of snow created using Hill and Dale Die and above them, high in the mountains that soar overhead are the Glacier Peaks Die cuts. The word Noel is from the Christmas Words #2 Die. Finally, the clouds are from Puddle Play Coordinating Dies. My card was made by die cutting several snowdrifts using Hill and Dale and ink blending them very sparingly using Distress Oxide Ink in Cracked Pistachio - I just wanted a hint of mint! I then die cut all 3 of the mountain ranges from Glacier Peaks. For the back two ranges I also cut the snowy/glacial peaks. I ink blended them with a hint of pale blue in the form of Distress Oxide in Tumbled Glass and adhered them. I also ink blended the front of the card base with more Tumbled Glass again very sparingly to make the sky. I layered all the die cuts together and stuck them down sometimes just with my tape runner and other times with a little foam tape behind a peak to give dimension. On Bristol Smooth cardstock I stamped all the images you see from Frosty Littles including lots of the trees. I watercolour painted the images using a combination of Kuretake Zigs and Arteza watercolour brush pens. I die cut all the images and began to layer them into the scene as imagined in my mind before I started. Again some were directly glued down and some for dimension had a little foam tape added on the reverse. The word Noel was die cut 3 times and each was adhered to the next and then I used a little more Tumbled Glass Ink and added a little blue to it then stuck it down. Finishing touches time! I made everything twinkle using Stickles in 'Crystal', I dotted in some pale gold dots with a gel pen through the 'minty' areas and the final touch was the mini wooden stars in the sky. This card feels sturdy but since the weight is at the bottom it is stable when it stands and doesn't blow over when someone walks past!!! I recommend 110lb Neenah cardstock for such a project. Are you up for making a card that will stand taller than anything else on the mantlepiece? Worth the effort I'd say. Until the next time, happy crafting ..... Nicky x
Hello! This is Day 3 of the new release showcase for Hello Bluebird Stamps and I'm playing with the new Frosty Littles. This is a 'Slimline' card which is to say that it has finished card dimensions that are 3 1/2" wide x 8 1/2" so from an A4 sheet of cardstock cut the length at 7 inches then score and fold in half (4 bar). My panel is cut from the remainder of the A4 sheet and the dimensions are 3.2" x 8.2". A simple online search for 'slimline envelopes' will yield several results to make life easier for mailing off your creations! The panel I created was ink blended in Distress Ink in Victorian Velvet. Once dry it was stamped and embossed with white snowflakes. I hand cut two wavy banks of snow sticking one down to the panel then with a very light hand I ink blended the other one using Distress Ink in Cracked Pistachio and layered it over the first snow layer but this time using foam tape to back it and lift it up! On Bristol Smooth cardstock (I favour Strathmore) I stamped my snowman and village images using Ranger Archival Ink in Black. I watercolour painted them using a mix of Kuretake Zigs and Arteza watercolour pens. Next, I fussy cut my images since at the time of making this card the coordinating dies had not been supplied to me. I backed each image with foam tape and adhered them into the scene having some of the snowmen interacting with others. I backed my panel with white craft foam and applied it to the card base .... this is long and chunky/substantial card ... I don't DO flimsy!!! I saved the sentiment stamping for the inside only for this card and felt no other embellishment was required this time around! I think it would be safe to say the Frosty Littles are adorable!? Thanks for stopping by, I'll be back with another card featuring the new release tomorrow! Nicky x