Showing posts with label Stitched Snow Drifts Die-namics. Show all posts

Wednesday, November 8, 2023

My Favorite Things - Vault Release Spotlight


Welcome to my blog!  Today I have a second card featuring products that were just released from MFT's Vault and which are once again available for purchase.  Here's what I've used to make this Christmas card:-

Stitched Snow Drift Die-namics
A2 Stitched Rectangles Stax Set 2 Die-namics
Small Brick Wall Stencil

I started with a panel of Kraft cardstock and overlaid this with the stencil and then I ink blended through it with white pigment ink to create the brick wall design.  I then created a white panel of cardstock.  From one end I die cut with the Icicle Edge Die-namics and from the other I used Stitched Snow Drift Die-namics.   I ink blended a little icy blue on to each using Distress Oxide Ink in Tumbled Glass and then I used the largest die from the Stax set to die cut both the kraft and white pieces so that they were all sized the same.


I stamped the sentiment to the icicle portion and then added both the icicle and snowy ground portions to the brick background using dimensional foam tape.  This panel was then adhered to a red card base inside of which I added a white insert for writing on.  I set this to one side.

I stamped the images I was needing from Santa's Elves using Memento Ink in Rich Cocoa.  I coloured using the following Copic marker combinations:-

Skin - E34, E11, E21, E00
Blushes - R22, R21, R00
Red - E59, E39, RV29, R24
Green - G29, G28, YG67, YG05
White - C5, C3, C1, C0
Tree - BG10, BG0000, C1, C0, YG31

I highlighted with a white gel pen then die cut with the coordinating die-namics and I applied the Elves and all other elements using either a single or double layer of dimensional tape.


For the finishing embellishments I used Stickles glitter to add twinkle to the icicle edge and then more subtly to other elements in the scene and then I used white Nuvo drops to add in some dimensional snow.

Thank you for stopping by my blog today and don't forget to visit and subscribe to the MFT You Tube Channel for endless how-to videos, inspiration and product reveals.


Friday, November 4, 2022

My Favorite Things - November Release Countdown Day 4


It's Countdown Day 4 to the MFT Stamps new release coming November 8th at 10am Eastern.   Here are the products used in the making of this new project:-


To make this card I first stamped a white panel using the background stamp using Sno-Cone Ink by MFT.  I did this in my Misti so that I could repeat stamp 3 times for a little more colour definition.

Over this I layered two die cuts made using the Snow Drifts Die-namics, I chose to use the smooth side of the stitched die-cuts.   I ink blended these with more of the Sno-Cone Ink and glued down directly to the background panel.  I popped the panel in my Misti and double stamped the sentiment.


I stamped the cable wire image on the background and all other images were stamped on Copic friendly cardstock.  I coloured the images using the following Copic combinations:-

Cable Cars/Red - R39, R29, R27, T5, T4, T3, T2
Clouds - BG10, BG70
Trees/Green - G19, G18, YG67
Penguins T5, T4, T3
Bunnies - E42, E41, E40, E0000, W3, W1
Polar Bear - C3, C1, C0, C00
Bear - E41, E40, E0000
Blushes - RV14, RV42, R11, R000

Points were highlighted with a white gel pen, then I die cut the images and added them with foam tape.   A few sparkling clear sequins completed the scene.


Thank you for stopping by my blog today and don't forget to visit and subscribe to the MFT You Tube Channel for endless how-to videos, inspiration and product reveals.


Thursday, November 3, 2022

My Favorite Things - November Release Countdown Day 5


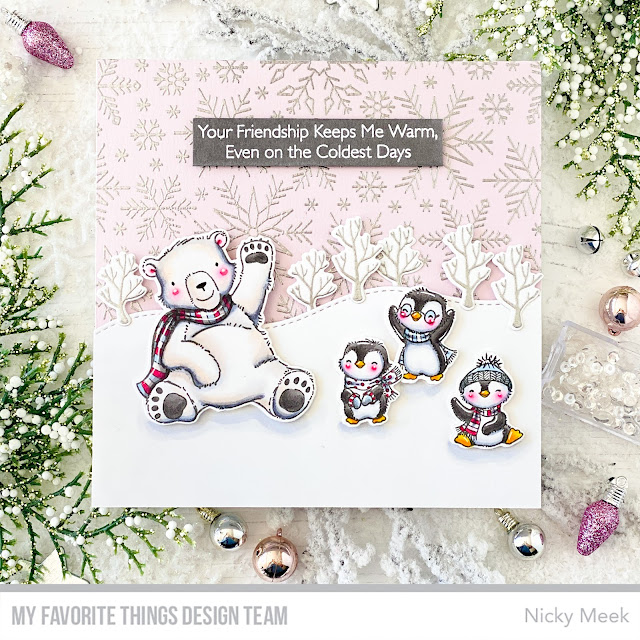
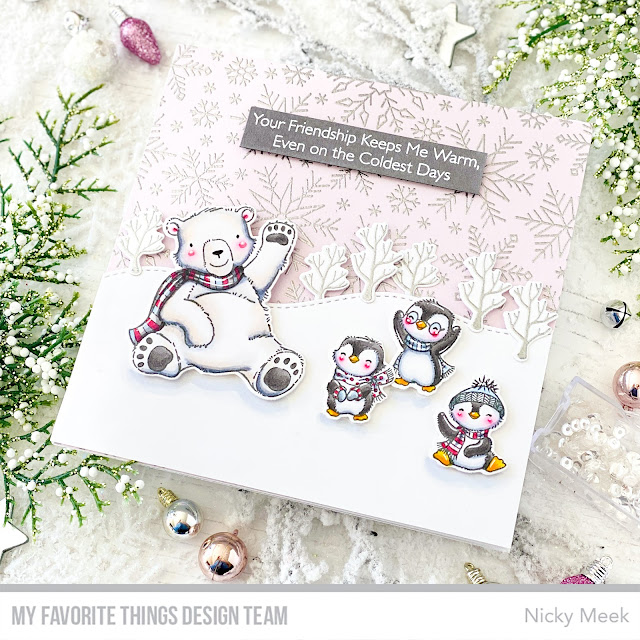
We're happy to be counting down the days to the next new release by MFT Stamps which comes on November 8th at 10am Eastern!   This is Countdown Day 5 and below is a list of the products used in this project:-


This is a 5 1/2 inch square card that started with a background panel of Princess Pink cardstock that I stamped with the background stamp using Versamark Ink and heat embossed in silver.   Because I used my Misti to do this, I was able to re-stamp and heat emboss once again for a more embossed effect.

I used the Stitched Snow Drifts Die-namics to create the snowy ground and applied it to the background with white craft foam behind it to lift it up.


I stamped the Stacey Yacula illustrated images from Polar Opposites using MFT's Gravel Gray ink and then used the following Copic markers to colour the images:-

Polar Bear - C5, C3, C1, C00, E0000, T5, T4
Penguins - T5, T4, T3, C3, C1, C00, YR04, Y38, Y19
Blushes - RV14, RV02, RV10, RV000
Blue - B91
Pink - RV14

I also stamped the tree images from the stamp set using Versamark Ink and heat embossed in silver.

All images were die cut and applied to the scene with dimensional foam tape.

I added a little shadow under the polar bear and penguins using C1, C0 and C00 and highlighted a few points with a white gel pen.

Finally I stamped and heat embossed the sentiment with white embossing powder on a strip of Gravel Gray Prestige Cardstock, apply this with foam tape to keep up with the dimension.

Card complete!


Thank you for stopping by my blog today and don't forget to visit and subscribe to the MFT You Tube Channel for endless how-to videos, inspiration and product reveals.


Wednesday, June 22, 2022

My Favorite Things - Wednesday Sketch Challenge 599

A warm welcome to my blog today where I'm share an inspiration card for the newest MFT Stamps Wednesday Sketch Challenge.   This is WSC599


Products used in the making of this card:-


I die cut a panel of which cardstock using the Snow Drifts Die-namics and I stencil ink blended the top portion as sky and the other portions were blended for grass.   They were adhered to another panel and the sentiment was stamped and it was framed using the A2 Die-namics.


The images were stamped and coloured with the following Copic markers:-

Animals - E55, E31, E41, E0000
Blushes - R21, R20, R00
Plane - BV000, V20, B60, BV0000, W4, W3, W2, W0
Blues - BG000, BG0000, BG70, W1, W0
Pinks - R21, R20, R00
Yellows - YR31, Y21, W3, W2, W1, W0

A white gel pen highlighted some areas.

Images were die cut and added to the scene with dimensional foam tape.

I finished the card by adding a few tufts of grass and a few sparkling clear sequins.


Thank you for stopping by my blog today and don't forget to visit and subscribe to the MFT You Tube Channel for endless how-to videos, inspiration and product reveals.