Showing posts with label Pop Up Box Card. Show all posts

Monday, August 15, 2022

My Favorite Things - August Release - Countdown Day 1


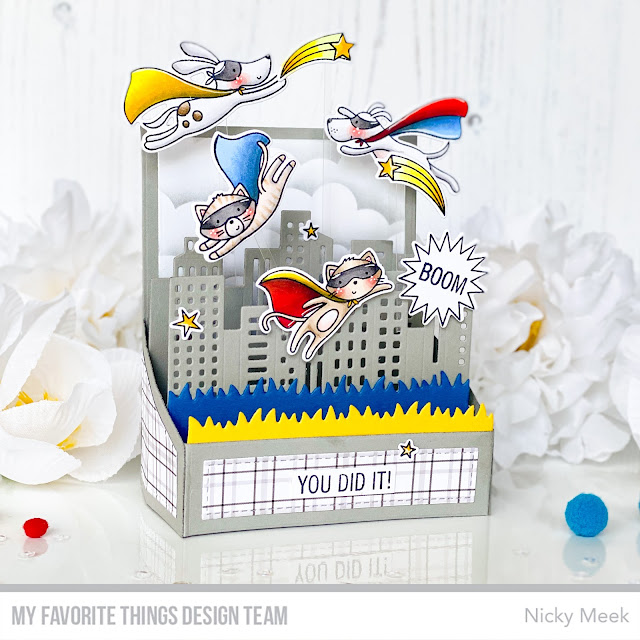
This is Countdown Day 1 to tomorrow August release from MFT Stamps.  You can buy the release at 10am Eastern.  My card features the new To The Rescue stamp set together with the new Outside the Box Cityscape Die-namics.

Products used:-

Also used are the Outside the Box Level Up and Grass Die-namics.

I started by using the die-namics to form my box card using grey cardstock and the Black and White Plaid 6 x 6 Paper Pad.  I also cut two grass panels with colours to suit how I'd be colouring the stamp images.  The back panel was stencil ink blended using the Mini Cloud Edge Stencil.
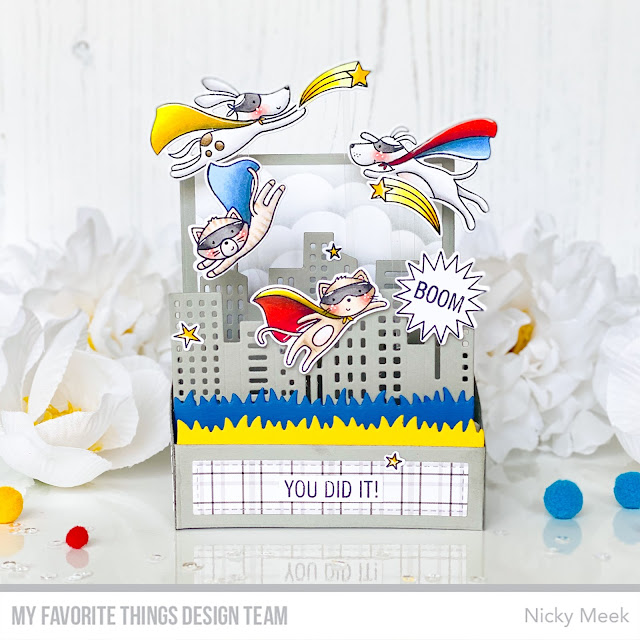


With the box formed using the Cityscape Die-namics I stamped the images from To The Rescue and coloured them with the following Copic markers:-

Blue - B24, B23, B21
Yellow - Y19, Y15, Y06
Red - R29, R08, R05
Superhero Masks - T6, T4, T2

Images were die cut and added to the scene hoisted up on slender pieces of acetate and with that the card was complete.


Thank you for stopping by my blog today and don't forget to visit and subscribe to the MFT You Tube Channel for endless how-to videos, inspiration and product reveals.


Saturday, June 19, 2021

My Favorite Things - Vault Release - Countdown Day 3

Well howdy everyone!    We've arrived at Countdown Day 3 of the June Vault release of Birdie Brown illustrated stamp sets.   14 stamp sets are being released on June 22nd and My Favorite Things will keep releasing them until they are all available and will stay available from now onwards.  Today I'm sharing a box card using 'Saddle Up & Celebrate'.


Also used in this card is the barn from Barn Die-namics and the Outside The Box Low Profile Die-namics.   The barn just happens to be the exact size needed as a backdrop to your box cards and so I first die cut the pieces required using Moroccan Spice Prestige Cardstock with Milk Chocolate Prestige Cardstock for the roof and regular white cardstock was used for the trim on the windows and barn doors.

Once the barn was constructed I glued it into the back of my formed Outside The Box card.    The layers of grass were die cut using the Outside the Box Grass Die-namics and then I ink blended using Prickly Pear and JalapeƱo Popper Premium Dye Inks.   I also splattered on the darker colour for a softer look.

I set this box card to one side and moved on to the next stage.


I stamped all of  the images from Saddle Up & Celebrate and coloured them with Copic markers.   A few finer details such as the gingham checks on the clothing were done with a red gel pen.   A white gel pen was used to highlight certain points on the images.  I used the coordinating die-namics to die cut each image and then adhered them into the box scene.


To finish the card I used paper from the Tiny Check 6 x 6 Paper Pack to finish the box card.   I stamped the sentiment to the piece on the front of the box prior to adhering it.

Box cards are never quick cards to make but they are always worthwhile!

Visit the MFT Stamps blog today and comment for a chance to win a gift voucher!   Good luck and happy crafting everyone, do come back tomorrow for Countdown Day 2!


Tuesday, December 10, 2019

Snowball Fight - Pop Up Box Card - Hello Bluebird Stamps

Hello!  I decided to switch things up a bit and get dimensional and I created this Pop Up Box Card using Snowball Fight from Hello Bluebird Stamps.


The actual die used to form the box is from Lawn Fawn and you can source others elsewhere.  I die cut all the parts from 110lb white cardstock.  I used Distress Oxide Ink in Tumbled Glass to ink blend the panels, fading away the blending to nothing.   I then used a white gel pen and hand drew in the falling snow.  Each panel was adhered in place on all sides of the box.  I wrote the message to my intended recipient on the panel that is on the reverse of the box before adhering it just for ease.


I stamped the kittens from Snowball Fight on to Copic friendly cardstock using Memento Ink in Rich Cocoa and I coloured them with Copic markers and highlighted points with a white gel pen then die cut the images and set them to one side for a while.


Using a Memento Ink in a pale blue shade I stamped the the pile of snowballs image 3 times from Snowball Fight.  I also stamped the two little trees from that stamp set and then I grabbed the Yeti Or Not stamp set which has more of the same style of trees but in 2 slightly larger sizes, so this provided me with a nice mix once I'd stamped them.  Using B000 I added a little colour to both the snowballs and the trees then die cut the images. 


Time to start assembling!  There's no hard and fast rule for how to do this but you just want to layer away and keep checking all your angles so that there is interest no matter from which angle the card is viewed.  Slowly but surely I adhered the elements to the scene.  A couple of the snowballs whizzing through the air are elevated and floating above the scene by adhering them to a narrow strip of acetate.  As you build your scene keep checking that the box card can be folded for mailing purposes and unless you want to size it up into a much larger envelope, be sure to keep all elements within the A2 frame (i.e. nothing should be poking out the sides when you fold it flat)!


Time now just for the finishing touches which come in the form of several Frosty Flakes being adhered into the scene and the sentiment was stamped with red ink and is from the Christmas Is Coming stamp set.

I appreciate you stopping by the blog today and I hope to see you next time.  Happy crafting!

Nicky x

Monday, June 11, 2018

Dandelion Wishes

Hello everybody, I've got a pretty special 3D pop up card for you today - I went to town on this one!  Mama Elephant have me onboard Guest Designing for a while and this month they are including a 3D Pop-Up Card die with their June release which makes pop up cards that bit quicker to make - they've done the calculating for you!


My card is constructed of Neenah Solar White 110lb cardstock which I nearly always use for my regular card bases!  I die cut everything twice to provide me with anything I could want.  I just followed my heart as I created, there was no big plan.  The panels for the flaps were ink blended using Distress Ink in Cracked Pistachio.  I also ink blended in similar fashion the inside of what would be the box.  This makes the card look more finished because remember the recipient will peer inside too!


The upper back panel of course was ink blended in Tumbled Glass Distress Ink.  The die includes the picket fence (yay!), a cloud and a speech bubble as well as choices for different hills (grassy or otherwise), so this die is a great investment because you can use it year round or just use parts of it for scene building on any card you create.  I chose grassy hills and ink blended them also.


On my favourite Strathmore Bristol Smooth cardstock I stamped out all the images I wanted for this card using waterproof Archival Ink.  I die cut them and watercolour painted them using my Kuretake Zigs.  I then set about applying them into the scene carefully checking heights and viewing it from different angles to make sure it was interesting from every vantage point and nothing was obscuring anything else.  For height, the cloud and the mouse floating on a puff of wind hanging onto a little dandelion, I used a tiny strip of acetate to get them where they are.  It is essential that you check your heights as you go and keep folding the pop up box card flat to determine before you glue, whether it will still fit in your A2 envelope!


I highlighted a few areas with my Uniball Signo White pen including applying dots to the dandelion heads to break them up a little, making them look fluffy and soft .... as they should be.  The sentiment was stamped and applied with a little strip of Scotch foam tape ...... and there you have it!  Like I said at the beginning, I went to town on this one and it was worth it I reckon!


Until the next time .....

Nicky x