Showing posts with label Dandelion Wishes. Show all posts

Wednesday, June 27, 2018

Dandelion Wishes - Two New Cards

Hello!  My blog is a busy place today with new cards ready for both Avery Elle and Mama Elephant.   This post is for Dandelion Wishes by Mama Elephant, you might remember my 3D pop up box card from a couple of weeks ago which also used Dandelion Wishes.  No box cards today but two classically pretty cards that are relatively easy to make.


This first card features a hand stamped gingham background which is from Hello Bluebird Stamps.  I then aged the edge by ink blending with Antique Linen Distress Ink and die cut the panel with the wonky stitched edge by Mama Elephant.  I already had this white square frame die pre-cut from a previous project and I applied it popped up on foam tape.  On Bristol Smooth cardstock I hand stamped all of my images with Ranger Archival Ink in Jet Black and watercolour painted them using Kuretake Zigs.  Colours used are Gray 090, Oatmeal 064, Pale Pink 028, Yellow Green 053, and Lemon Yellow 051.  They were die cut and then I just built the scene that you see here by means of layering and building depth using different amounts of Scotch foam tape.  The sentiment was stamped on a little strip of cardstock and also applied with foam tape.  The final touch was the addition of a few pearly white sequin accents.


For my second card I chose the same basic idea but gave it a slightly different look - less antiqued if you will!


I stamped a panel with a cozy plaid background stamp by Hello Bluebird using Simon Says Stamp Premium Dye Ink in Lake Shores.  I used another white frame die cut I had to hand and applied it with foam tape.  I stamped the sentiment and added it below.  When I stamped and watercolour painted my images for the last card I made enough extra images to complete this second one and so all of these components were painted with the exact same colours as listed above.  Once again I set about to arrange a dimensional scene with foam tape that was pleasing to my eye and finished this card off with some pretty sparkling clear flower sequins from Pretty Pink Posh for a little twinkle.


When you have stamp sets with lots of little images I find this basic layout a really good 'go to' design.

I hope you're inspired ... go forth and craft!

Nicky x

Tuesday, June 12, 2018

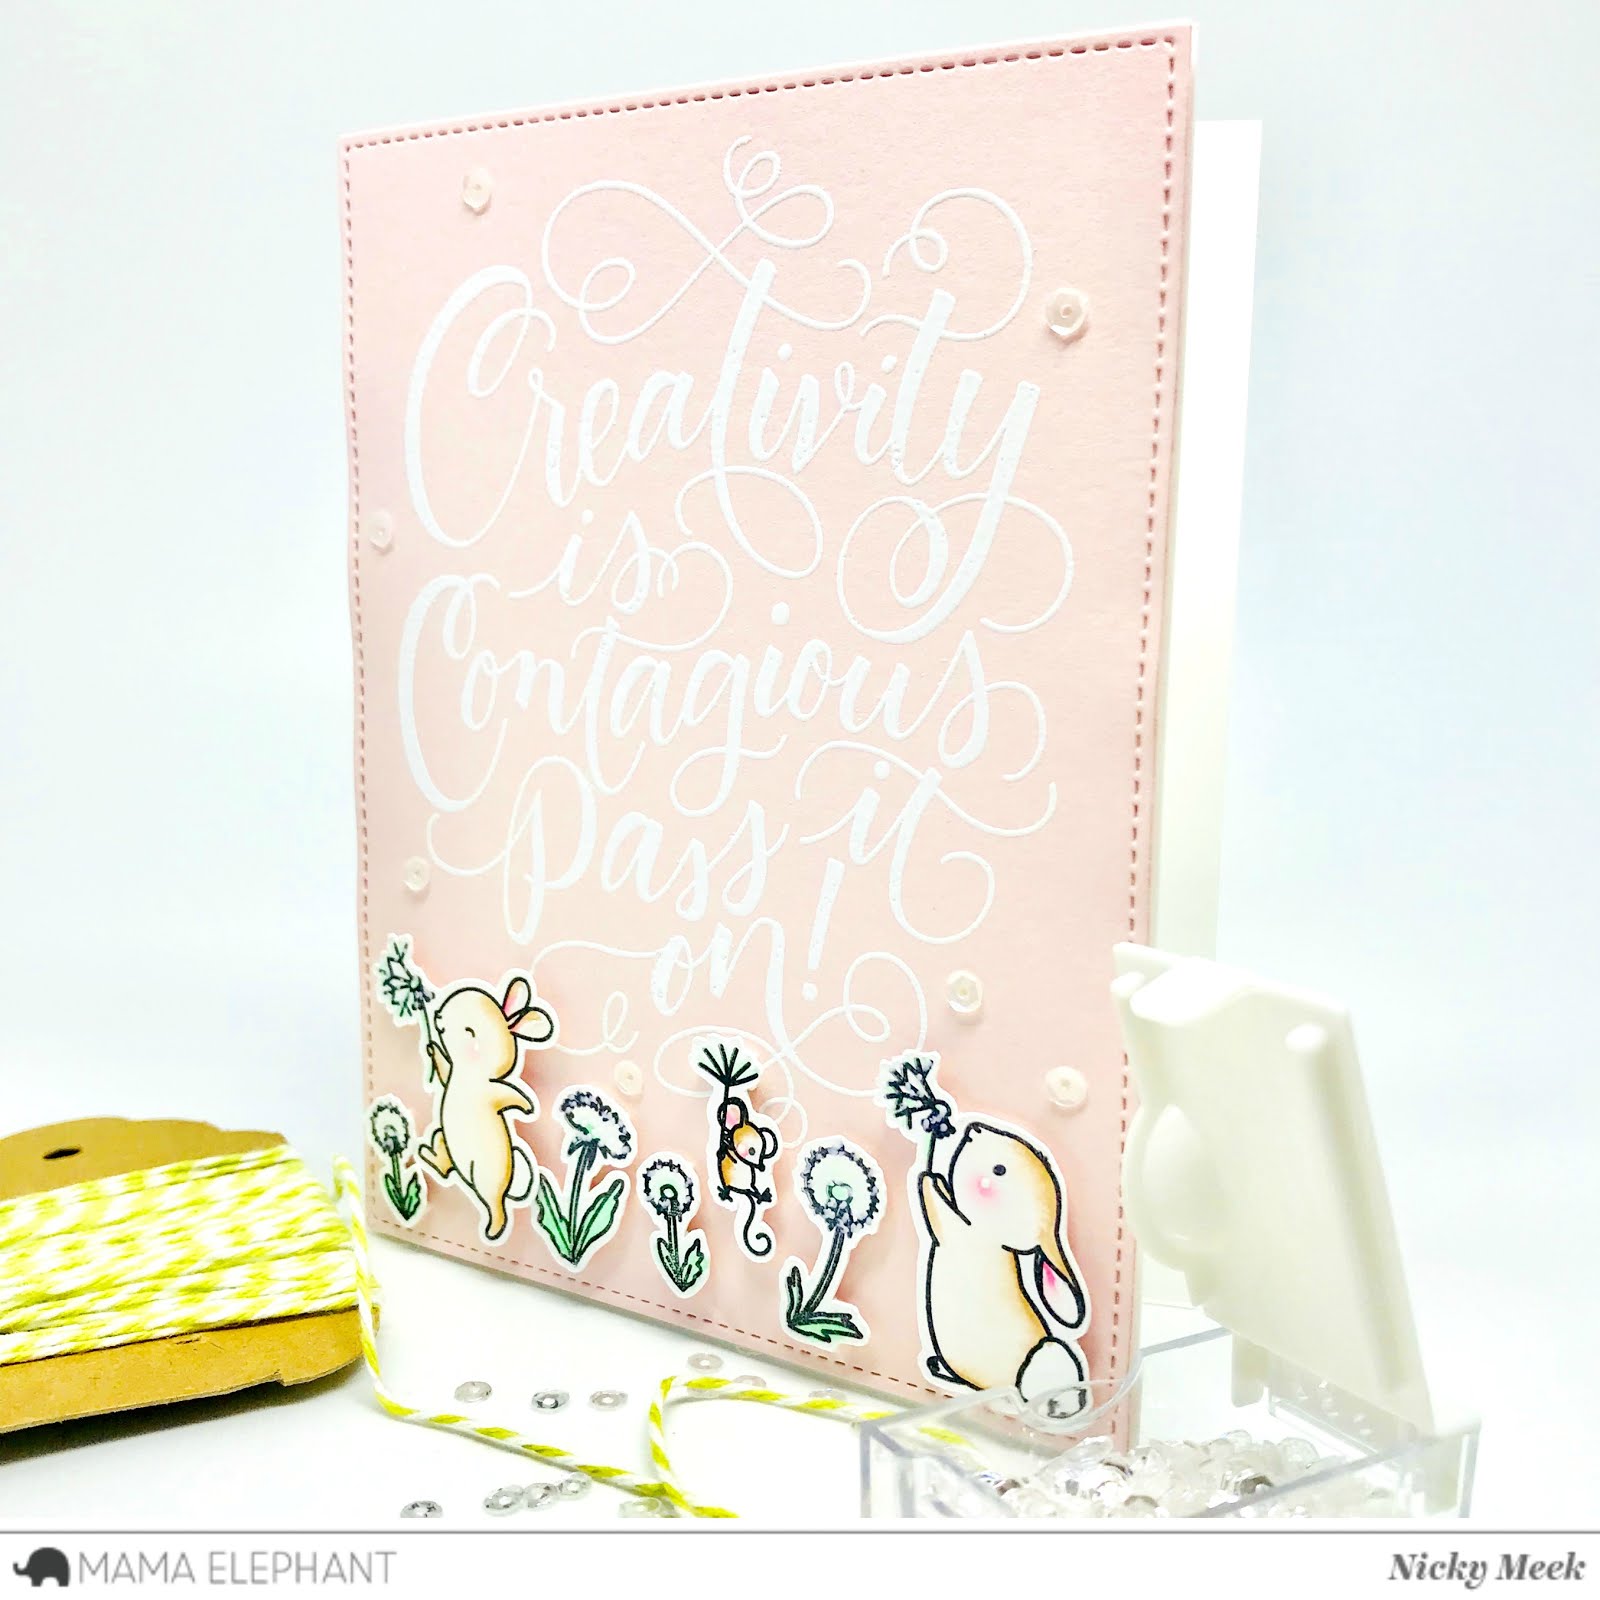
Creativity Is Contagious

Hi!  Here's a look at a part of the new release from Mama Elephant who I am Guest Designing for right now.  I'm sure like me, many of you have friends and acquaintances in the card making world or friends who crochet up a storm etc.  Well here's the stamp for them, or at least here's the stamp you'll want so that you can create and encourage them, otherwise known as 'enabling'.


I wanted the sentiment to shine on this card and kept the design simple but pretty.  I die cut a stitched panel from soft pink cardstock.  I used my Embossing Buddy to prep the panel then stamped the sentiment using my Misti with Versamark Ink.  I stamped it 2 or 3 times to get a strong impression.  I then heat embossed it with Ultra Fine White Embossing Powder.


The panel was then adhered to the card base which is white but it has a layer of white craft foam sandwiched in between which lifts the panel up and makes it feel beautifully substantial when handled and truth be told, it handles the rigours of the mail system so much better when you do this (better than putting dimensional foam tape back there!

The next step was to hand stamp the beautiful bunnies and their Dandelions from the new Dandelion Wishes stamp and die set onto Strathmore Bristol Smooth using Archival Ink which is waterproof, then watercolour painting them using my Kuretake Zigs.  I die cut them and applied them with foam tape.


The final touch was to add dots of Uniball Signo White pen over the dandelion heads, to make them look fluffy and altogether softer, sort of perfectly imperfect if you will and then a few pearl sequins add that final but necessary accent.


Thanks for coming along to read how this card was made, I'd love to hear from you if you'd like to leave me a comment!

Nicky x

Monday, June 11, 2018

Dandelion Wishes

Hello everybody, I've got a pretty special 3D pop up card for you today - I went to town on this one!  Mama Elephant have me onboard Guest Designing for a while and this month they are including a 3D Pop-Up Card die with their June release which makes pop up cards that bit quicker to make - they've done the calculating for you!


My card is constructed of Neenah Solar White 110lb cardstock which I nearly always use for my regular card bases!  I die cut everything twice to provide me with anything I could want.  I just followed my heart as I created, there was no big plan.  The panels for the flaps were ink blended using Distress Ink in Cracked Pistachio.  I also ink blended in similar fashion the inside of what would be the box.  This makes the card look more finished because remember the recipient will peer inside too!


The upper back panel of course was ink blended in Tumbled Glass Distress Ink.  The die includes the picket fence (yay!), a cloud and a speech bubble as well as choices for different hills (grassy or otherwise), so this die is a great investment because you can use it year round or just use parts of it for scene building on any card you create.  I chose grassy hills and ink blended them also.


On my favourite Strathmore Bristol Smooth cardstock I stamped out all the images I wanted for this card using waterproof Archival Ink.  I die cut them and watercolour painted them using my Kuretake Zigs.  I then set about applying them into the scene carefully checking heights and viewing it from different angles to make sure it was interesting from every vantage point and nothing was obscuring anything else.  For height, the cloud and the mouse floating on a puff of wind hanging onto a little dandelion, I used a tiny strip of acetate to get them where they are.  It is essential that you check your heights as you go and keep folding the pop up box card flat to determine before you glue, whether it will still fit in your A2 envelope!


I highlighted a few areas with my Uniball Signo White pen including applying dots to the dandelion heads to break them up a little, making them look fluffy and soft .... as they should be.  The sentiment was stamped and applied with a little strip of Scotch foam tape ...... and there you have it!  Like I said at the beginning, I went to town on this one and it was worth it I reckon!


Until the next time .....

Nicky x