Showing posts with label Nesting Deckle Mini Slimline Die. Show all posts

Wednesday, October 9, 2024

Hello Bluebird Stamps - Mini Slimline Fall Cleanup Crew


I'm back with a new Fall themed card using Hello Bluebird's latest Fall Kits.  This card was made by combining 'Fall Cleanup Crew' with Nesting Deckle Mini Slimline die which is part of the Essentials collection on the HB site.

I die cut sturdy white cardstock using the largest deckle die then I ink blended using Rusty Hinge, Vintage Photo and Forest Moss Distress Oxide Inks.  I spritzed it with diluted white acrylic paint.  I stamped the sentiment and used Copic markers to add interest to the grass area.


I glued this panel to a fractionally larger white panel and then added this to a slightly larger dark green cardstock panel, then to the card base.  I set this to one side.

I stamped the images from Fall Cleanup Crew with Eiffel Tower ink by MFT.  I coloured the images with the following Copic marker combinations:-

Fox - E18, E09, E39, E15, E13, C3, C1, C0
Squirrels - E37, E35, E33, W3, W1, W0
Dark Teal - B99, BG78, BG75
Pumpkin - YR27, YR04, YR21
Leaves - E18, YG97, YG95, YG93, YG91, YR21, YR27
Log - W5, W3, W1, W0, E41, E40


I highlighted then die cut the images using the companion dies and I applied them to the background using dimensional foam tape until the scene was built out.  So much fun to create with beautiful Autumnal colours!  Thanks for stopping by.


Sunday, September 29, 2024

Hello Bluebird Stamps - All The Spooks


I'm continuing to play with the amazing Fall Kits from Hello Bluebird Stamps and today my card features the 'All The Spooks' stamp set which was part of the Halloween Speciality Kit (now sold out).

Firstly, I used the Nesting Deckle Mini Slimline die to create what would be the feature panel.  I ink blended using Distress Oxide Inks in Shaded Lilac, Dusty Concord and Black Soot.  I dotted in some interest with a white gel pen and a metallic gel pen then backed the panel with craft foam and applied it to a larger white panel then to a slightly larger black panel then to the card base.


I stamped the images from All The Spooks using black ink then coloured with the following Copic markers:-

Ghosts - C3, C1, C0, BV000, BV0000
Blushes - R22, R20, R00
Pumpkins - YR27, YR09, YR04, YR21

I die cut the images using the companion dies.


Each image was backed with dimensional foam tape and applied to the the ink blended background and then to finish things up I just highlighted the ghost's cheeks and points on the pumpkins with a white gel pen.

I hope you like my Ghost Story card, such a cute stamp set!


Thursday, September 26, 2024

Hello Bluebird Stamps - Fright Mice


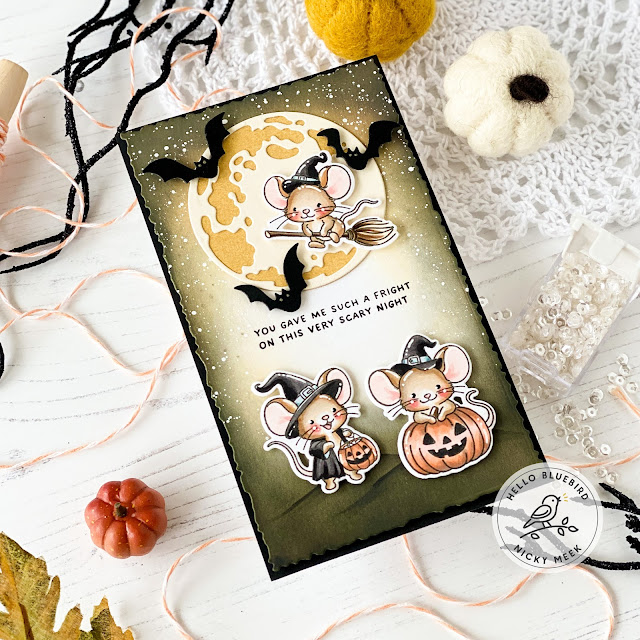
Hello friends!   Today I have created a new card for Hello Bluebird Stamps using the Fright Mice stamp set from the recent (but now sold out) Halloween Speciality Kit.  I already had all of the images coloured from the first time I made and shared a card with Fright Mice and knew when I had a couple of hours I'd get to use the remaining coloured images.  So, without further delay here's what I used to make this card:-

Fright Mice Stamp Set
Fright Mice Die
Light of the Moon Die
Nesting Deckle Mini Slimline Die

I used the deckle die to create a white panel of cardstock (largest die from the set).  I ink blended the panel using Dried Marigold and Black Soot Distress Oxide Inks.  I then covered the bottom portion of the panel with kitchen paper and with the rest I splattered on some diluted white acrylic paint.  I then used Copic markers to give the suggestion of some ground for the mice to eventually stand on.


I stamped the sentiment in black ink and then die cut and formed the 'Light of the Moon' die cut pieces and glued in place.

So I had those Fright Mice already coloured so here are those colours again from my first card a few days ago:-

Mice - E34, E31, E41, W00, W3, W1

Blush - R22, R21, R20, R00

Black - T7, T5, T4

The images were highlighted with a white gel pen, backed with foam tape and then applied to the scene.


The 'Light of the Moon' die set includes the 3 bat images which I die cut from black cardstock and applied with foam tape and I gave them glimmering eyes with a metallic gel pen and dotted in a few stars in the background with the same pen.

This whole decorative panel was backed with a panel of black craft foam and applied to a slightly larger black panel of cardstock which in turn was adhered to the card base.

Thanks for stopping by, I'll be back soon with something new!


Monday, February 12, 2024

Hello Bluebird Stamps - Word Buddies Woodland


I'm so happy you are visiting my blog today because I'm starting the week out with some eye candy in the form of this 'Miss You' card using Hello Bluebird Stamps products.   Here's what I've used:-

Big Greetings Die

Using the largest size die from the Nesting Deckle set, I die cut kraft cardstock and then I used the next size die down to cut sturdy white cardstock.  I applied the kraft panel to a white card base which was cut just small enough to hide behind the kraft panel.  I masked a line on the white panel and ink blended above it using Blush Pink ink by The Stamp Market.   I carefully removed the mask and then stamped 'just to say' from Big Greetings.  This panel was then backed with white craft foam and applied to the kraft panel and set to one side.


I stamped the critters I was wanting from Word Buddies Woodland using Memento Ink in Rich Cocoa and I coloured with the following Copic marker combinations:-

Bunnies - E5, C1, C0, C00
Raccoon - W8, W7, W5, R0000
Bear - E79, E77, E44, E43, E42
Squirrels - T7, T6, T5
Blushes - R20
Hearts, Bows & Balloon - E95, E93, R81

I highlighted a few points with a white gel pen and then die cut using the coordinating dies and arranged them in a row along the masked line and used dimensional foam tape to anchor them down.


Last but not least I stamped 'I Miss You' from Big Greetings using Versamark Ink and I heat embossed using 'Salsa' Embossing Powder by Wow!  I repeat stamped and heat embossed to make the glitter a little more chunky and then I die cut using the coordinating die, added foam tape to the reverse side and then stuck it down.

Hope you like my card today.  Wishing you a great week ahead and hopefully you can find some time to get creative.


Wednesday, January 31, 2024

Hello Bluebird Stamps - Little Painters


I'm over on the Hello Bluebird blog today with these two Easter cards.  If you'd like to join me there where I share all the details, please just used THIS LINK to go directly to the post.  Thank you!


Friday, July 21, 2023

Hello Bluebird Stamps - Nine Lives


Hello!  I've got a new card to share with you that I made for Hello Bluebird Stamps using the Nine Lives stamp set from their incredible new release.  Here's what I've used in this project.

Nine Lives
Nine Lives Die
Nesting Deckle Mini Slimline
Cake Time
Cake Time Die
Party On The Farm
Party On The Farm Die

I created a panel of patterned  cardstock (this is from Lawn Fawn) using the Nesting Deckle Die.  I used the same die to create a second white panel.  I trimmed this panel down and created an additional strip from it.  I ink blended with a little Spun Sugar then glued the skinny strip along the edge then adhered this to the 'wallpaper' patterned background.  I backed this panel with white craft foam and adhered it to a white mini slimline panel then to the card base.


I stamped the cats from Nine Lives and some accessory images from Cake Time (balloons and banner) Party On The Farm (party hats).  Here are the Copic colours used:-

Cats - Left to Right

E50, E41, W1, W0
T1, T0, T6, T5, T3
E77, E74, E71, E70, E40
E35, Y25, Y32

Mouse - W2, W1, W0
Blushes - R22, R20, R00
Green - G43, YG61
Pink - R21, R20, R00, R000
Pink Balloon - R22, R21, R20, R00, R000
White Balloon - C3, C1, C0, C00

Points were highlighted with a white  gel pen then I used the coordinating dies to die cut all images.  I used dimensional foam tape to adhere the images and stamped and applied the sentiments and I styled it all as a happy and chaotic scene with the mouse standing back observing it all with a little caution lol!

I'll be back soon with something new!


Thursday, May 19, 2022

Hello Bluebird Stamps - May Release - Flower Friends

We are kicking off previews for the May 15th release from Hello Bluebird Stamps and my card today features the darling new stamp set called Flower Friends and I also have used the new Nesting Deckle Mini Slimline Die.  The release goes live at 7pm MST!


I ink blended a mini slimline panel (3 1/2 inches x 6 inches) to create a beautiful cornflower blue sky and grass.  I used the largest die in the deckle set to create the pretty uneven edge which I adhered to my prepared card base.


I stamped the images from Flower Friends and coloured them with more Copic colours than I could possibly list this time (my apologies but I couldn't find my craft table I'd used so many!) and then I die cut using the coordinating dies and applied them to the background using dimensional foam tape.   A few areas were highlighted with a white gel pen.

The sentiment which is from Flower Friends too and was stamped on a little strip of cardstock and applied with more foam tape.

Please be sure to visit the Hello Bluebird Blog where you can see lots of additional previewing products and plenty of Design Team inspiration cards that bring it all to life.   Be sure to leave a comment because one lucky winner each day will be chosen from the comments to receive a gift certificate for $50 to the HB shop.   Winners will be announced a couple of hours prior to the release going live.   Good luck!